Threshing
Things to Remember
- If any seed drops on the table or floor do not pick it up unless you know for sure which seed it is.
- When working next to other studnets also threshing seeds please leave enough space to avoid mixing seed.
- If you are not sure about something, ask.
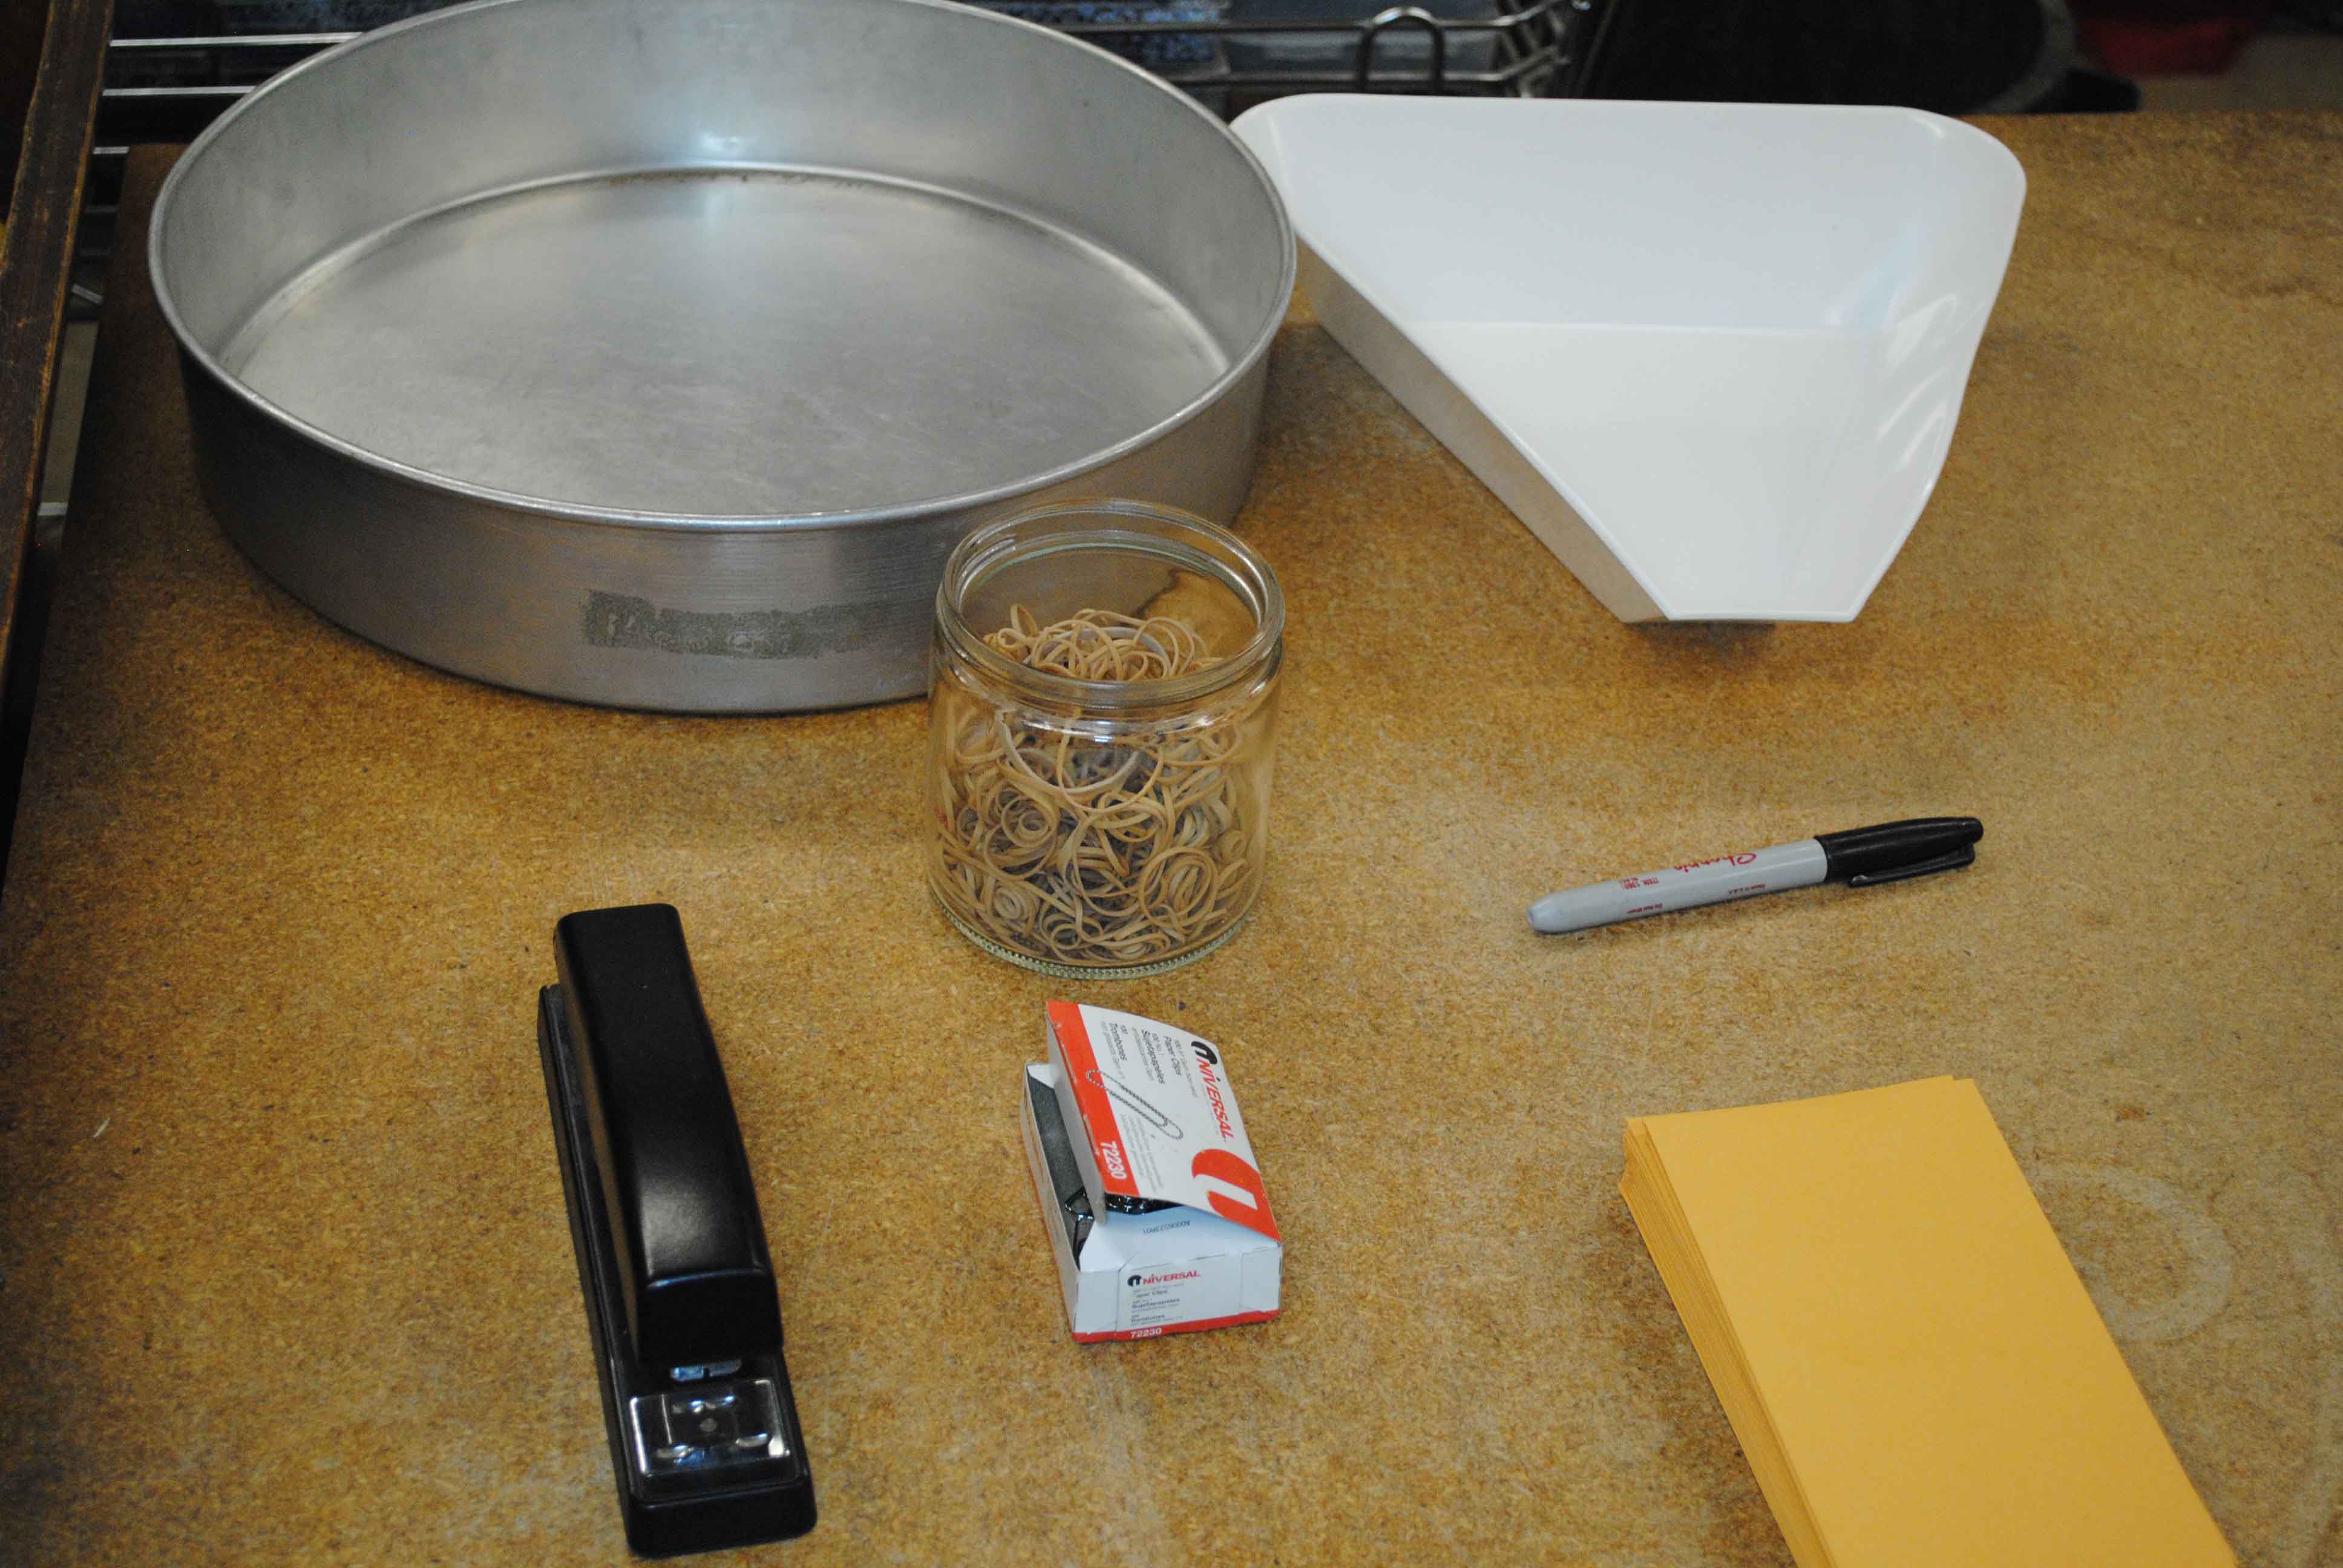
Tools Required
- Tin Pan
- Triangular Pour Pan
- Stapler
- Rubber Bands
- Paper Clips
- Sharpie
- Envelopes
Getting Started
- Gather all required tools in the threshing room.
- Place the first group of heads near by.
- Grab the first mesh bag from the group.
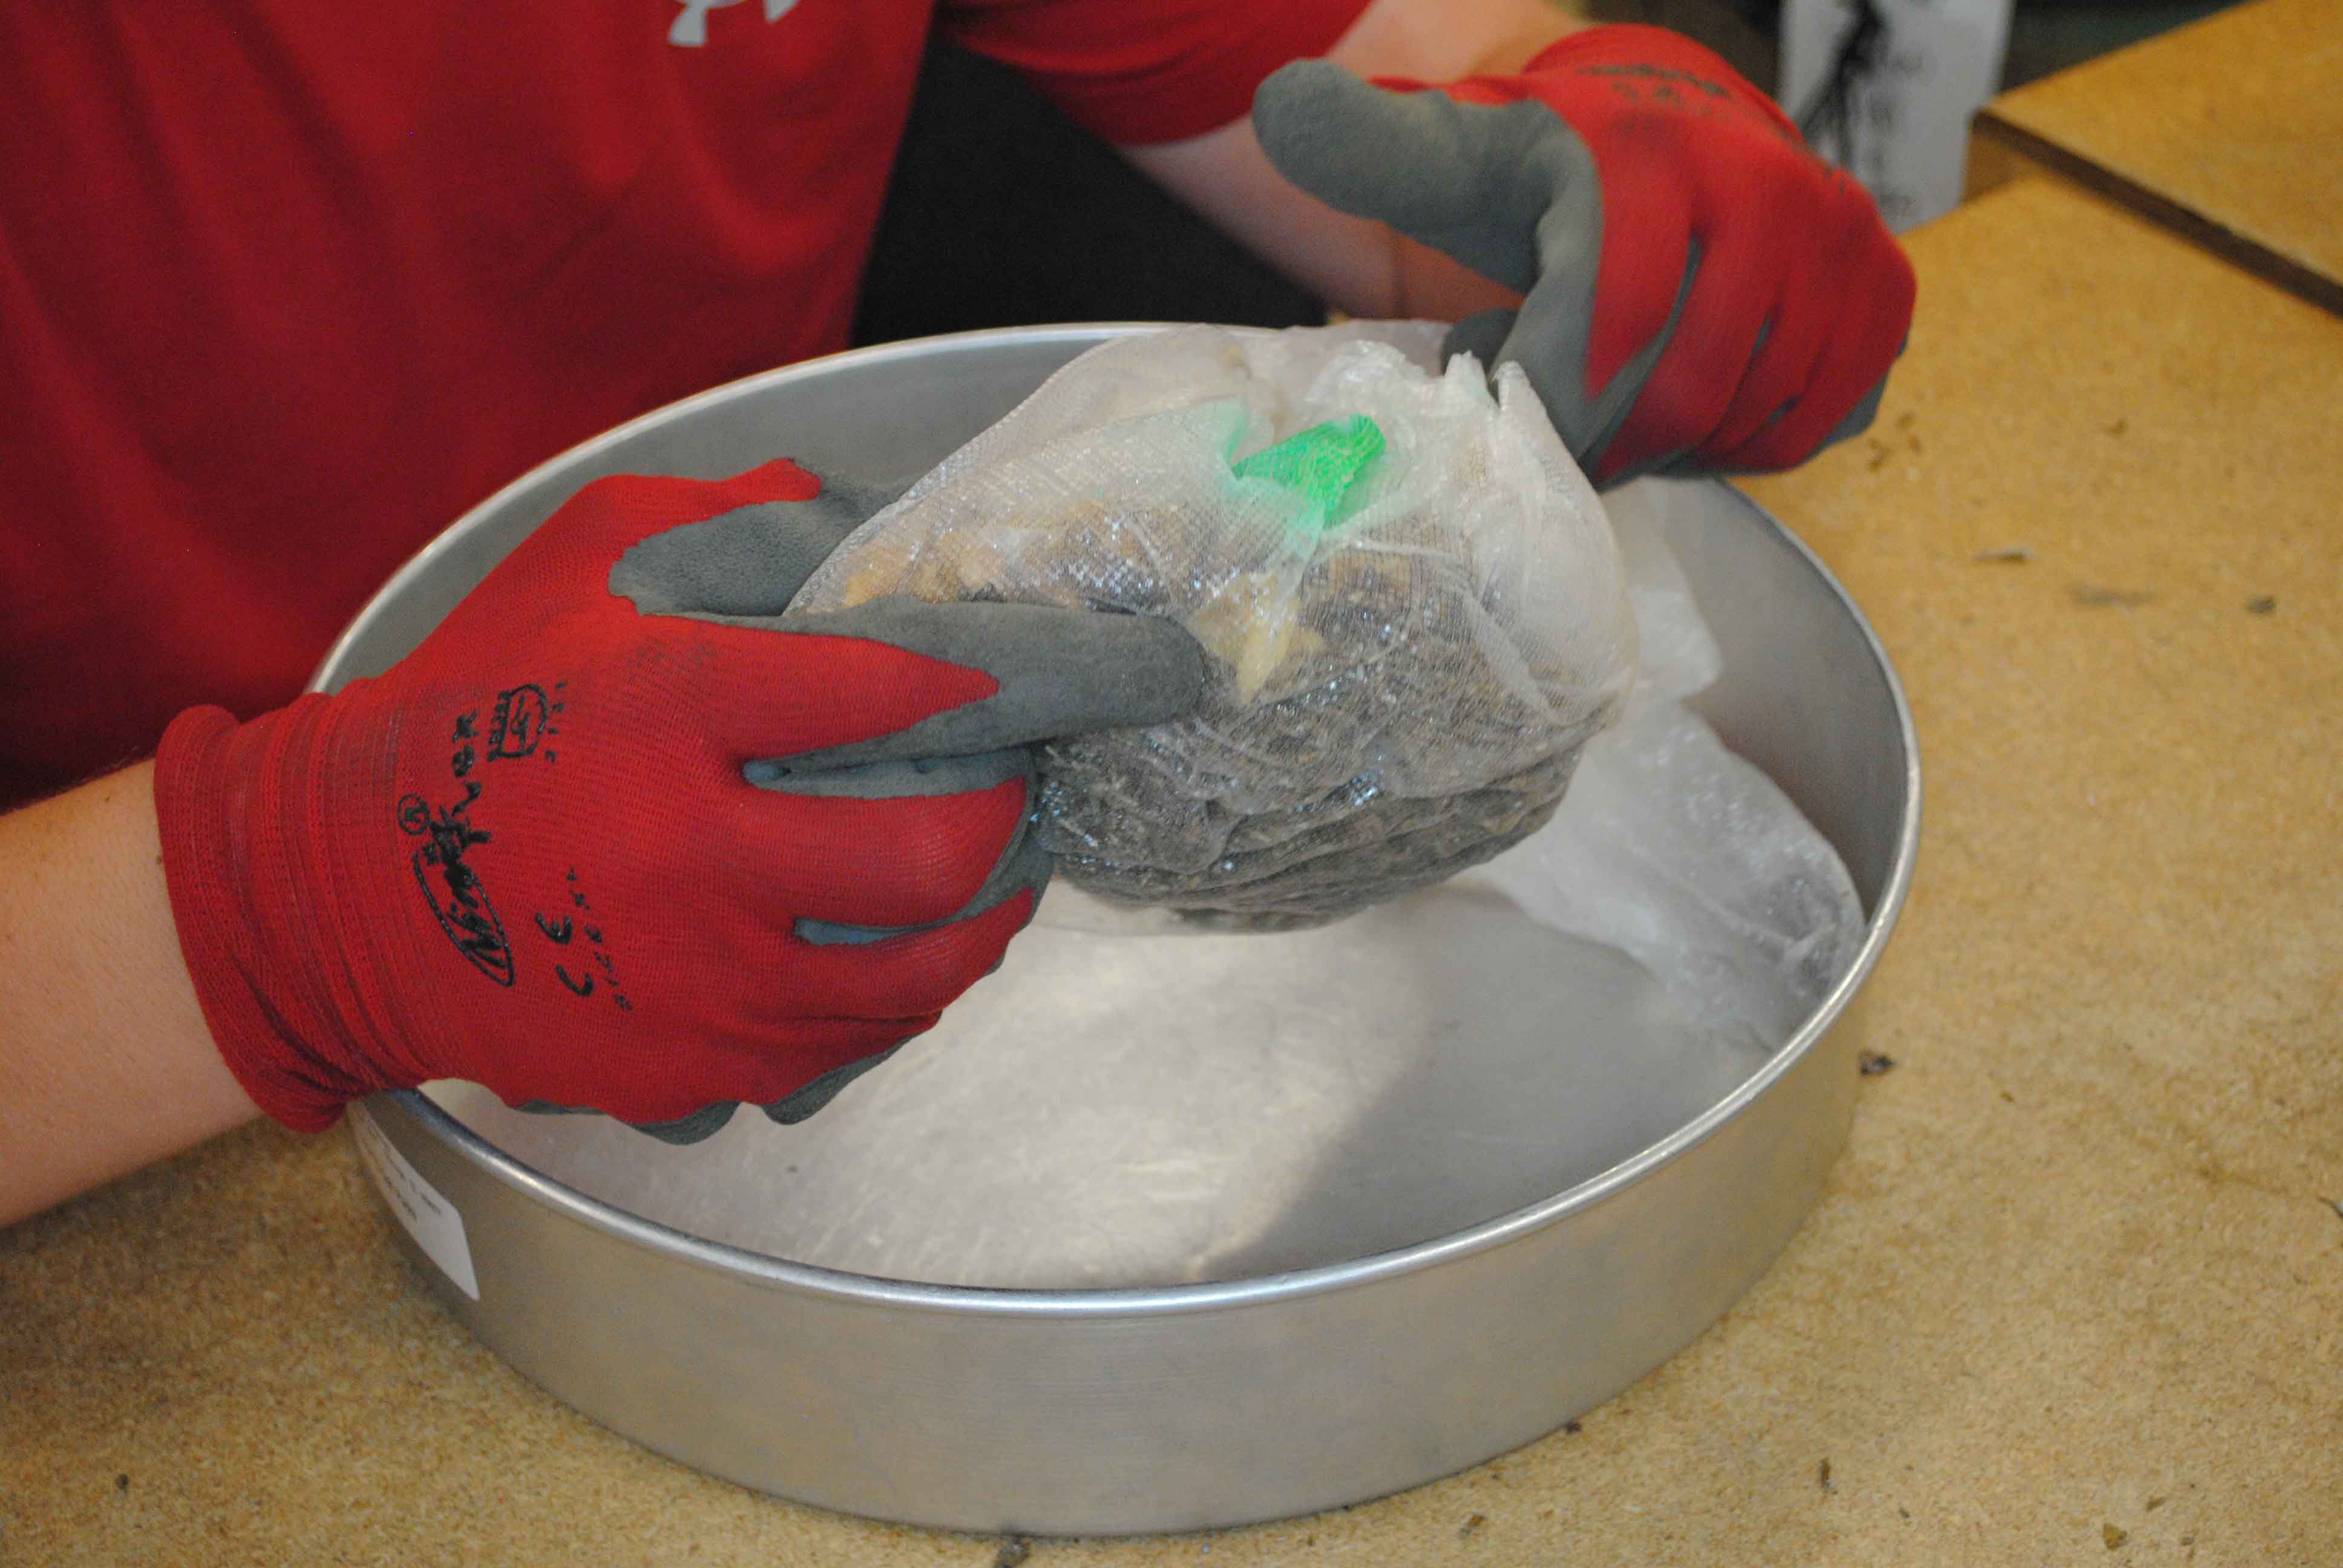
- Remove the Delnet bag, containing the head(s), and tag from the mesh bag.
- Open the Delnet bag over top of the tin pan.
- If the Delnet bag contains multiple heads see Appendix A.
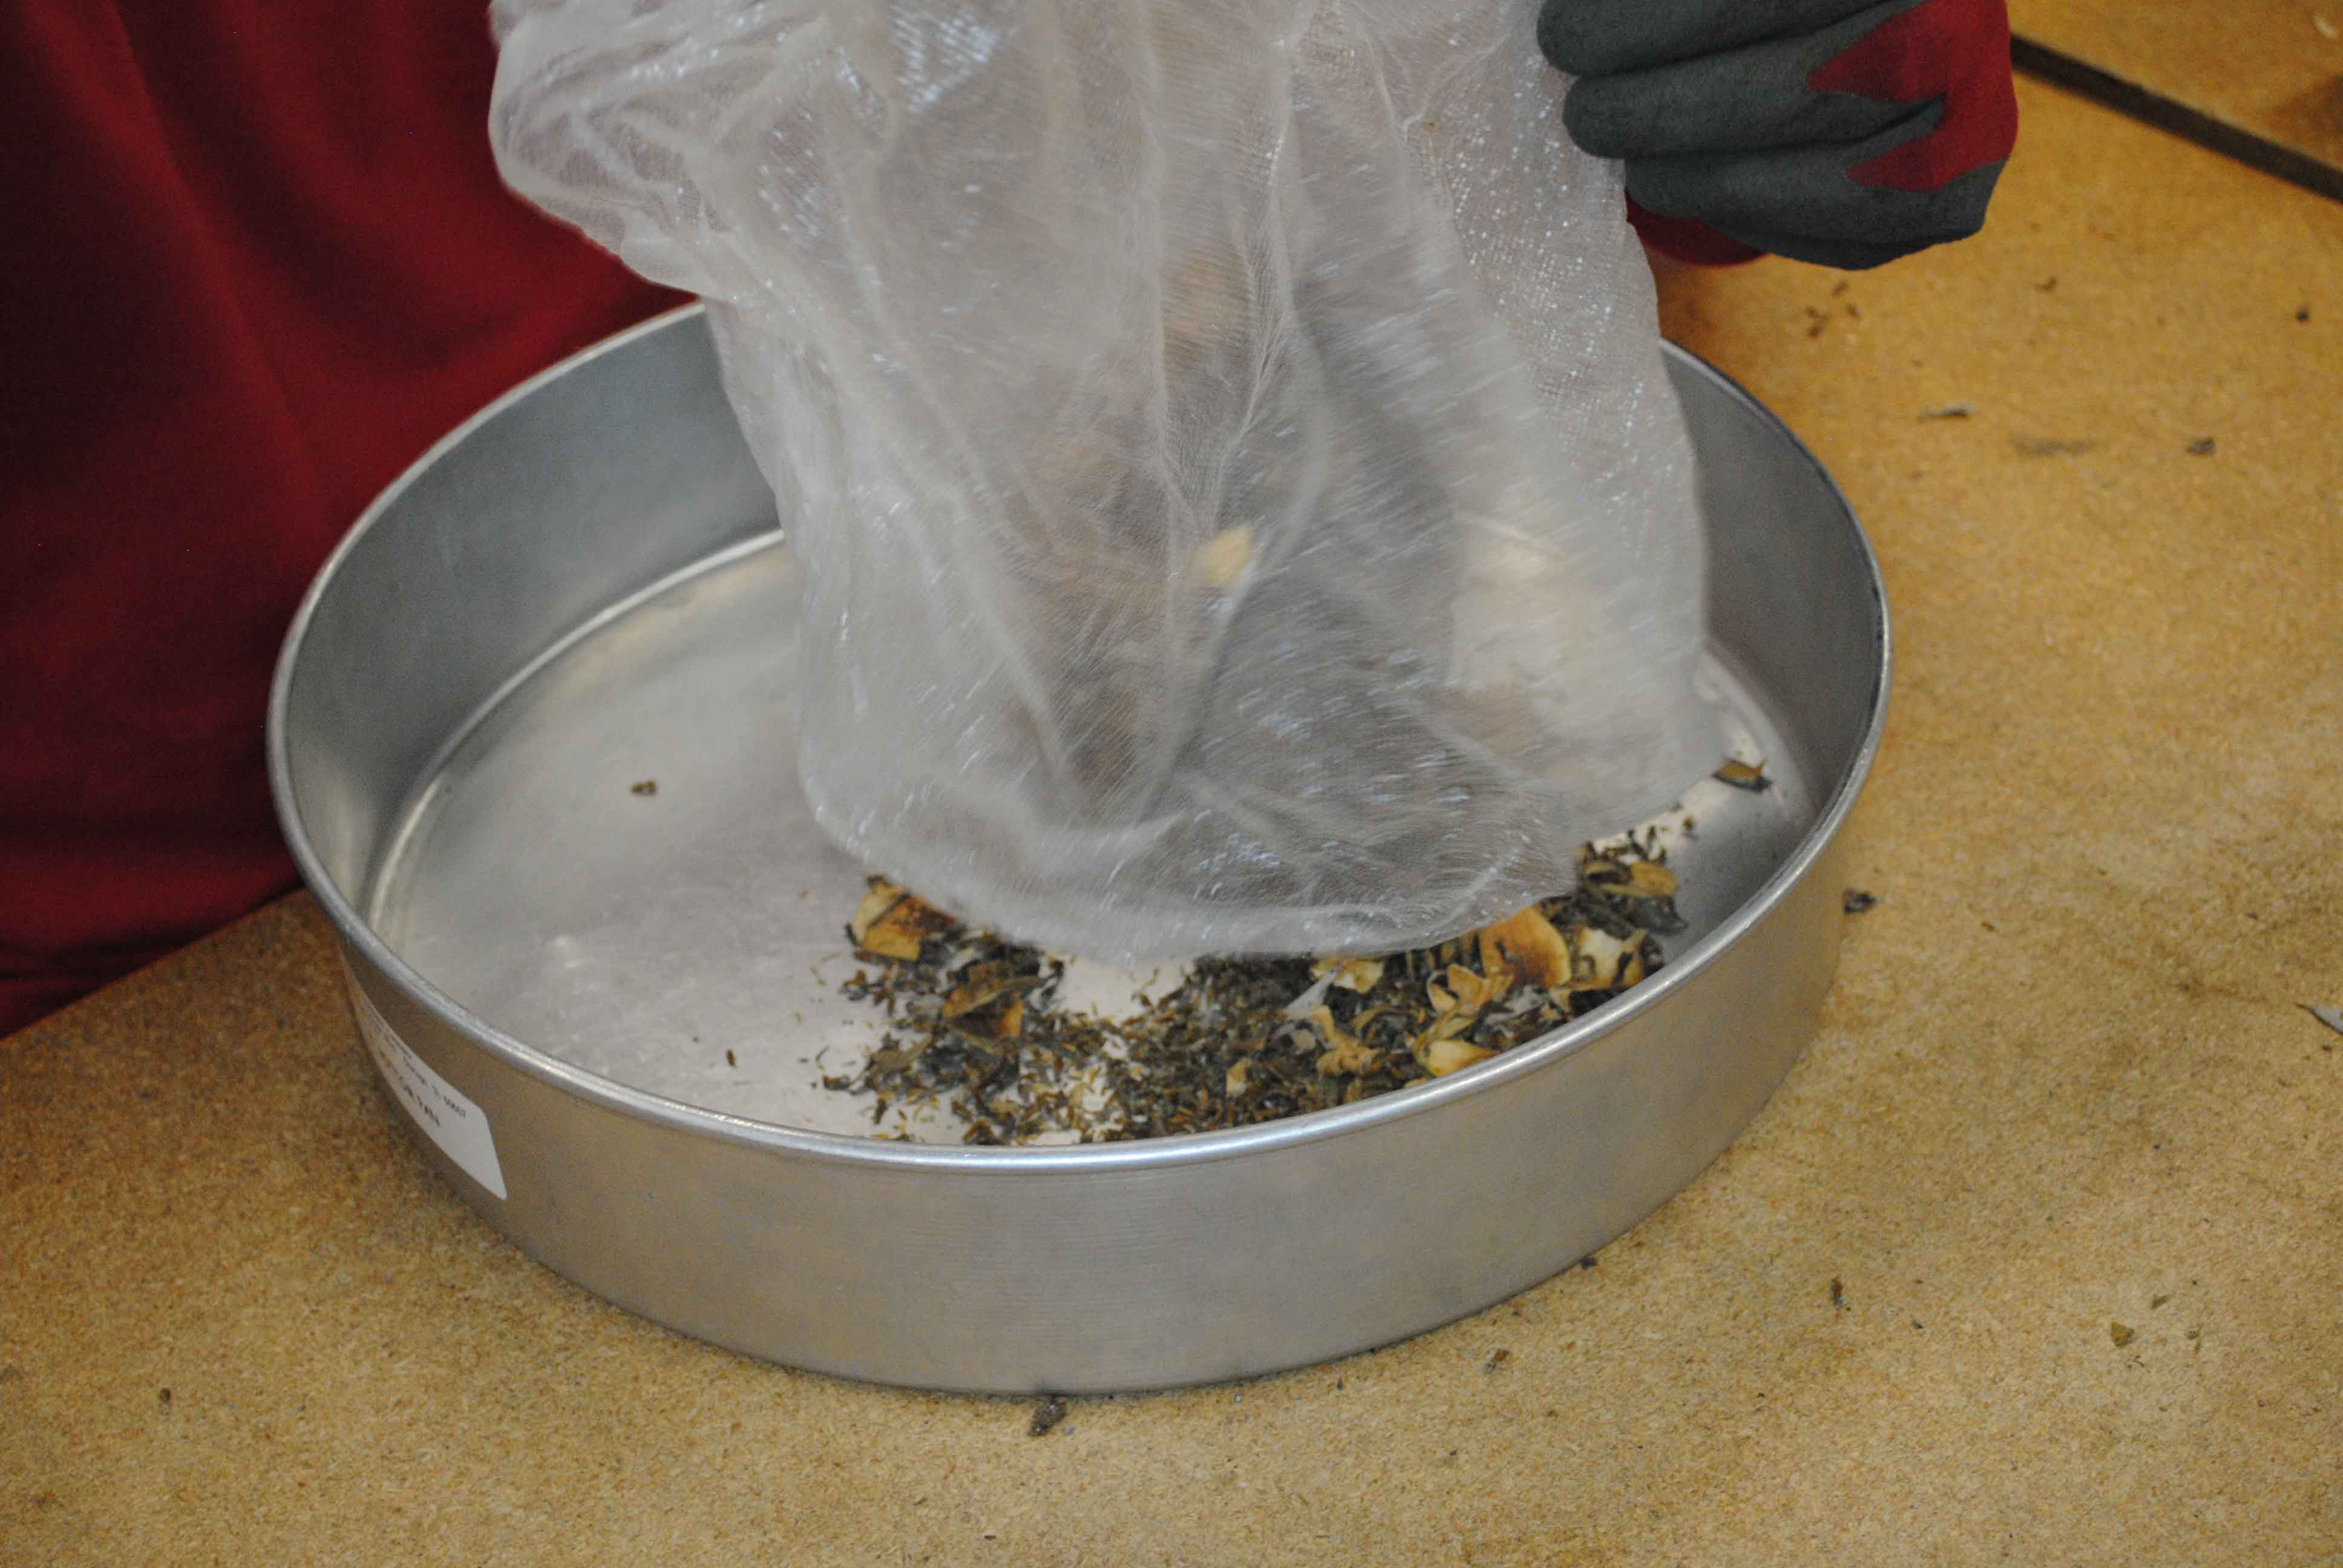
- Dump the contents of the Delnet bag into the pan, discard the Delnet bag.
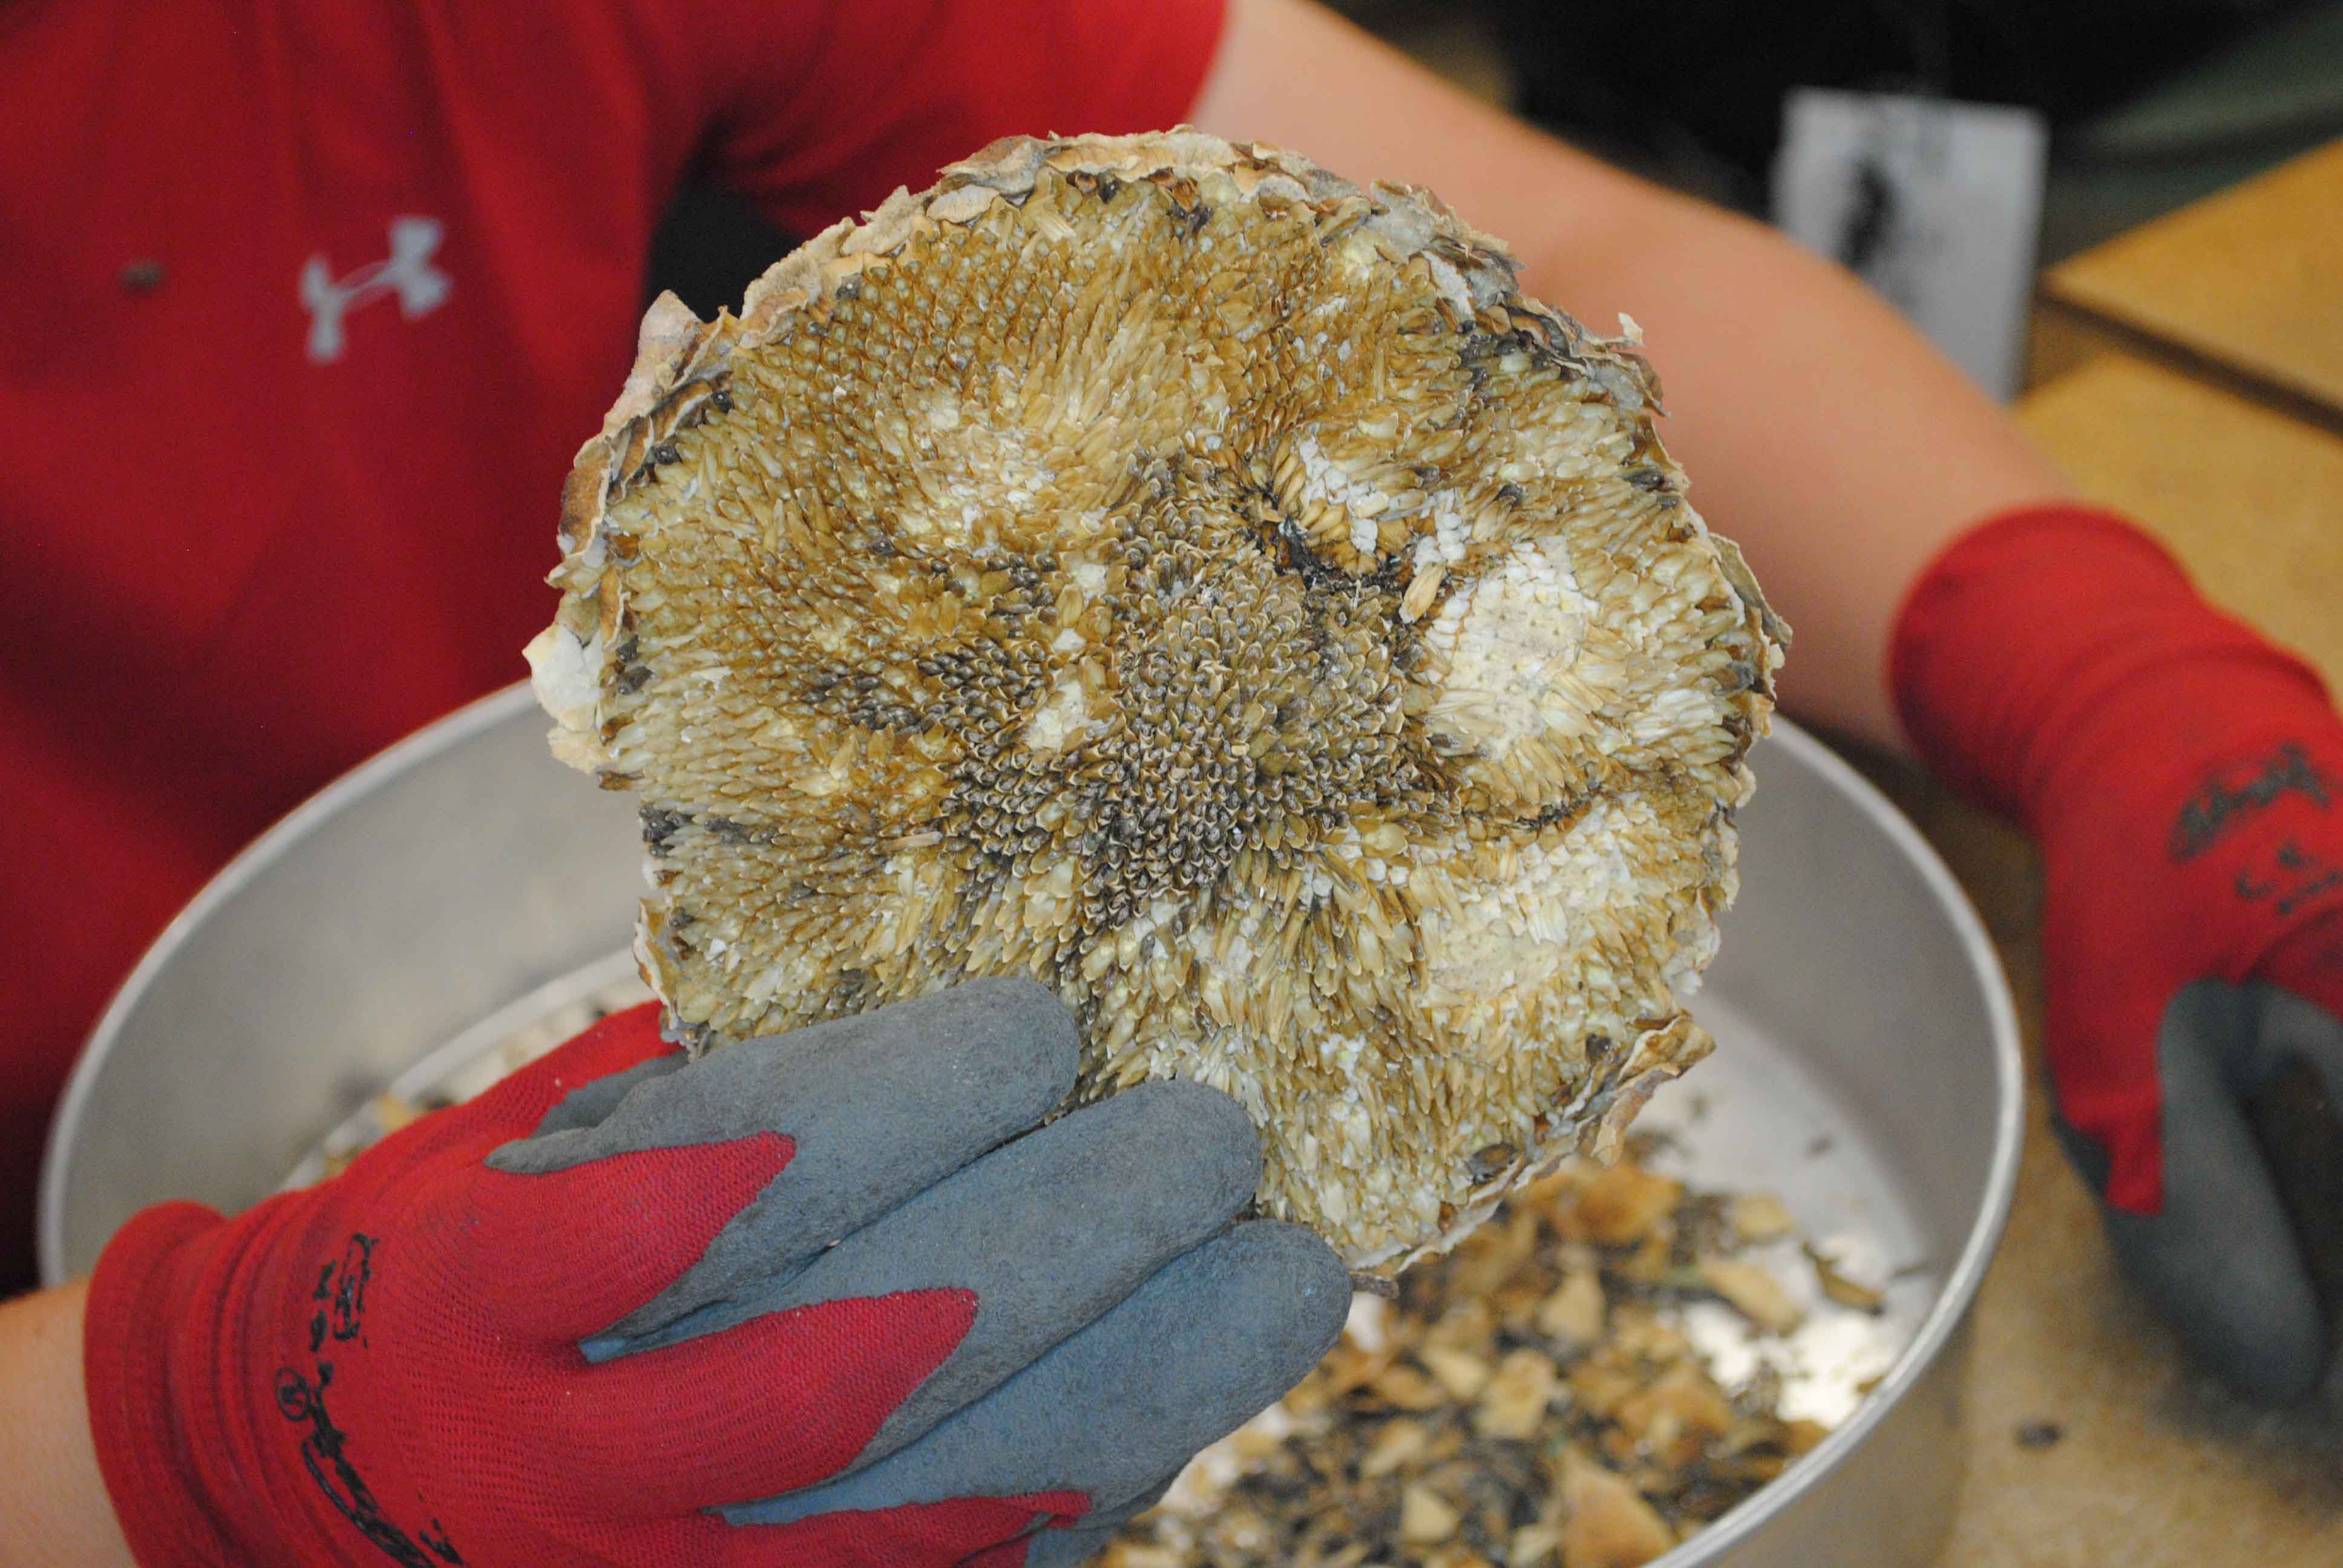
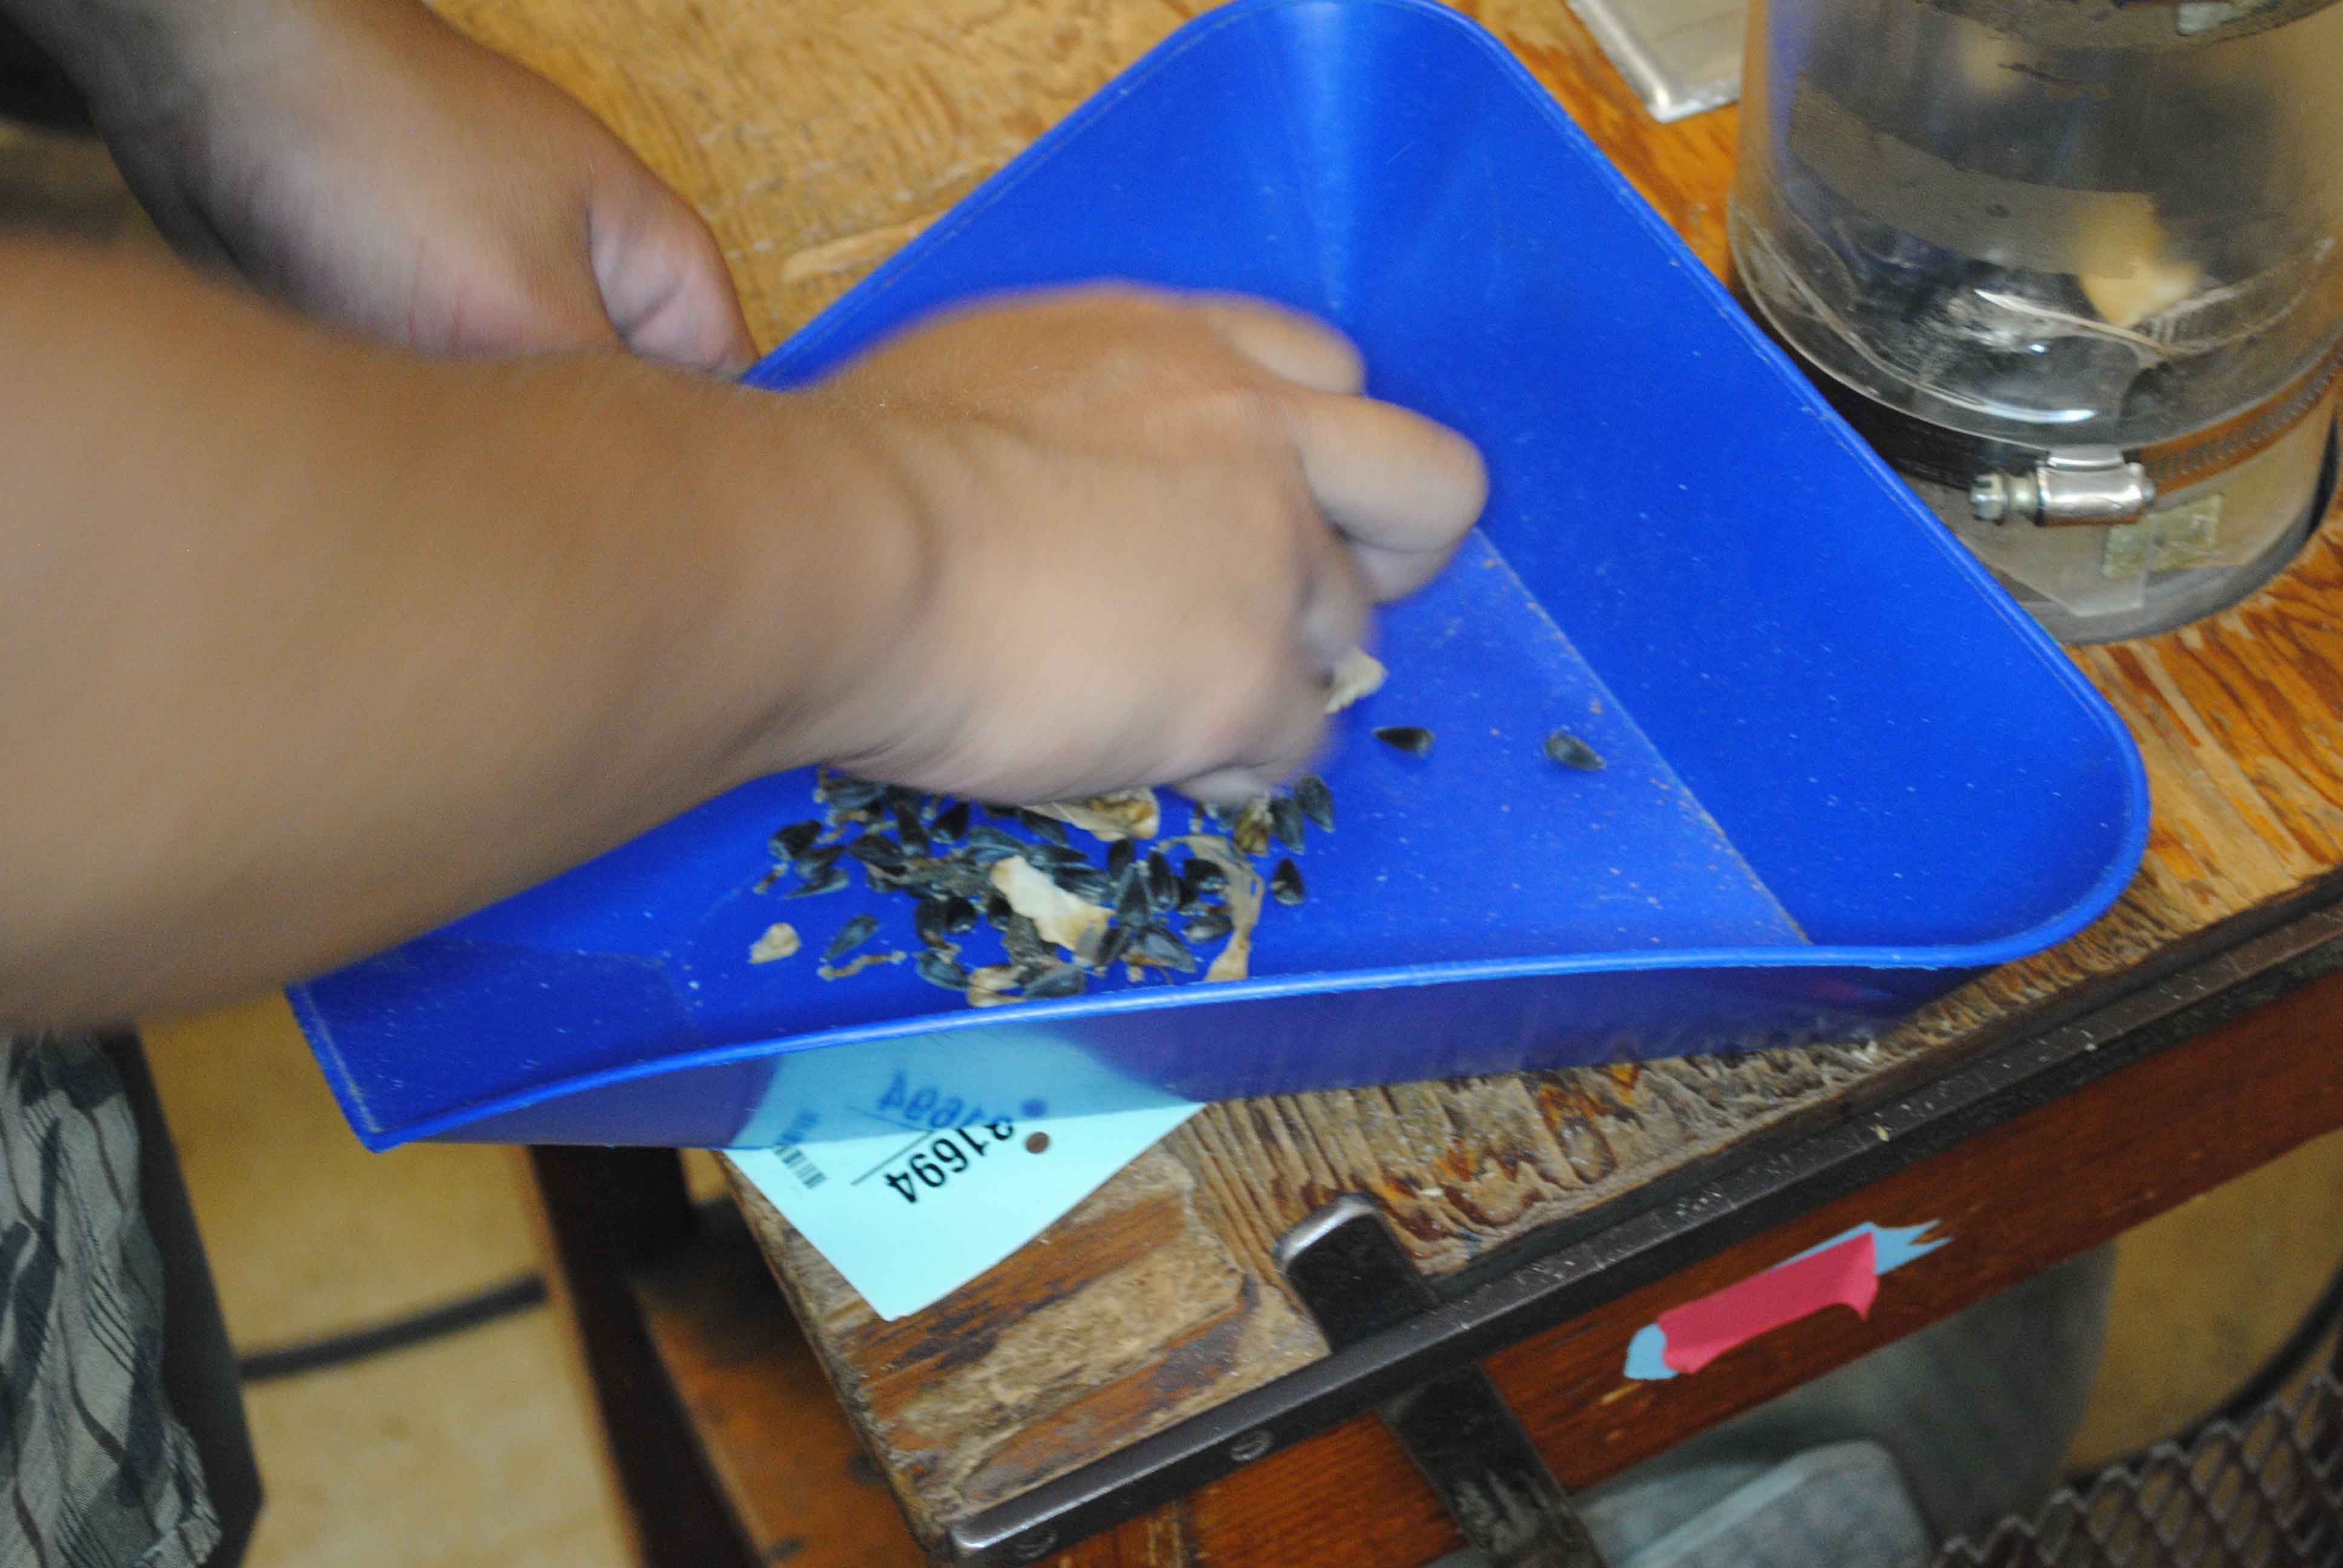
- While wearing gloves, rub the seed off the head.
- Ensure the head is facing down over the pan.
- Examine the head for any remaining seed.
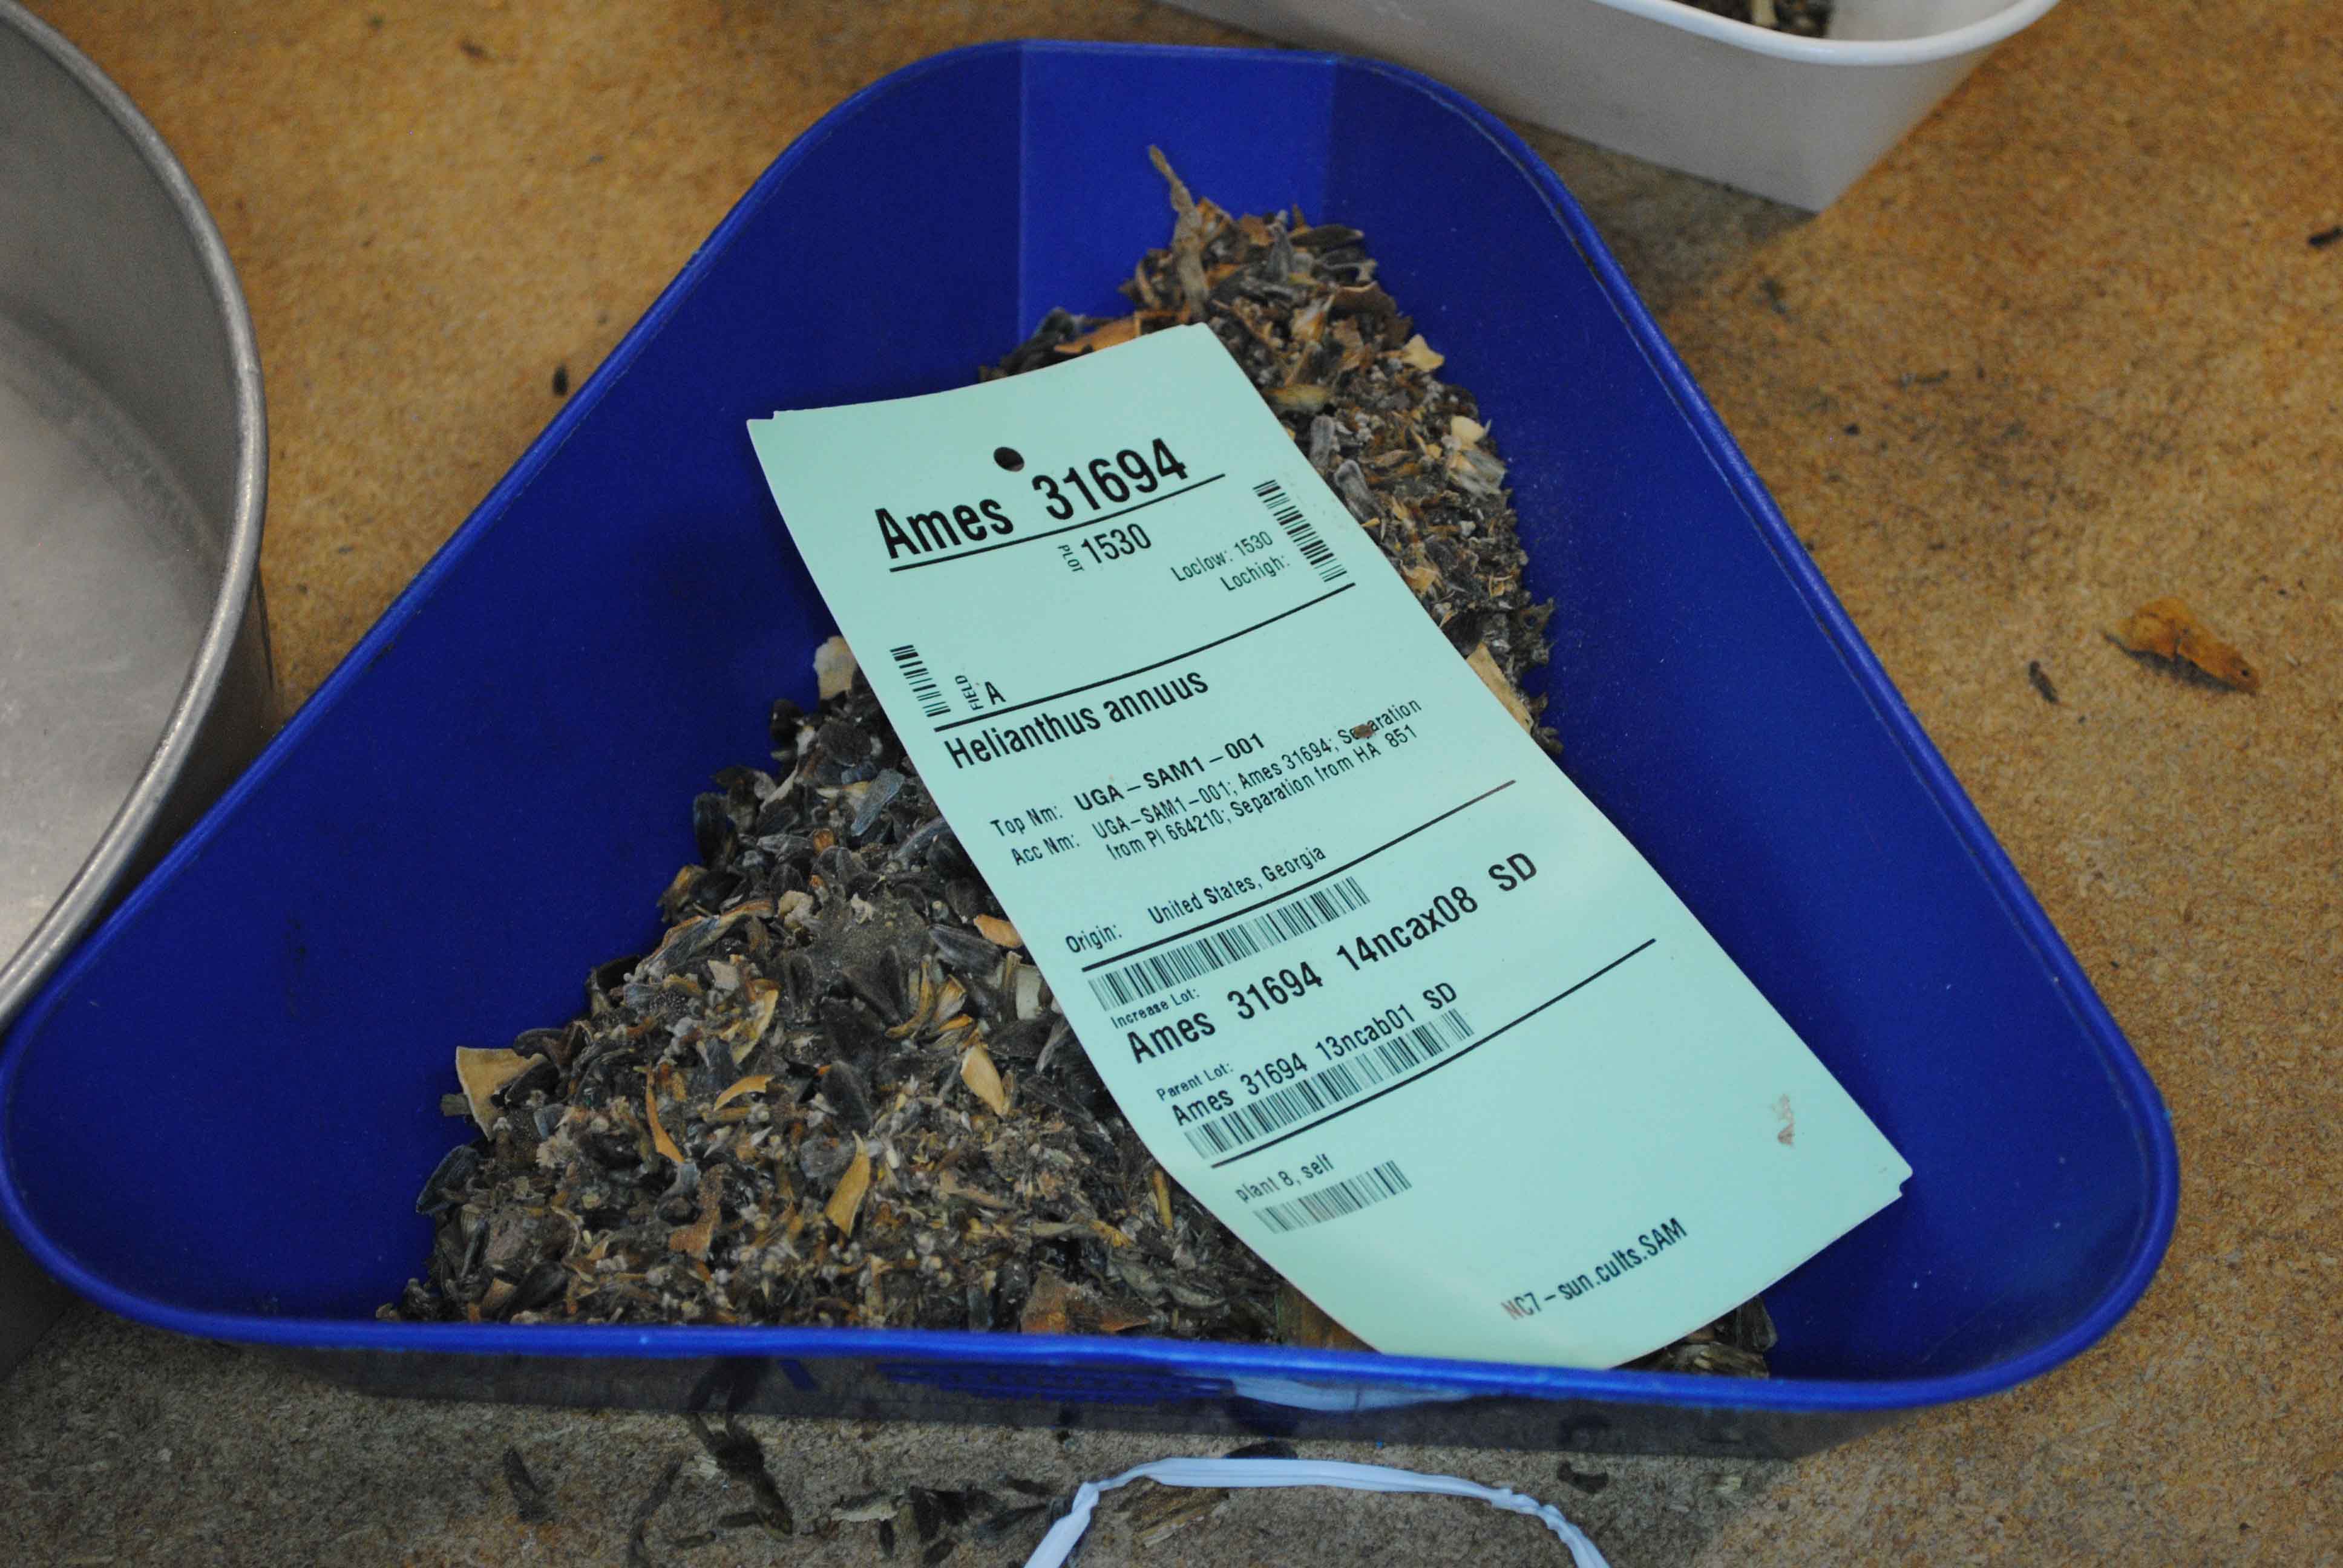
- Pour the contents of the tin pan, carefully, into the triangular pour pan.
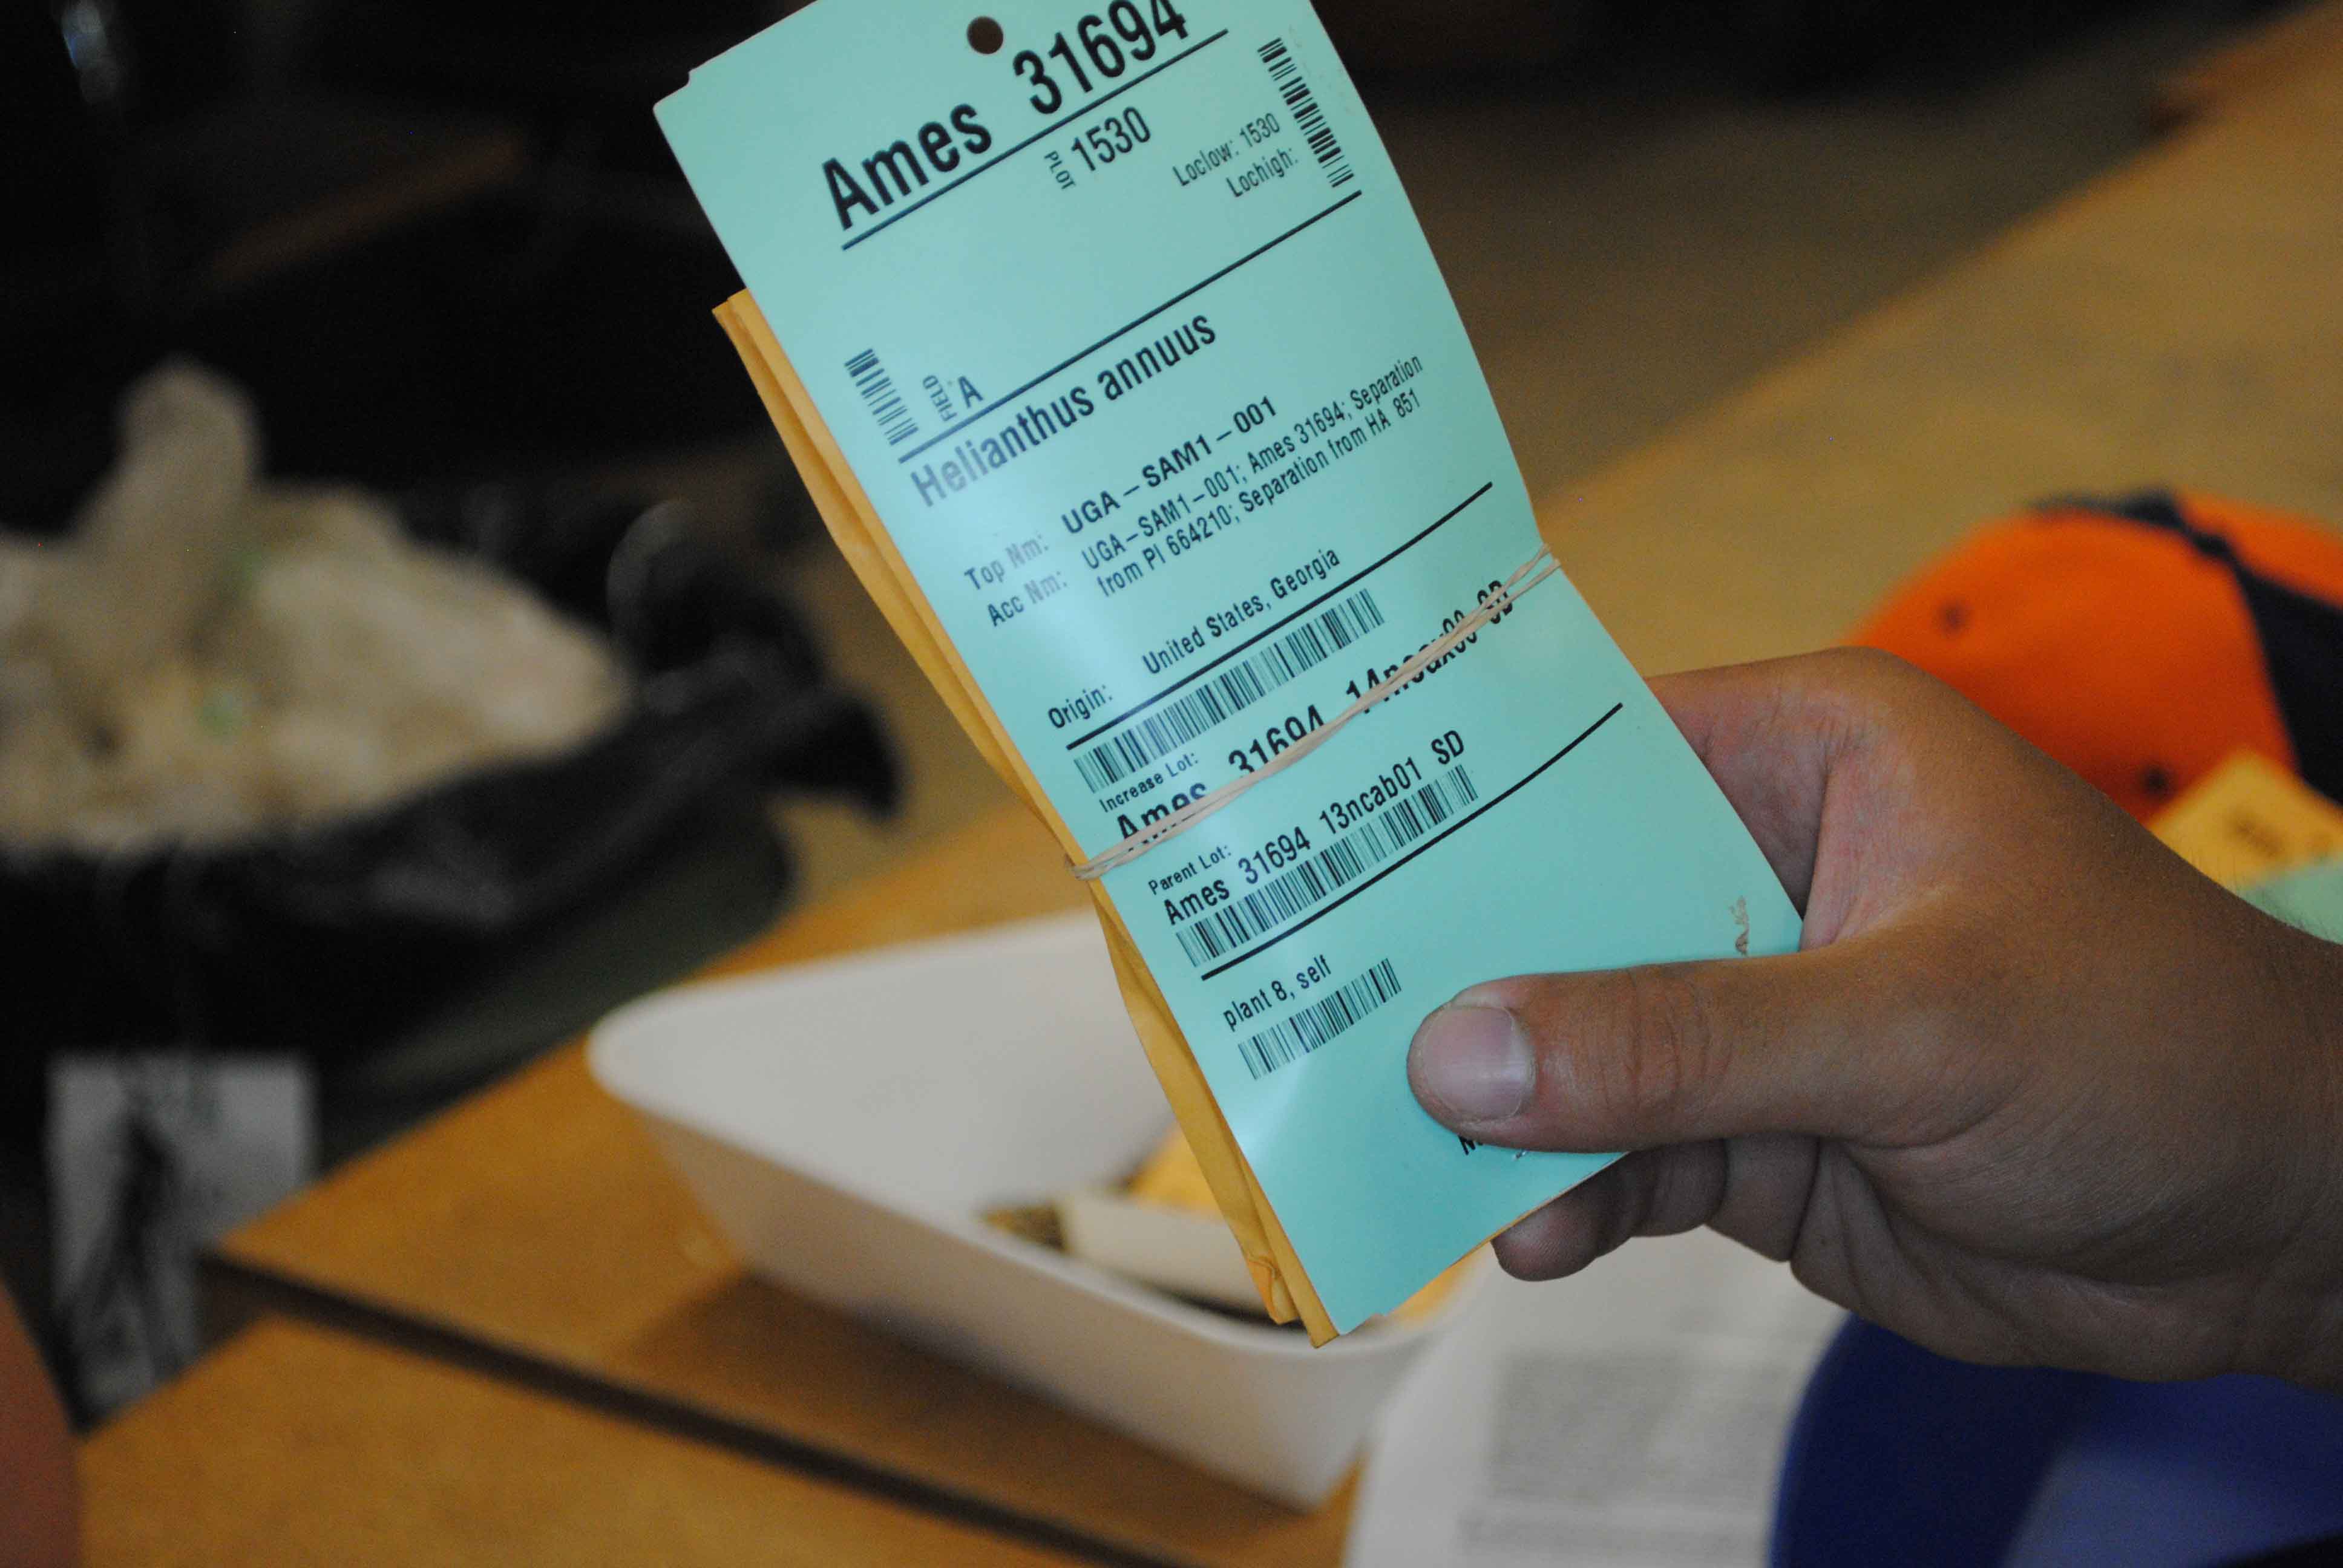
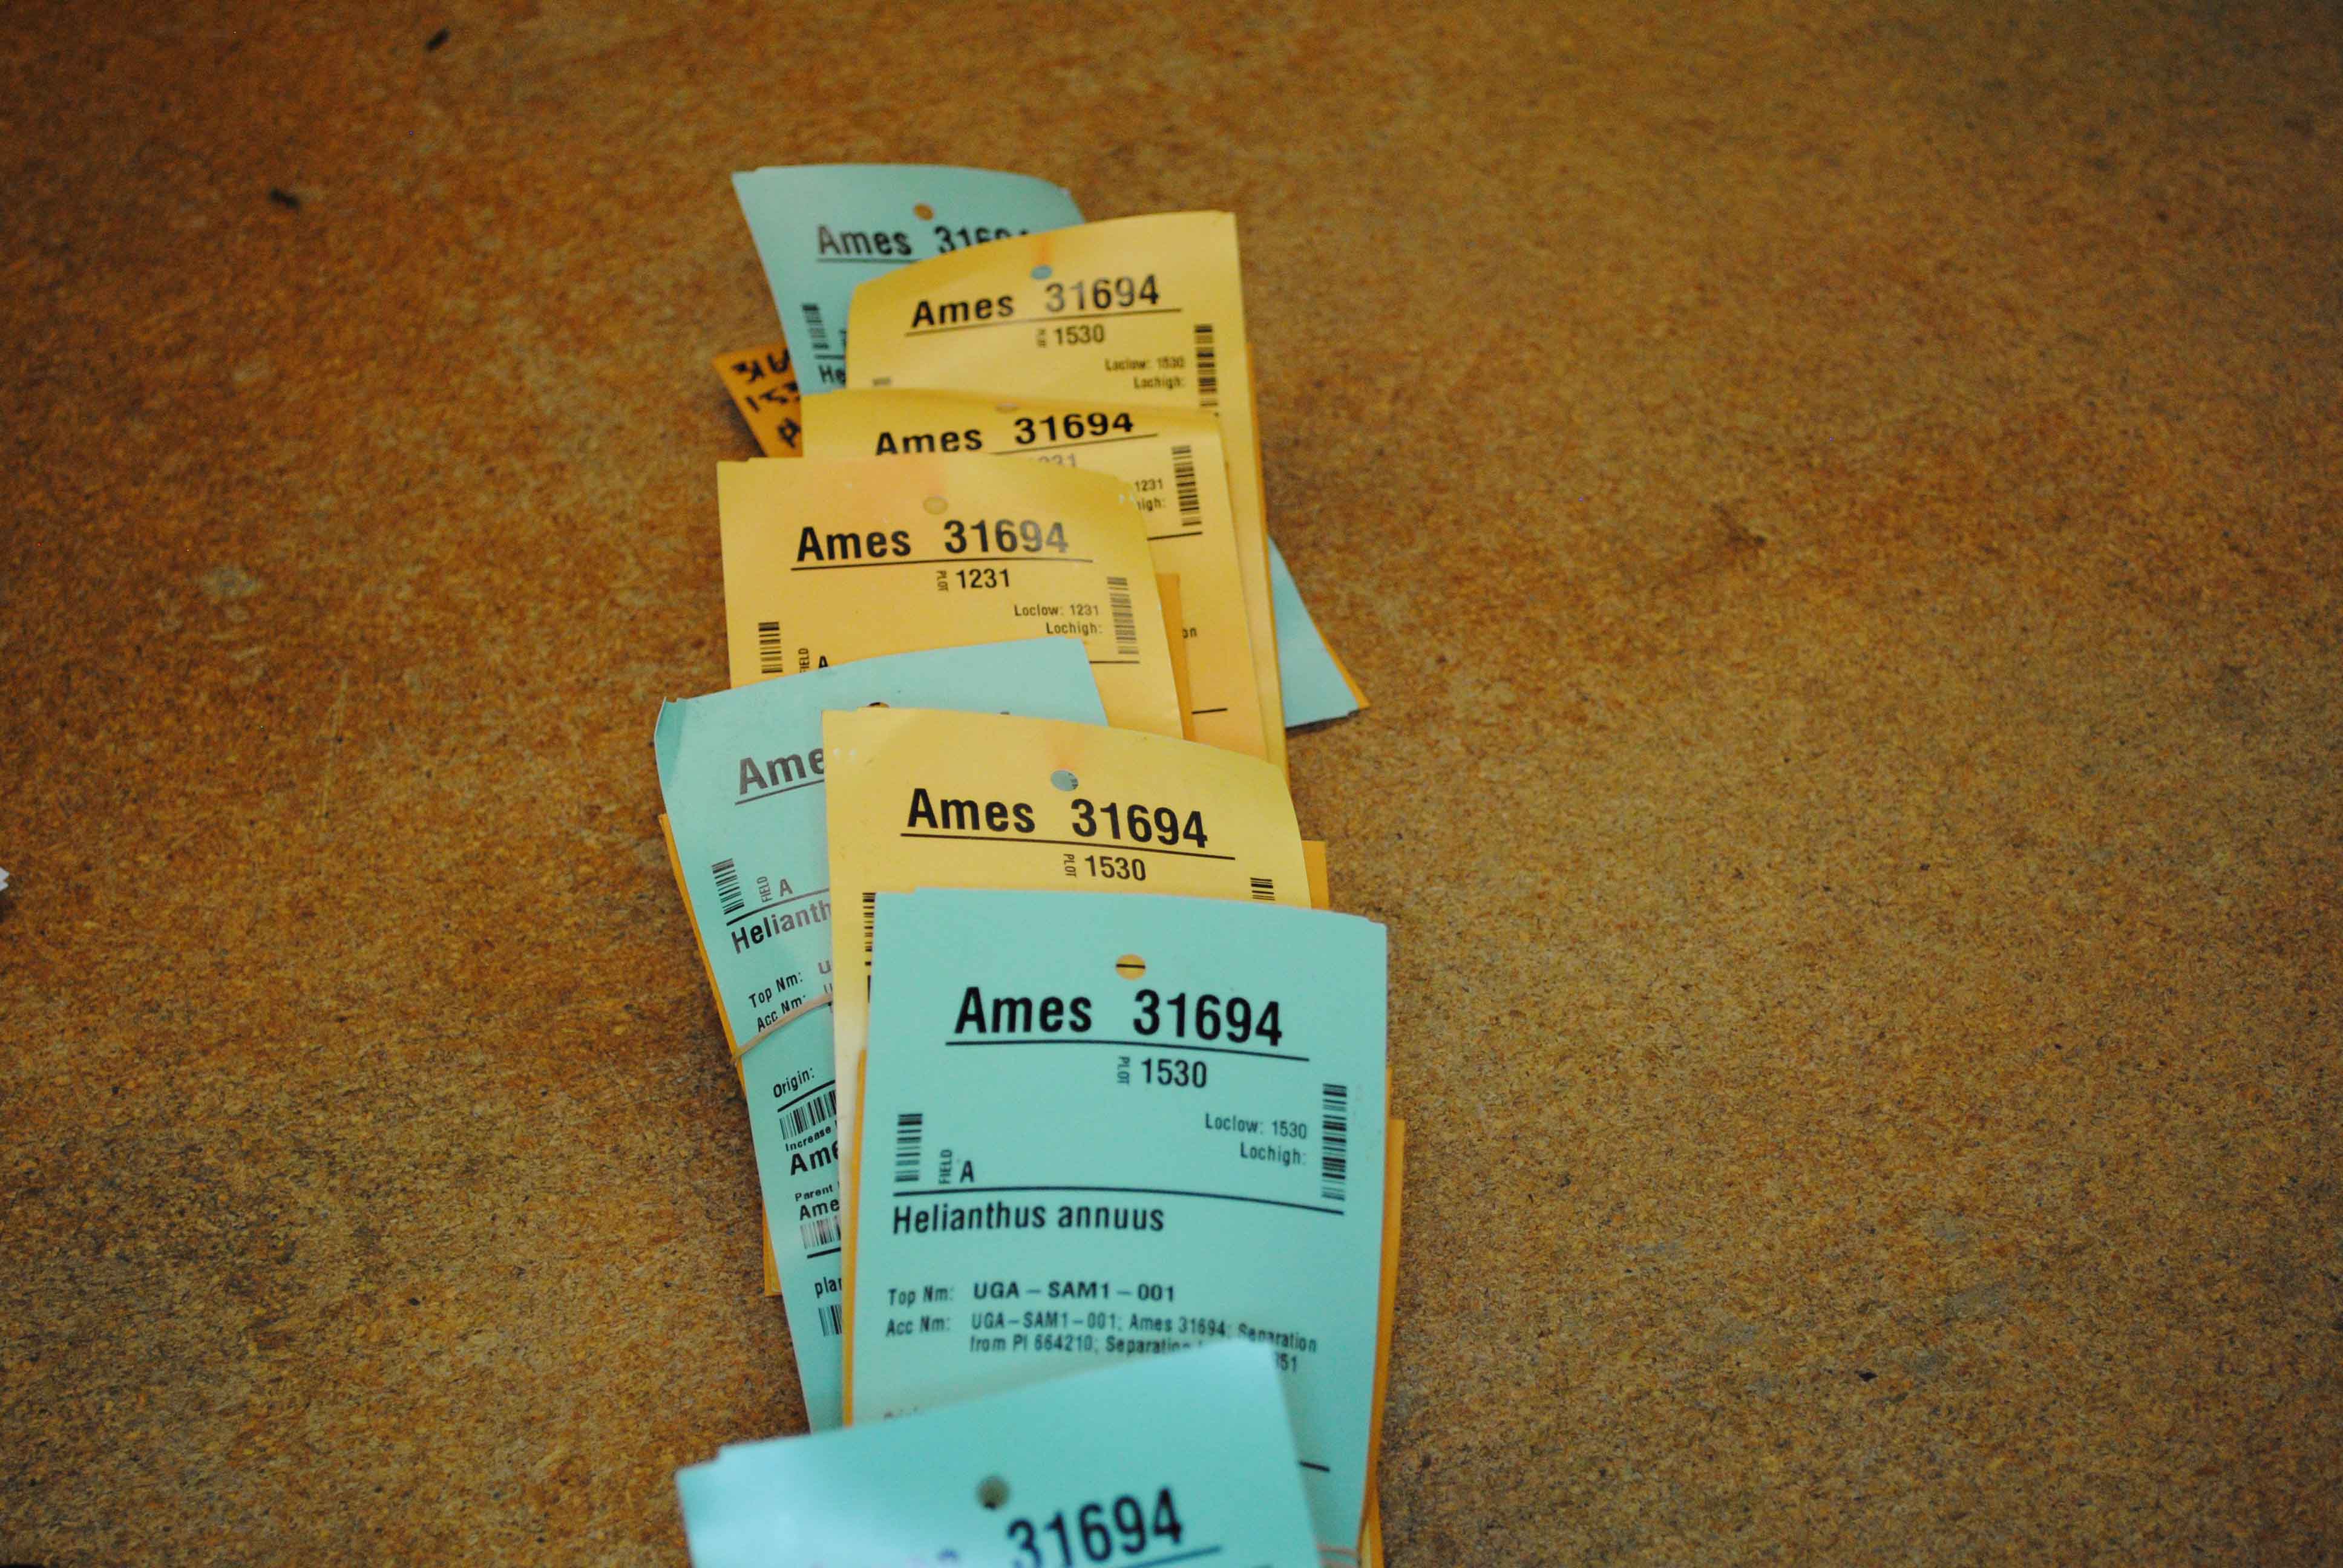
- Keep the tag with the seed at all times. When other heads are also being threshed it is easy to mix things up.

Using the Blower
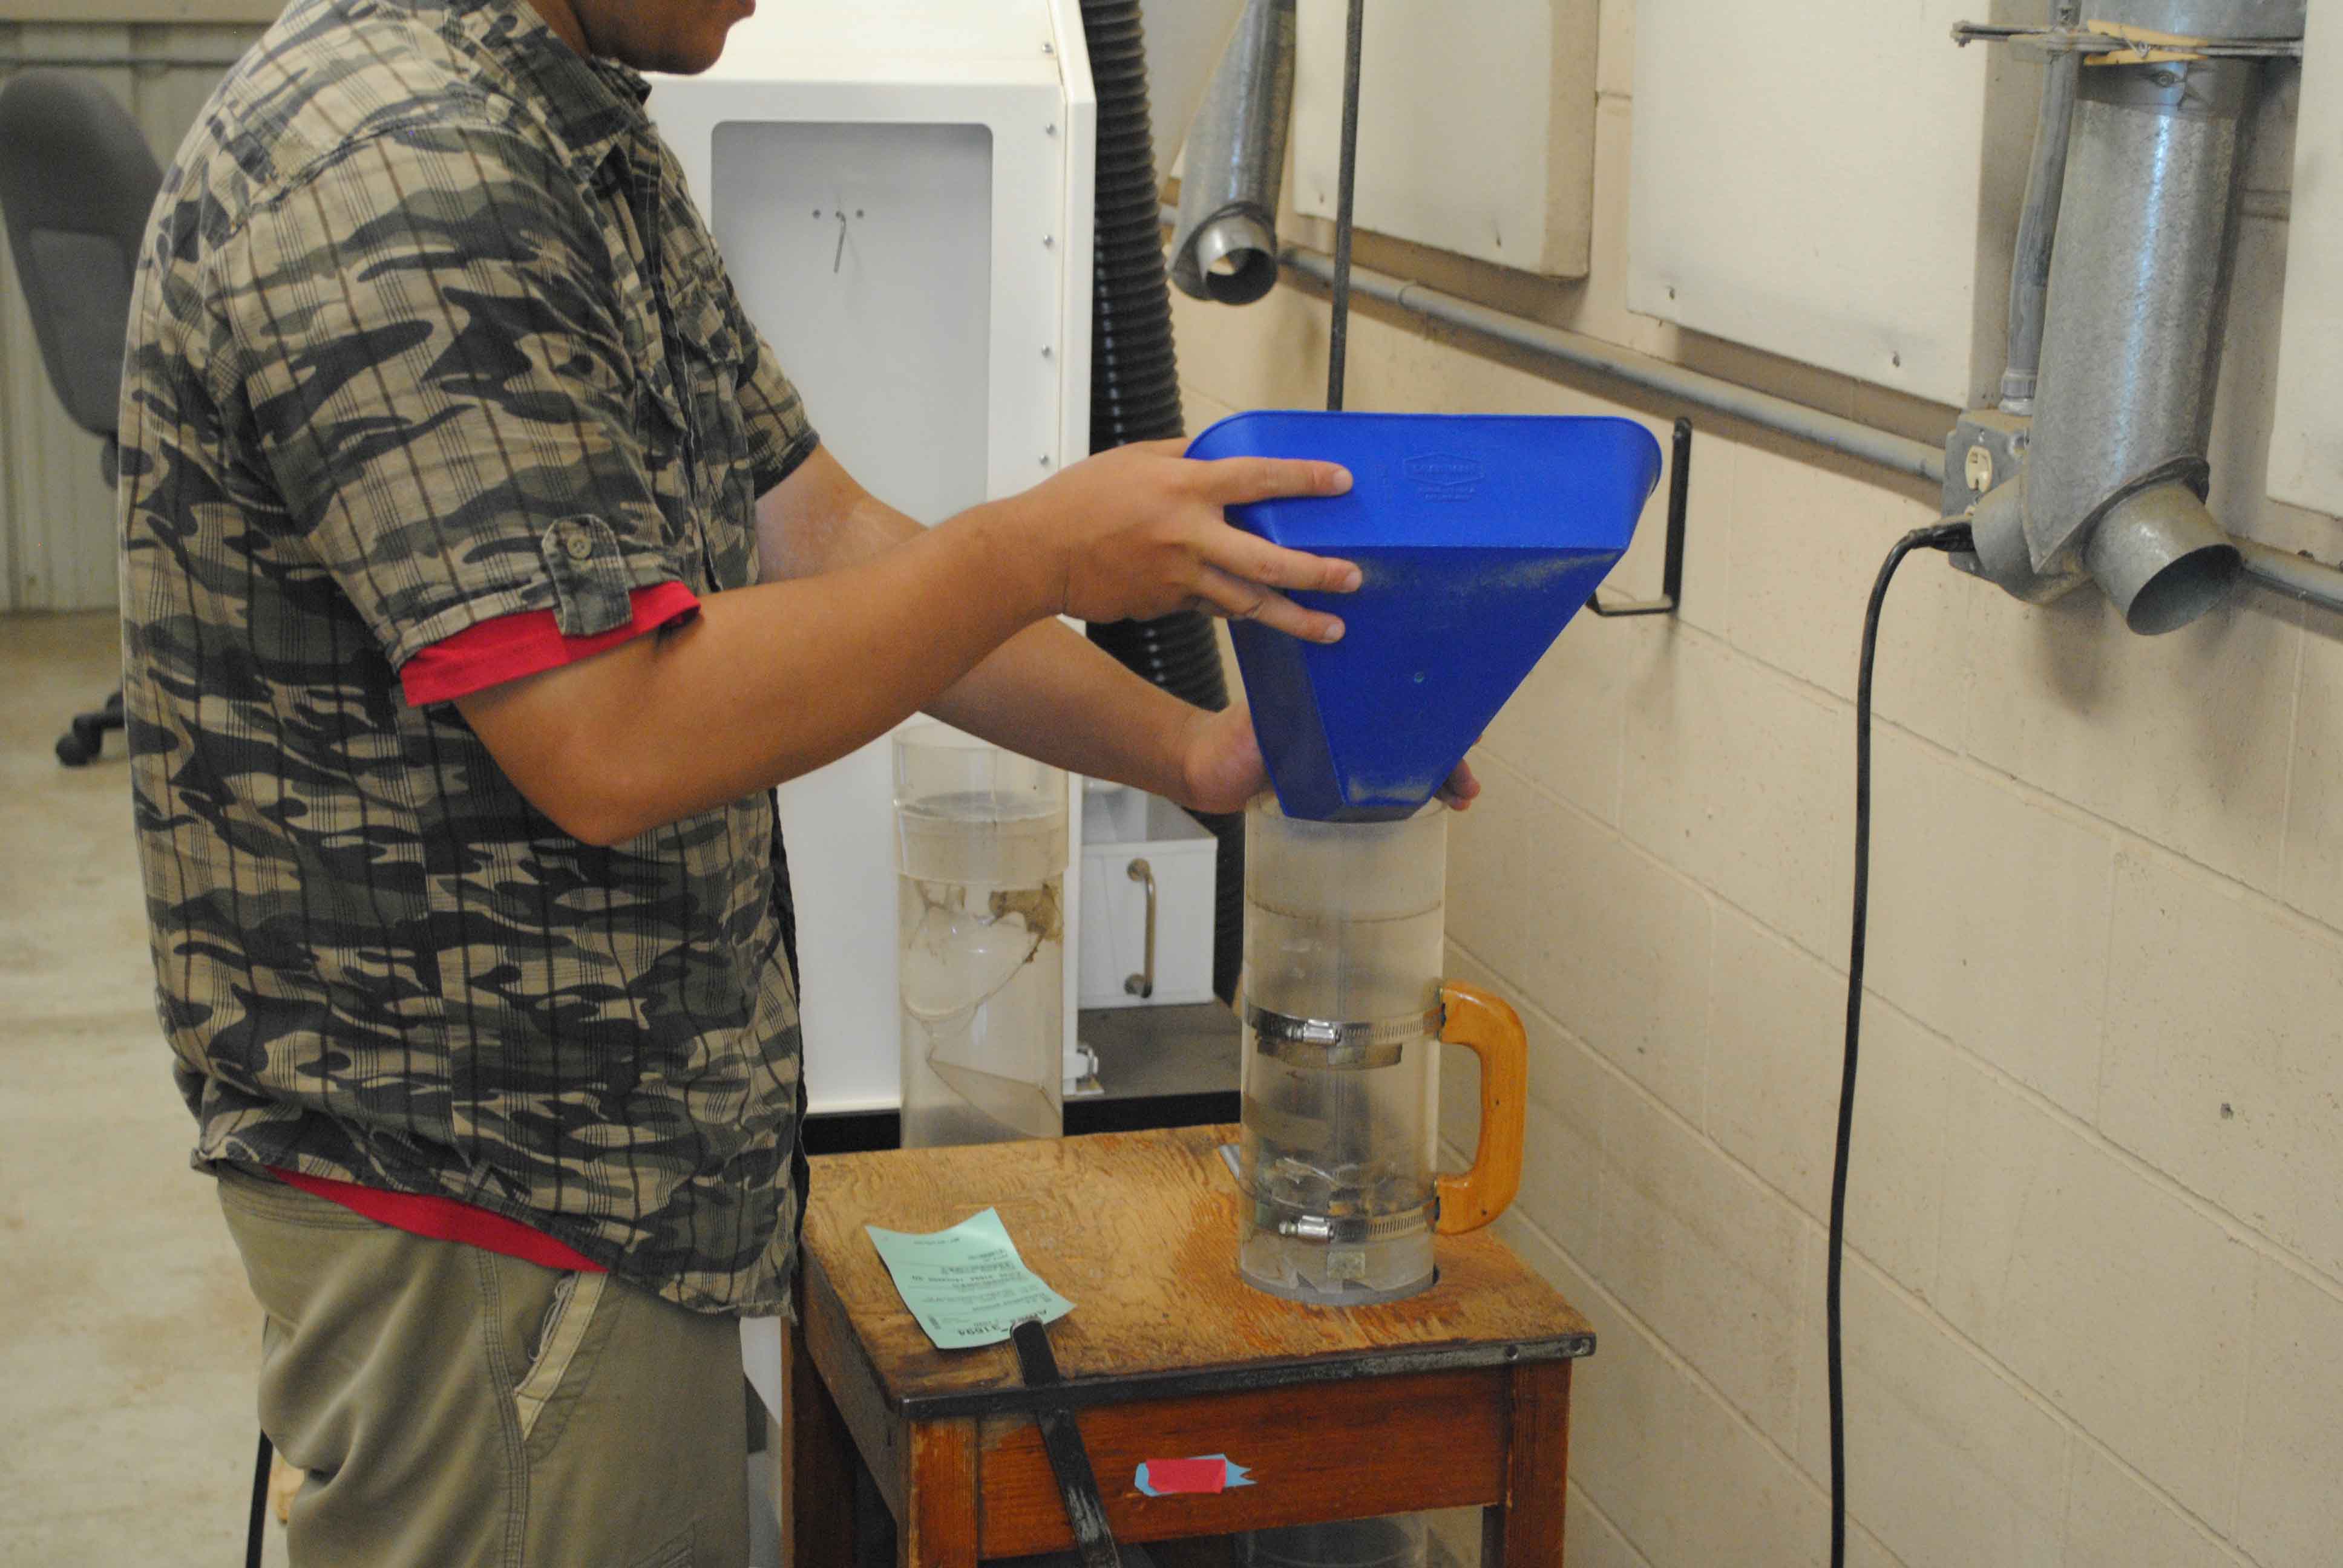
- Move the pour pan to the blower.
- Remove the tag from the pan and place it on the blower table.
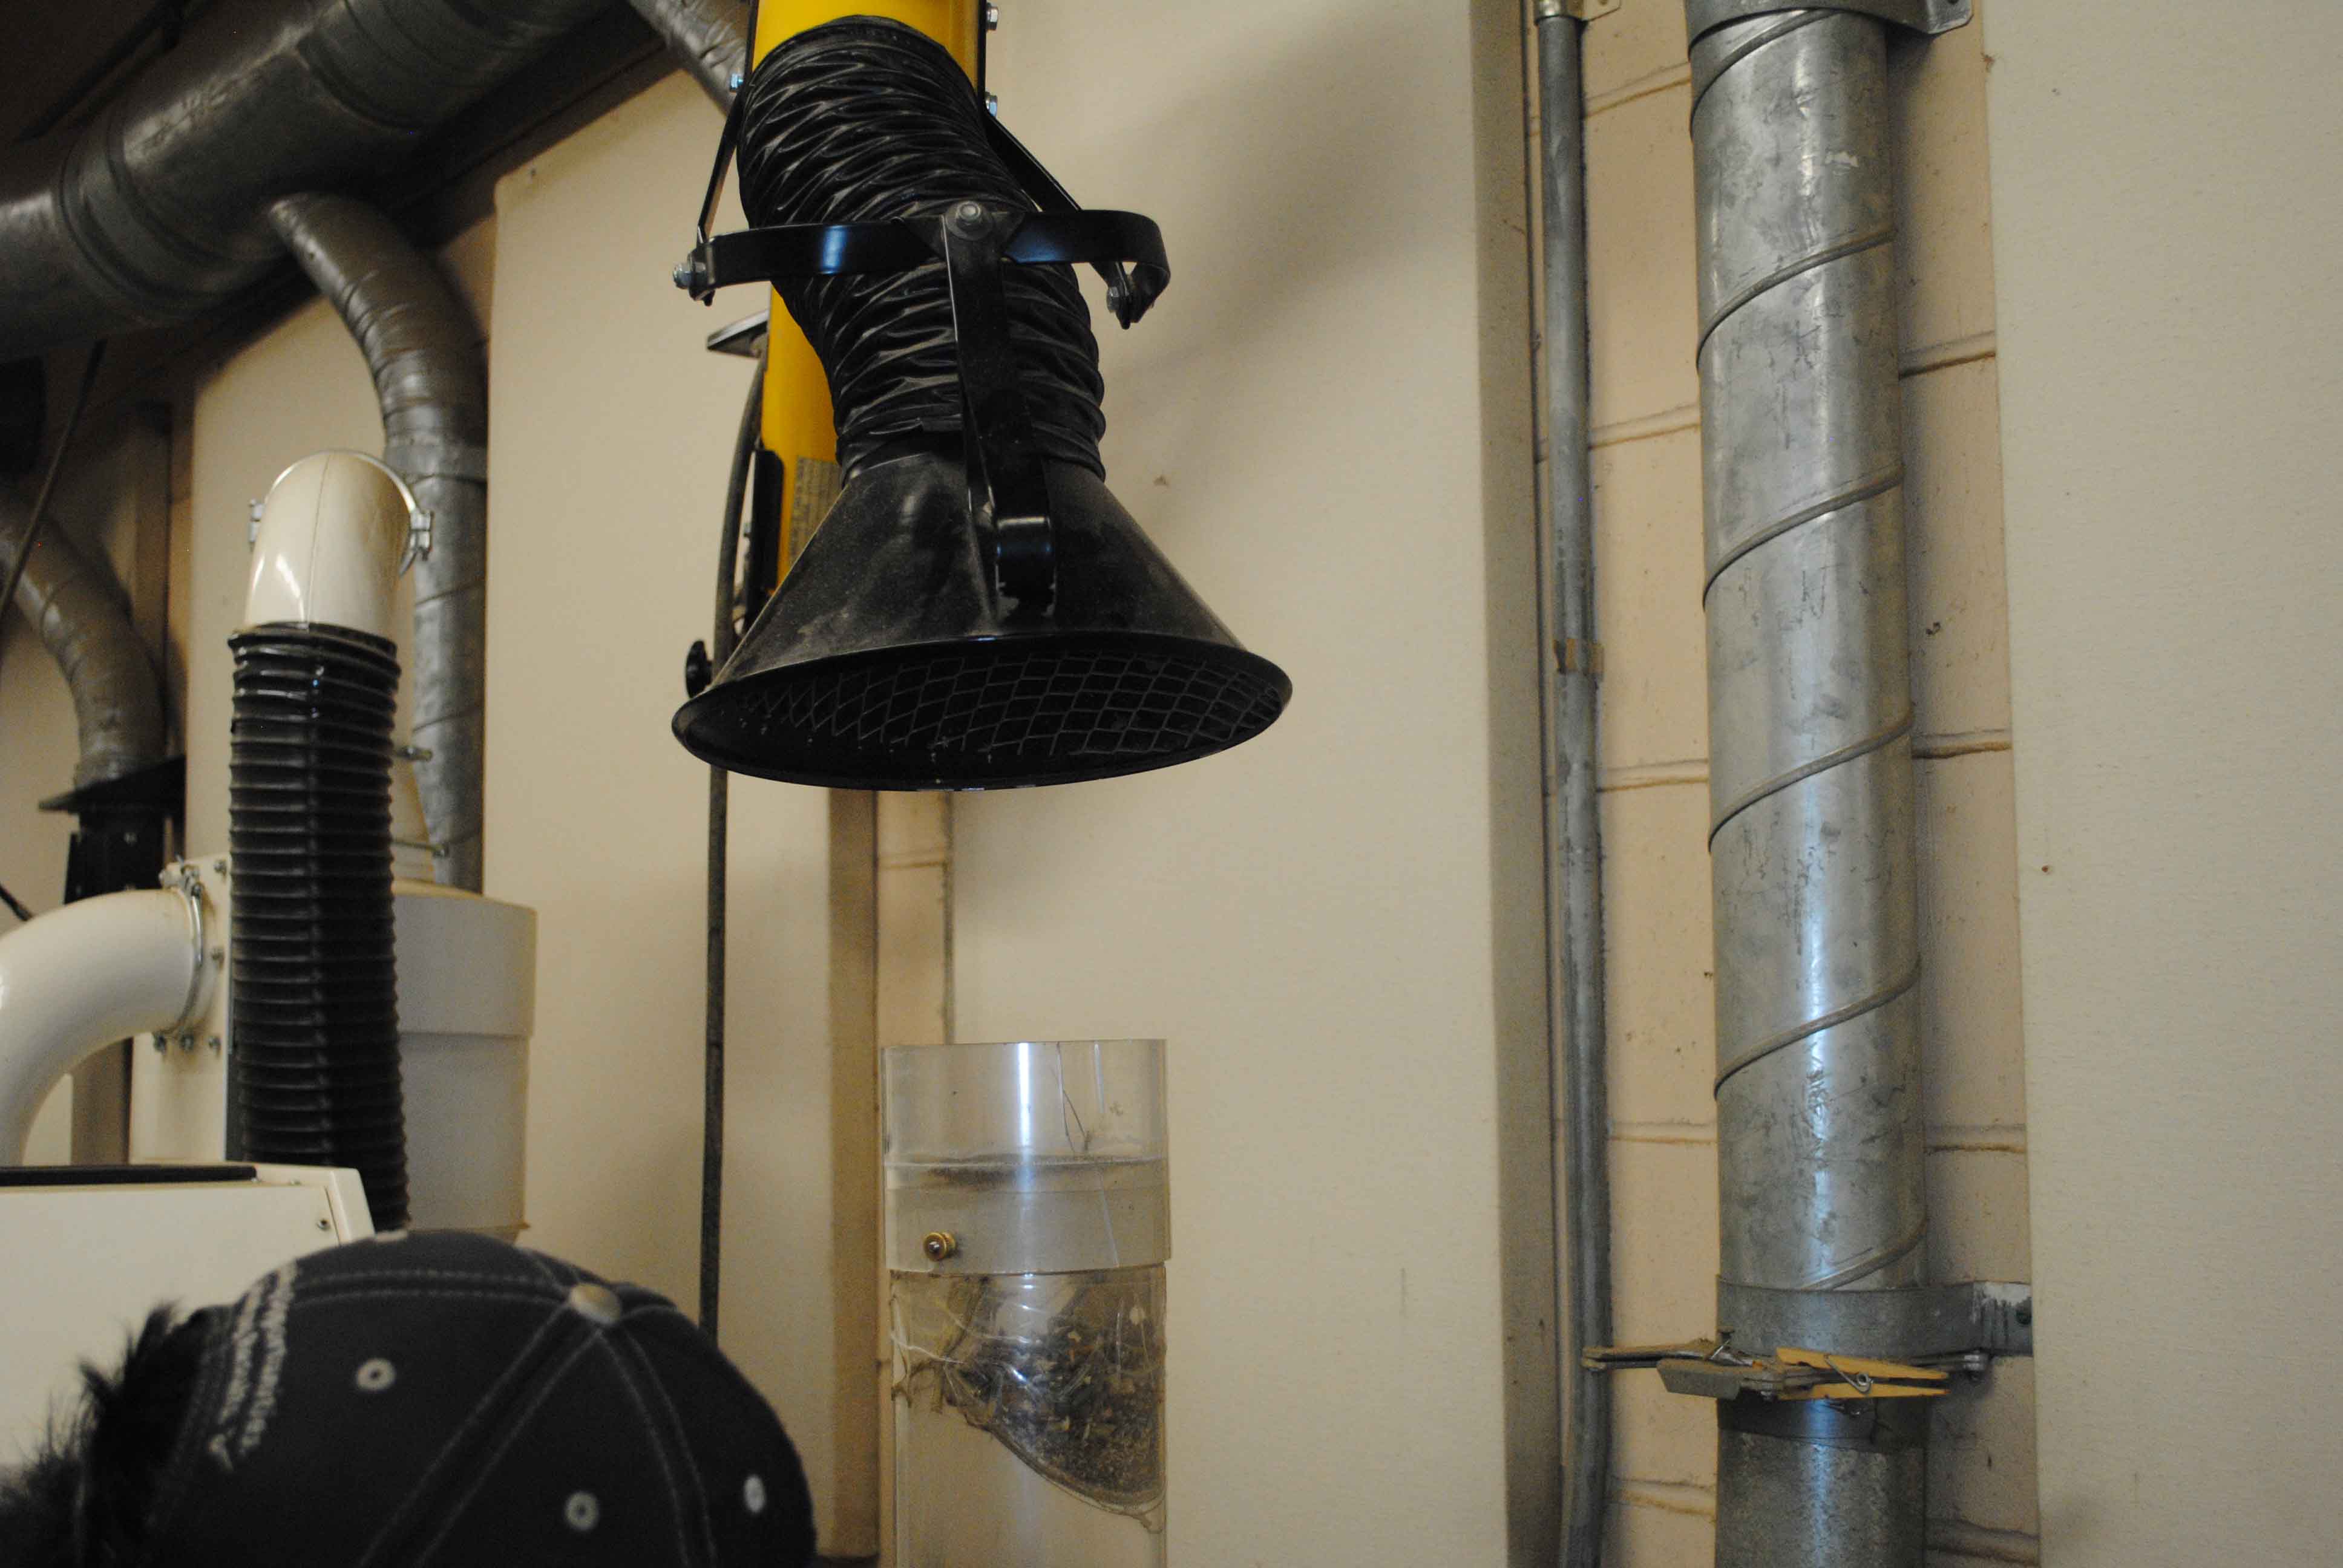
- Ensure the blower tube is empty and the mesh screen is free of debris.
- Pour everything from the pan into the base of the blower tube.
- Place the pan on the table and insert the top portion of the blower tube into the base tube.
- The blower tubing is very fragile. Be careful when you are using it.
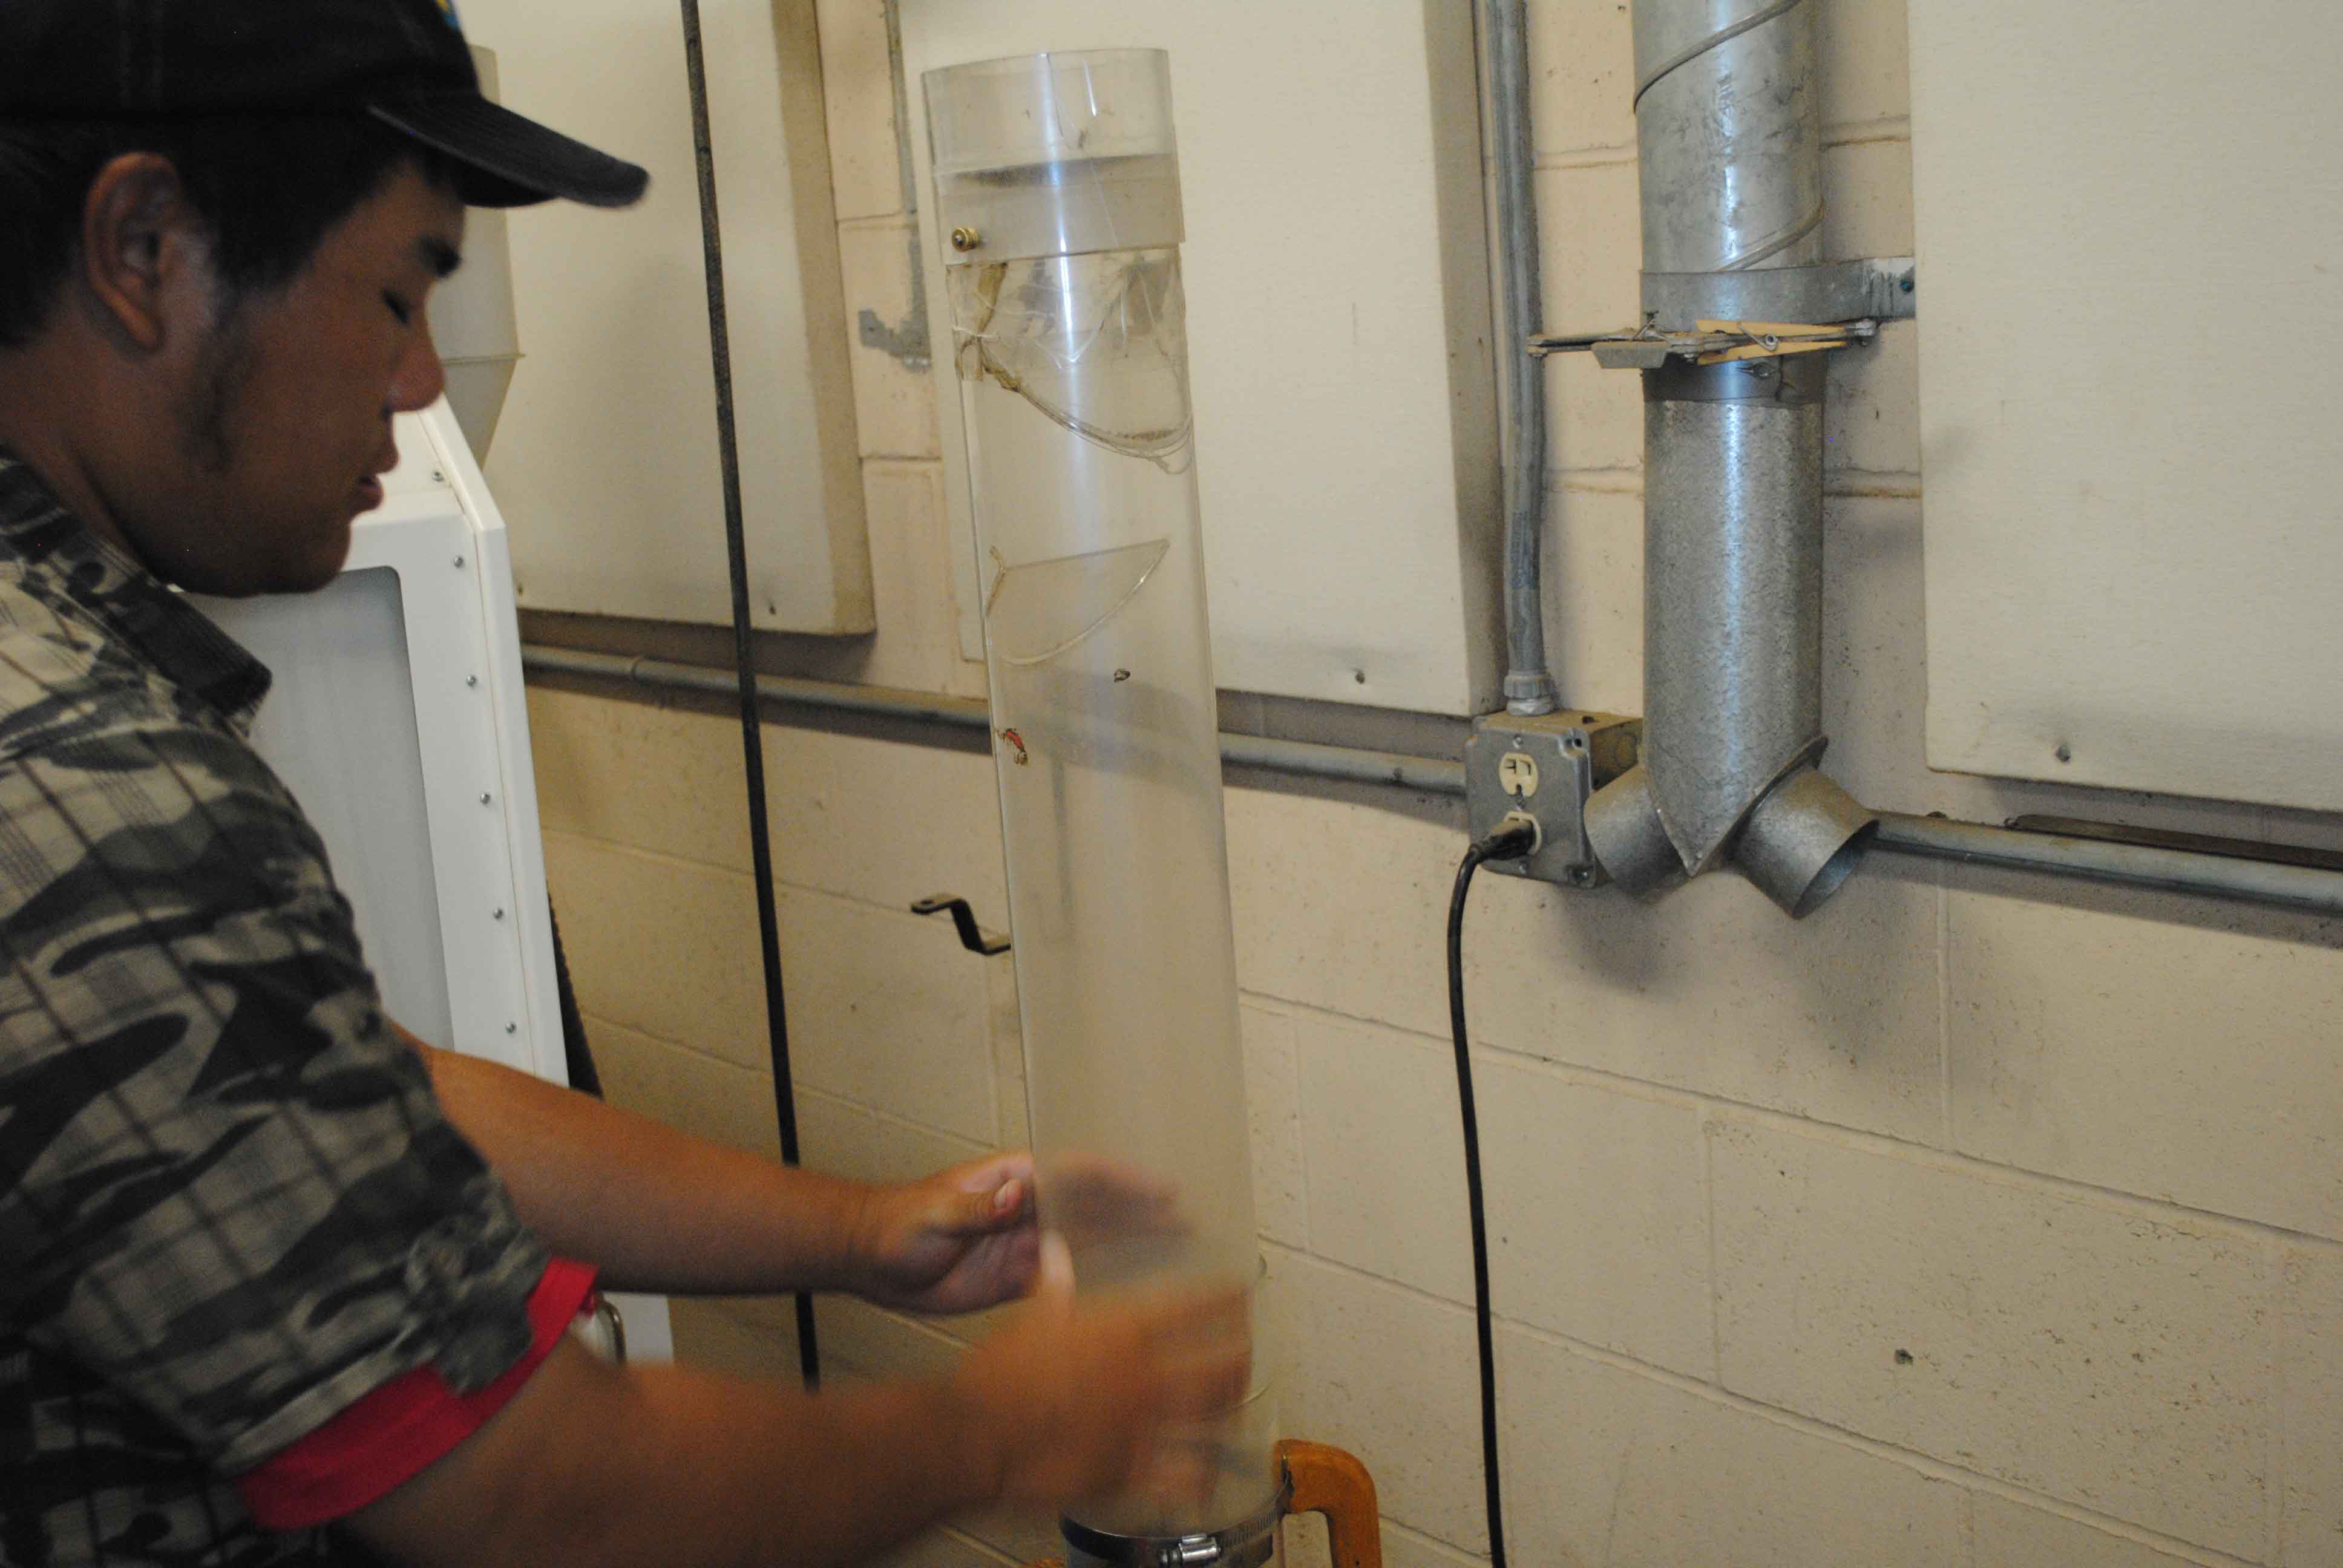
- Lock the top piece of the blower tube in place by tightening the nut.
- The larger blower does not have this feature. When blowing you must hold this piece down.
- Move the dust collector head over the blower tube.
- Do not touch the tube with the dust collector. Leave at least six inches to one foot between them.
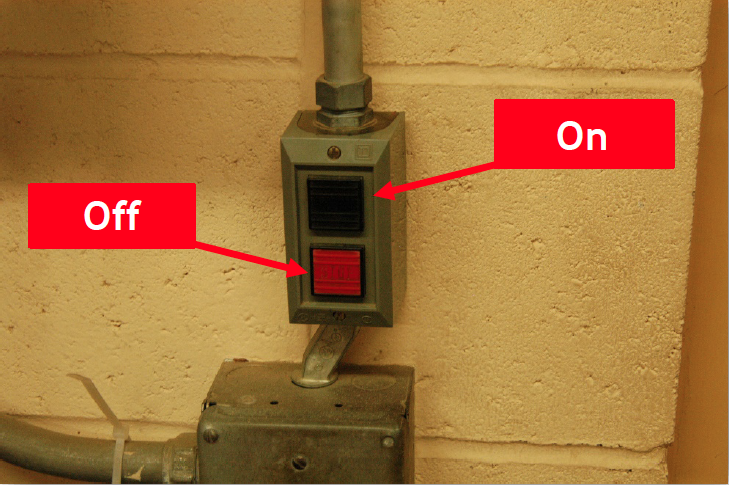
- Turn on the dust collector using the black switch by the door.
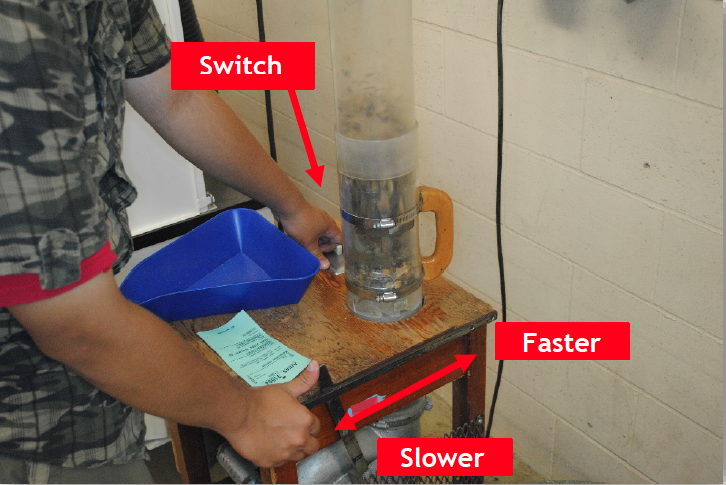
- Turn the blower on by flipping the switch on the far left corner of the base.
- Slowly increase the speed of the blower by moving the metal bar on the right side forward.
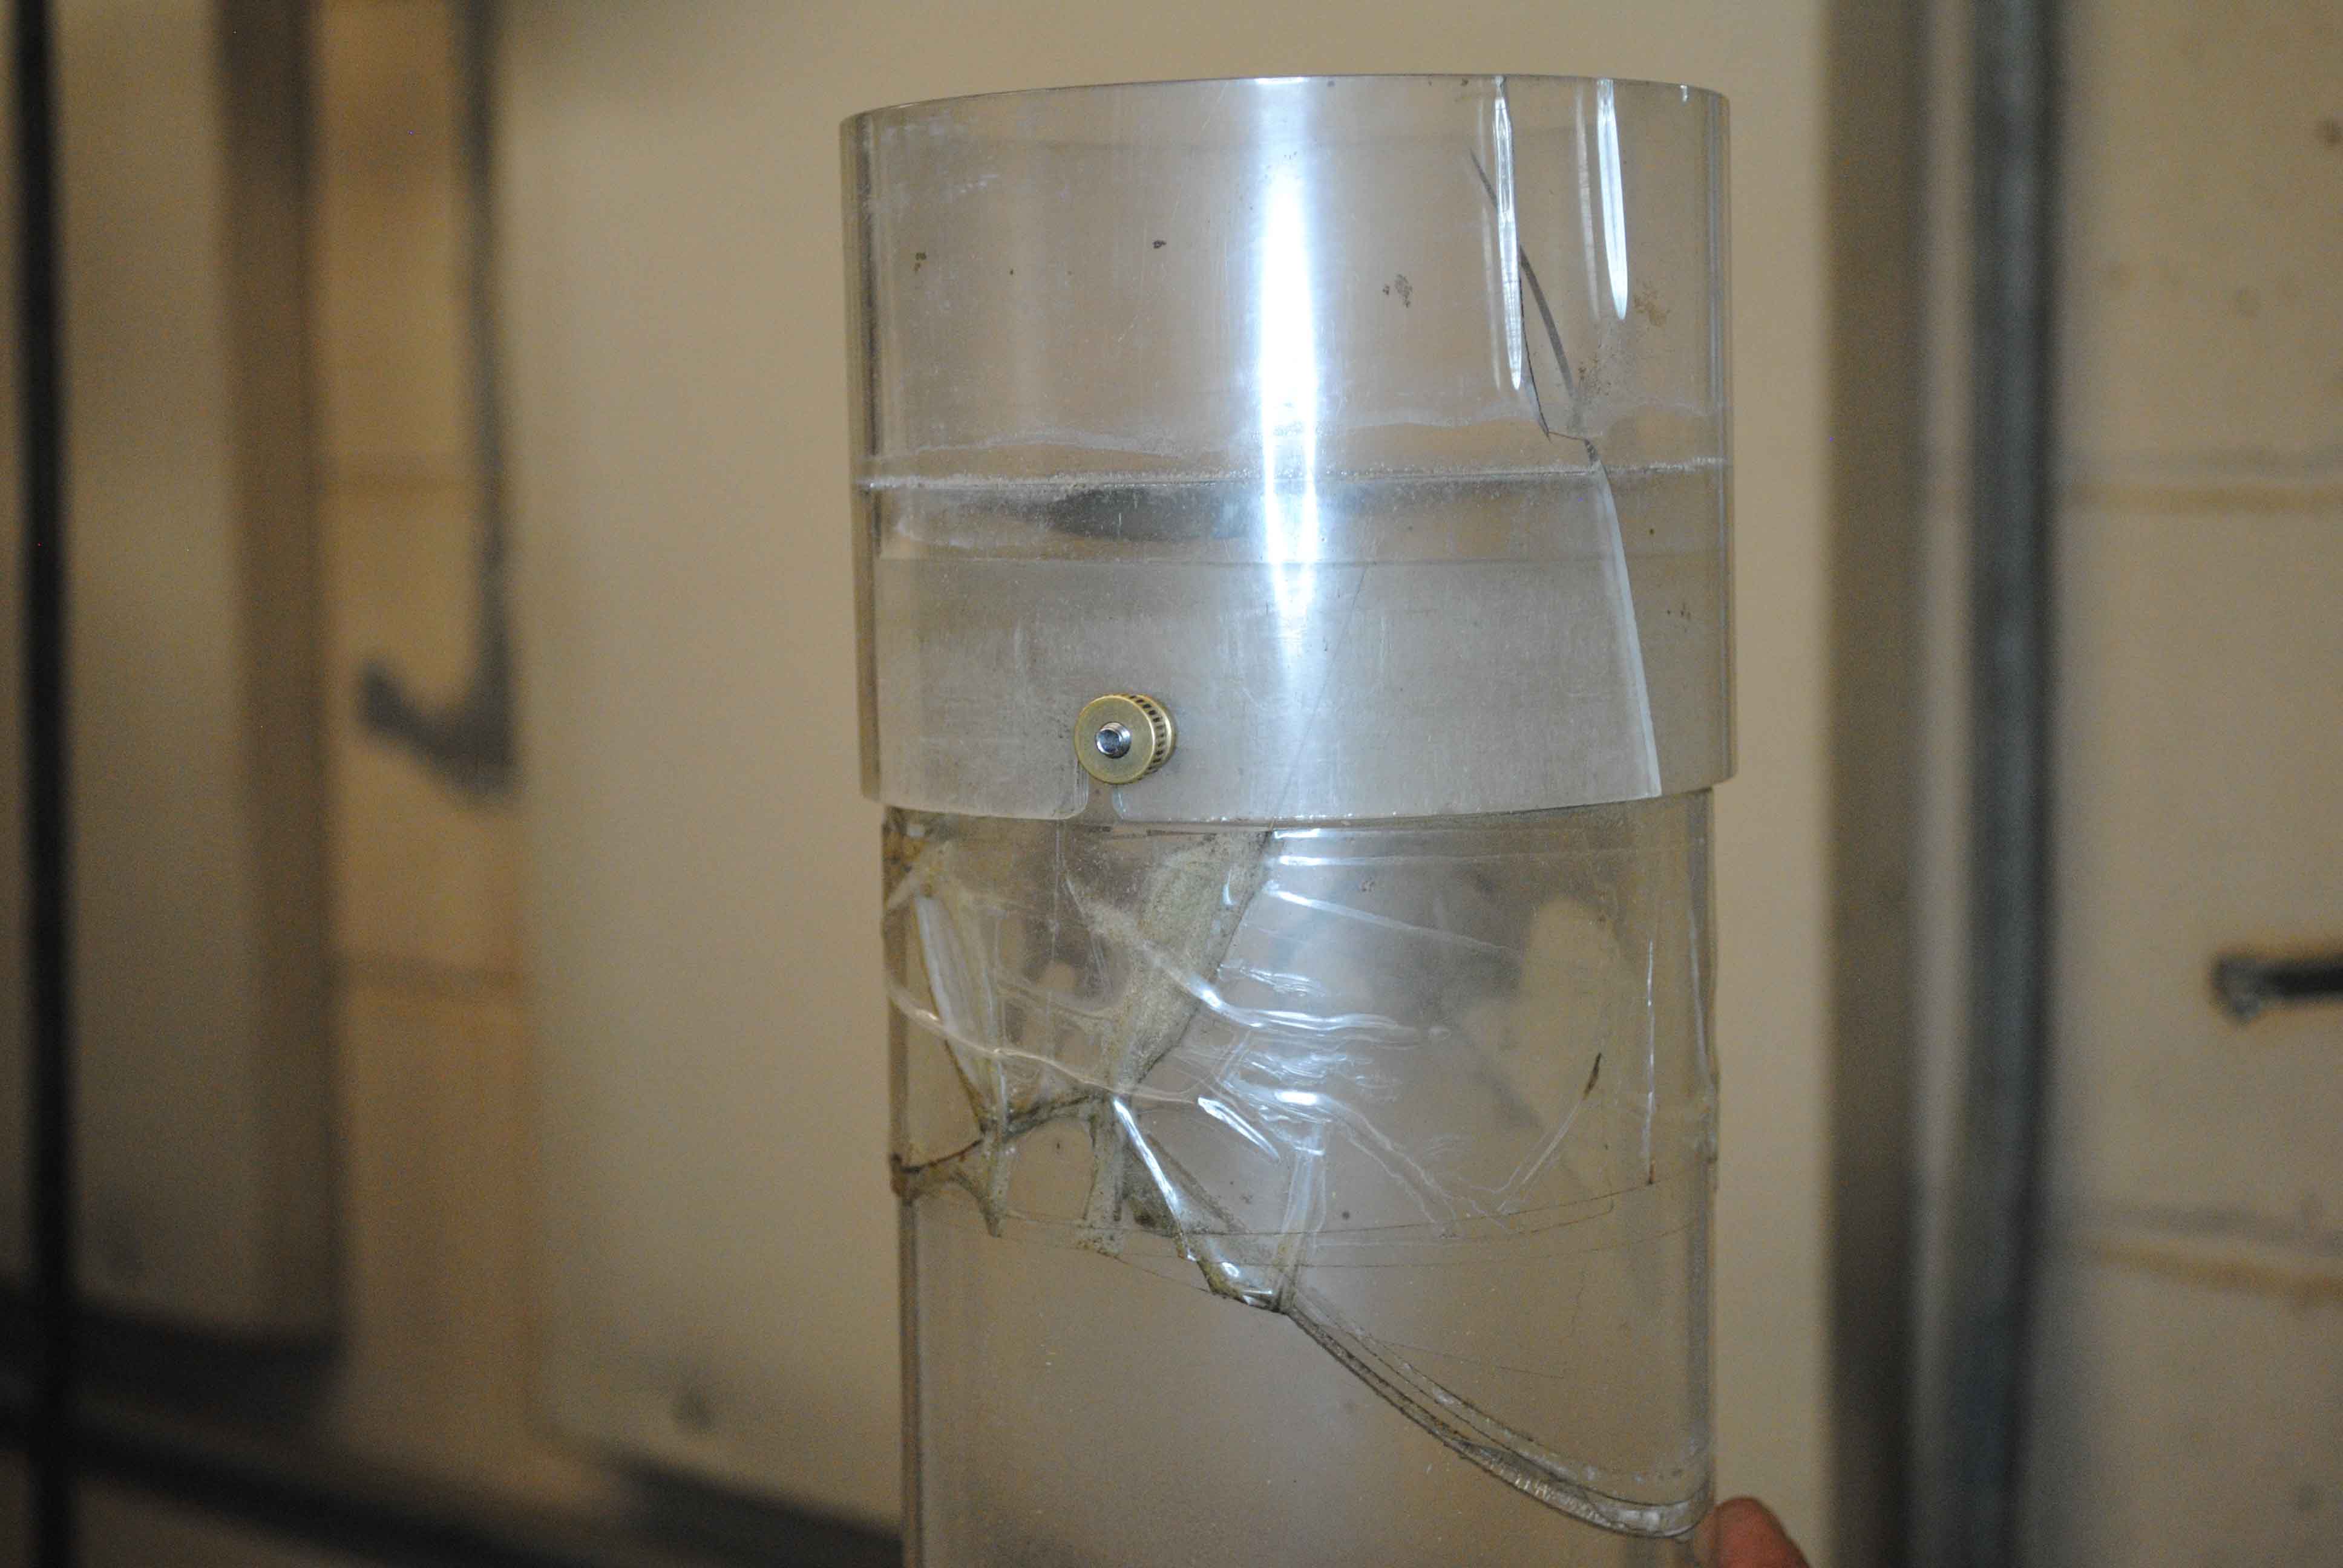
- When the top section of the blower tube is full of trash/chaff/empty hulls, slow down by moving the metal bar backward.
- Turn the blower off.
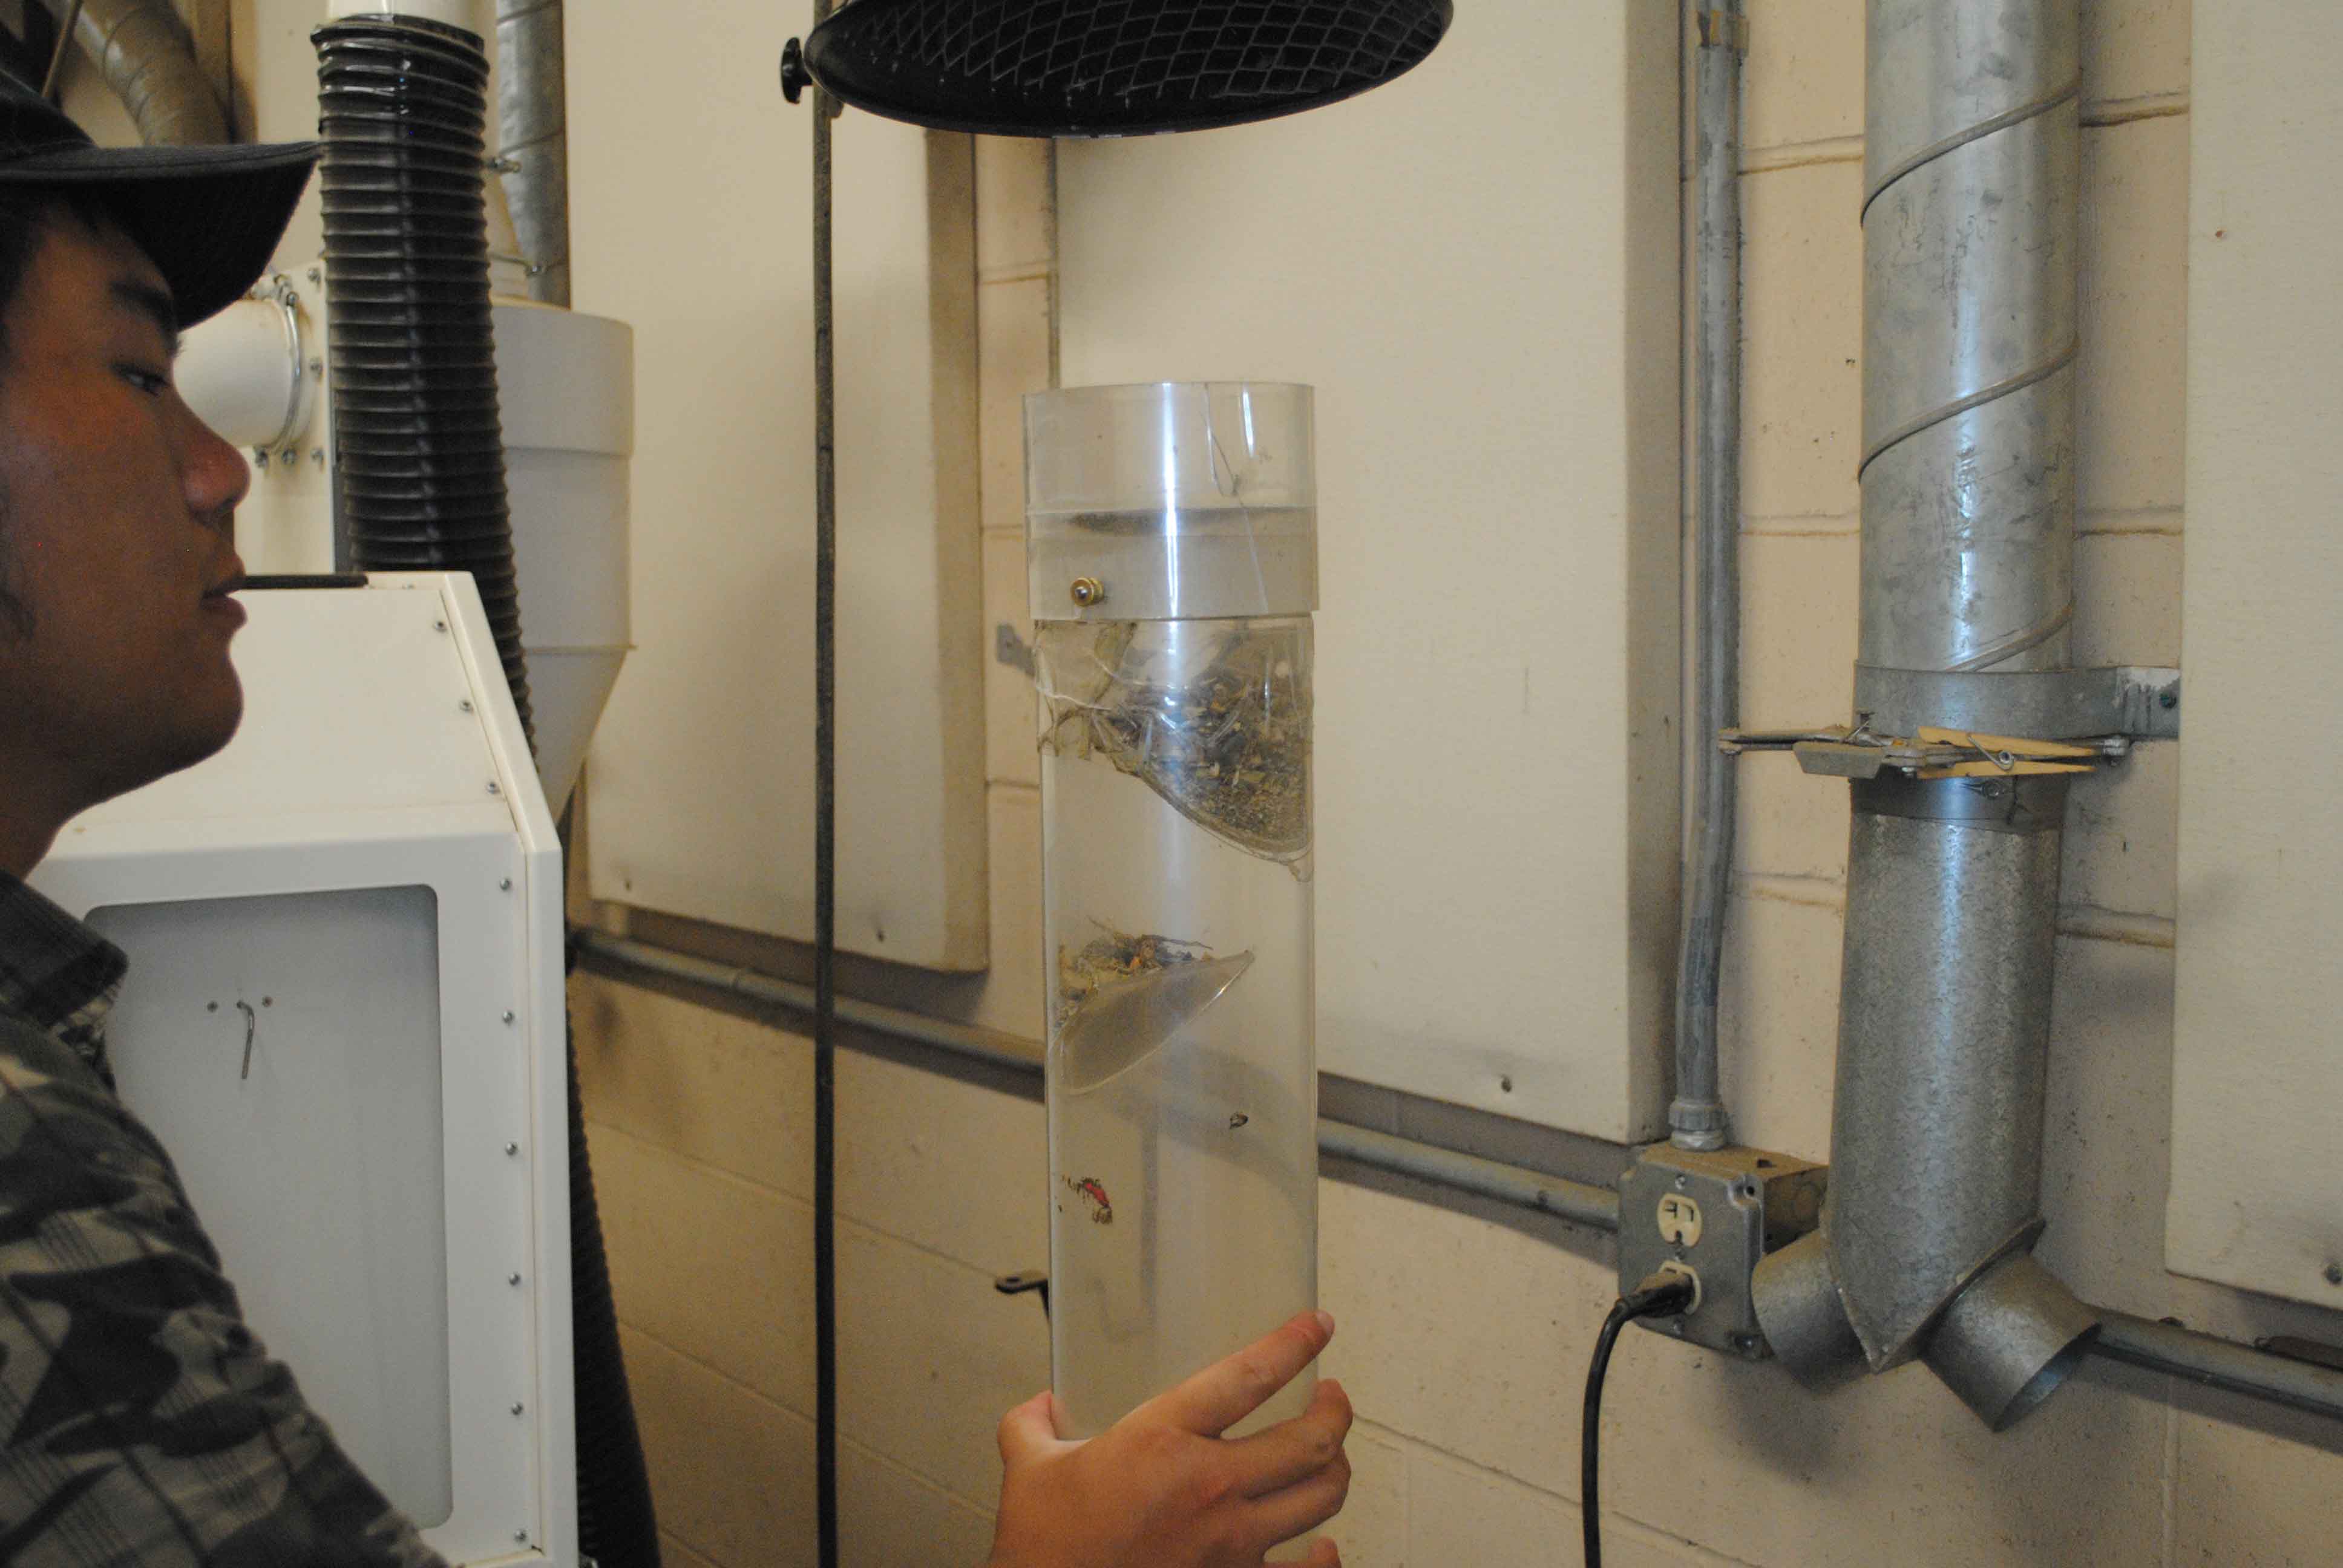
- Remove the top portion of the blower tube and empty the plant material into the triangular pour pan.
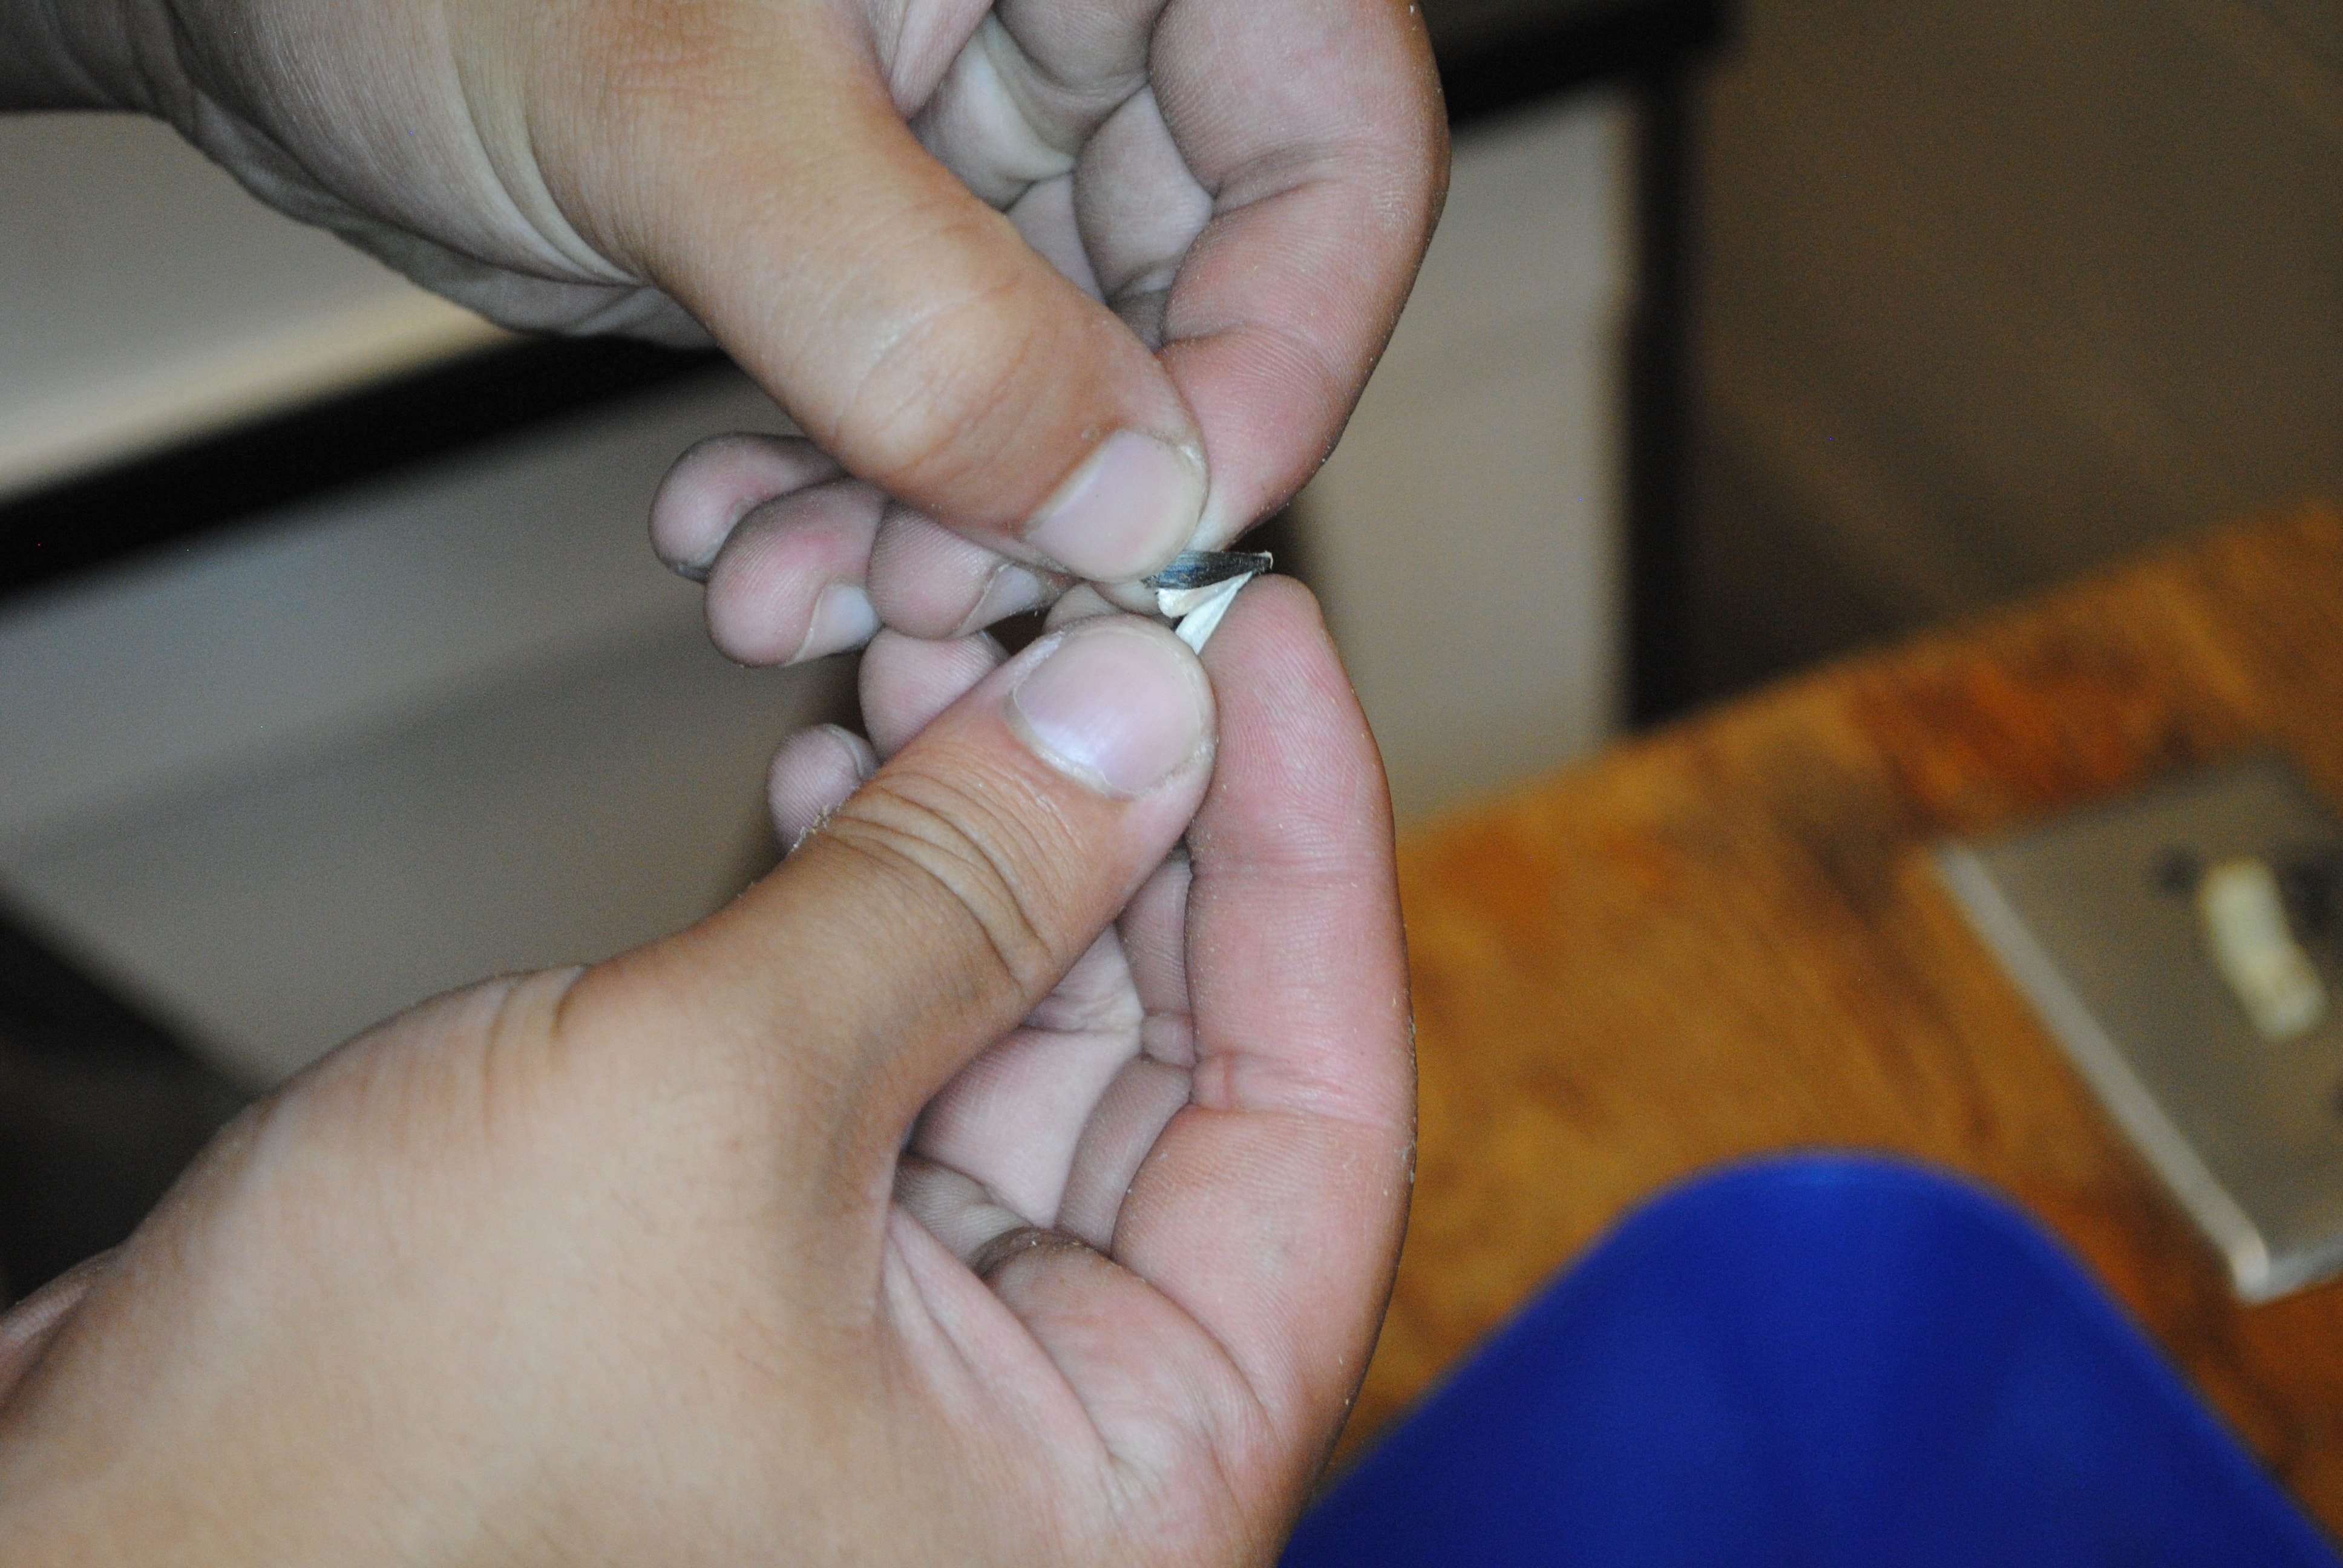
- Pick out five seeds.
- These will be a sample of the seeds in the pour pan.
- Open each seed coat and look for a seed inside.
- Follow either "a" or "b".
- If the sample contains no viable seed throw the material in the pour pan, into the organic trash and repeat steps 9 through 15.
- If the sample contains viable seed move on the step 17.
- Pour any remaining seed in the base tube back into the pour pan.
- Move the pour pan containing the seed and tag back to the work table.
Finishing Up
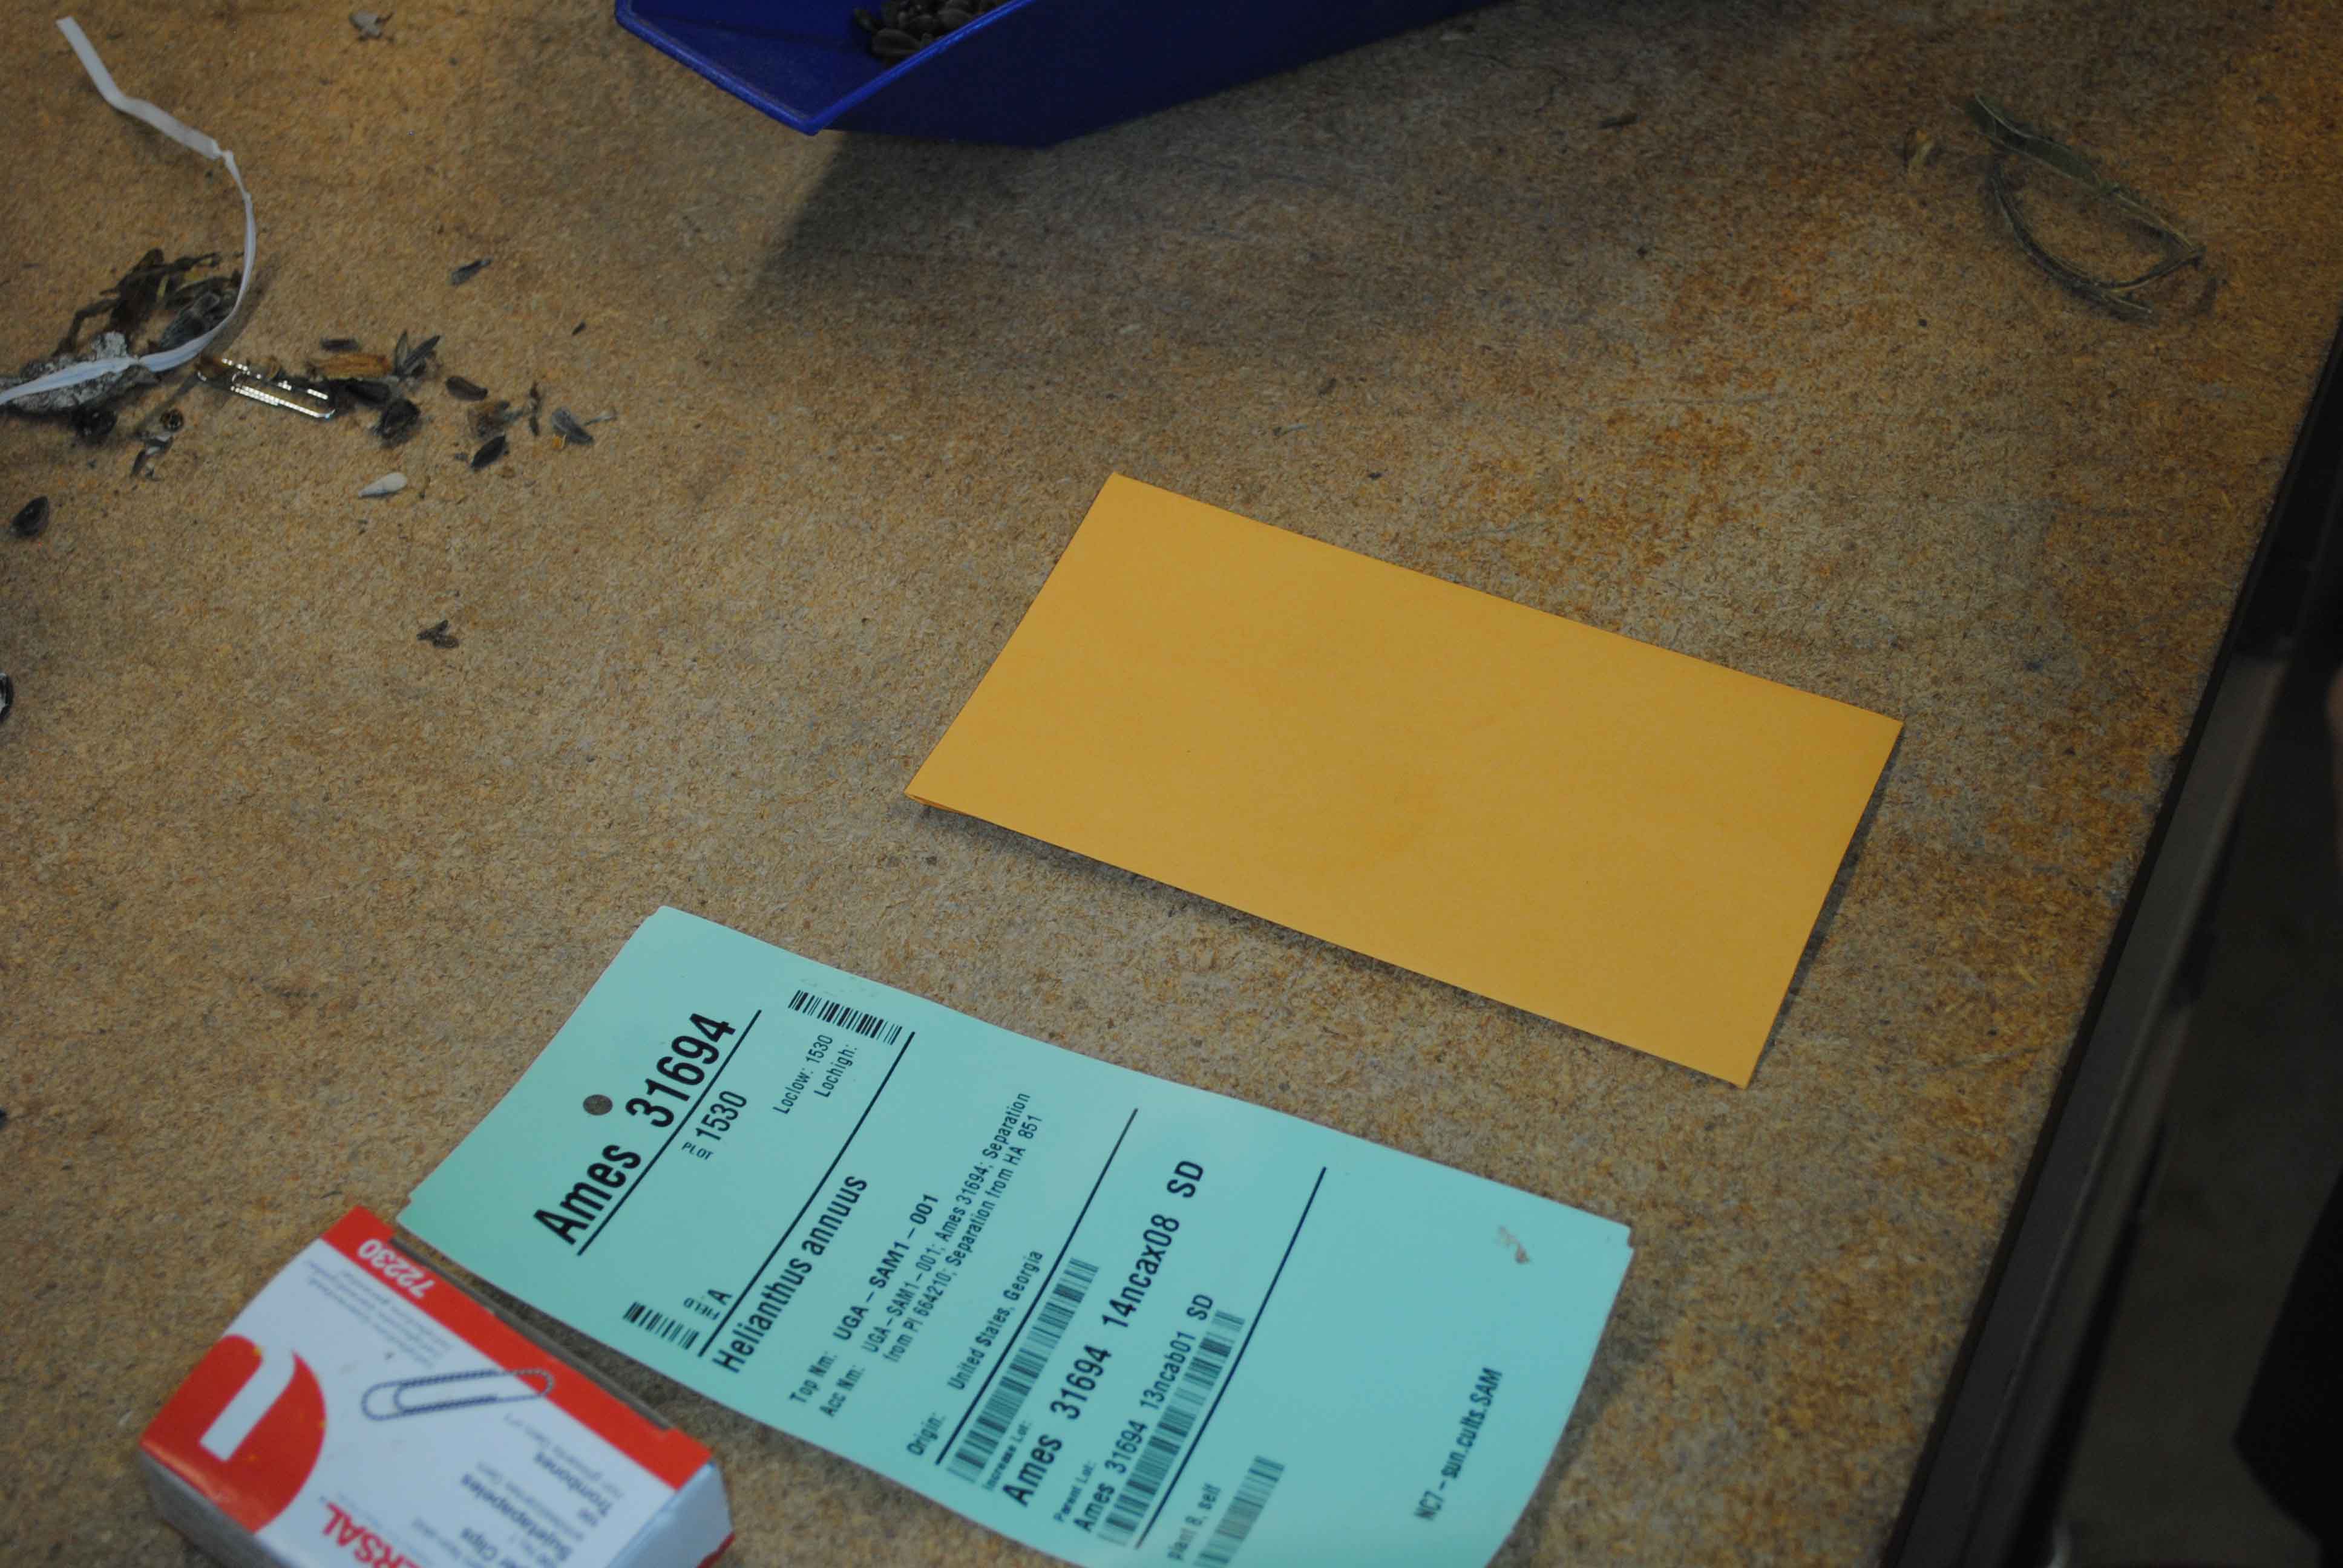
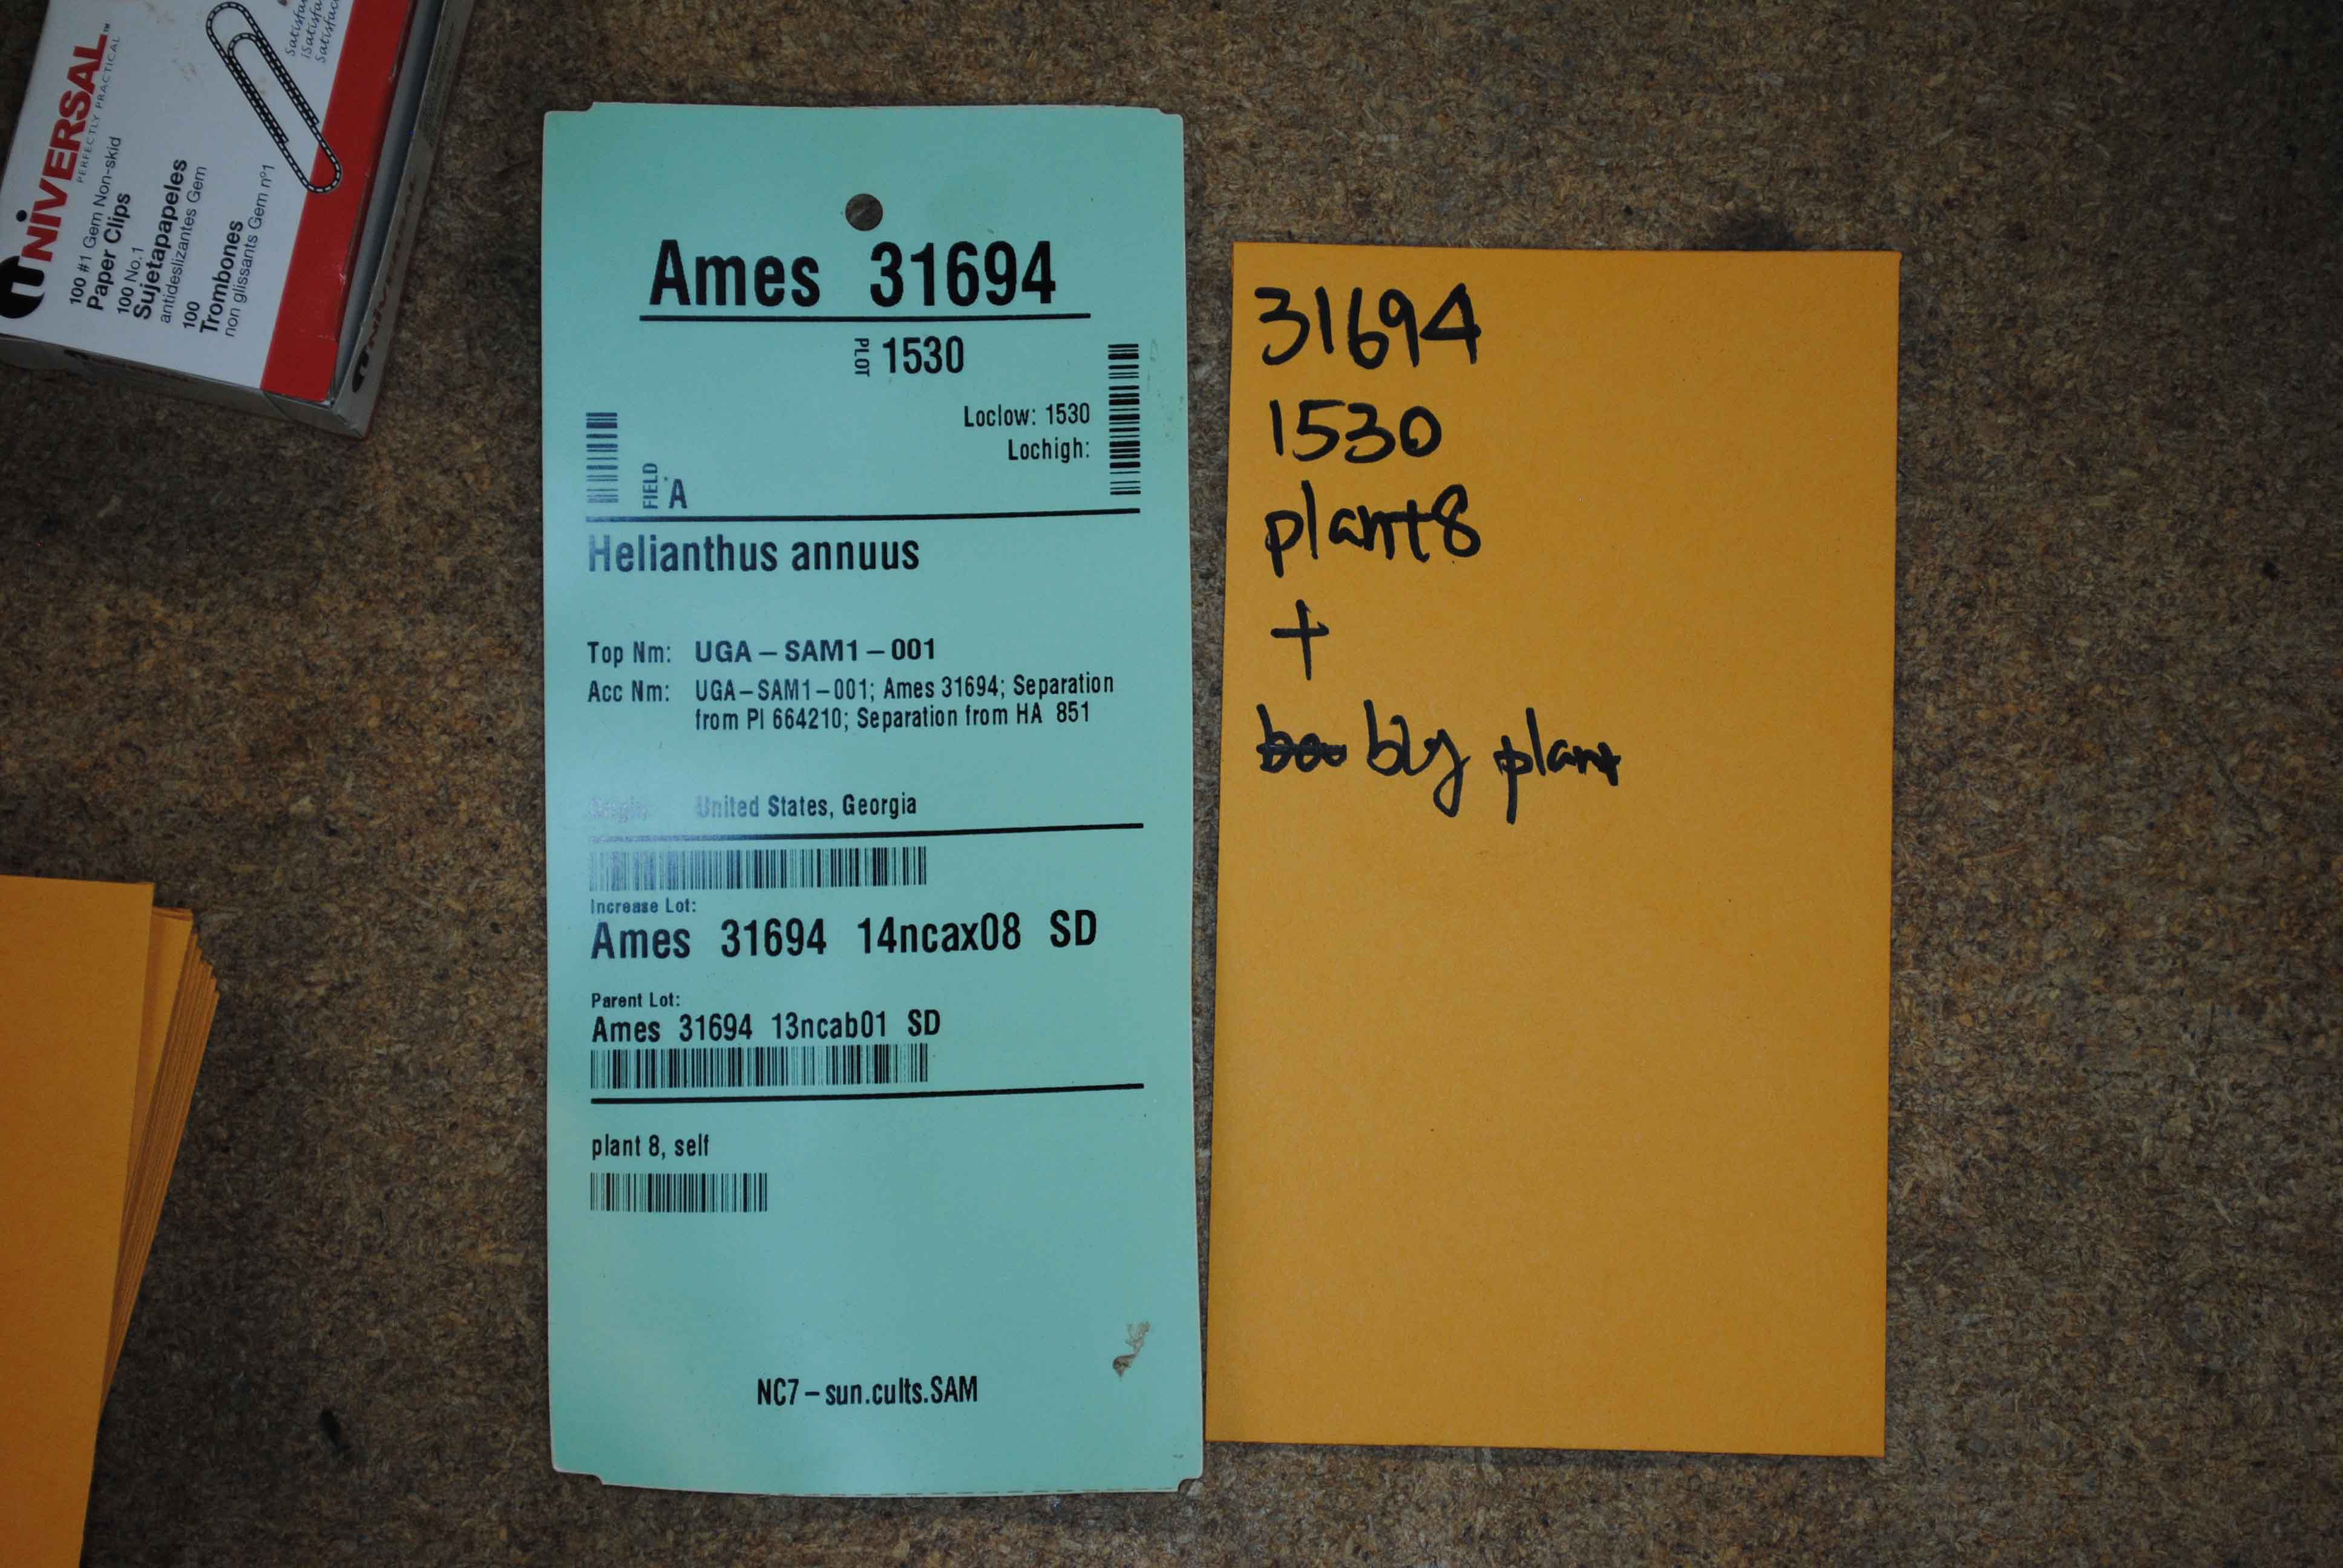
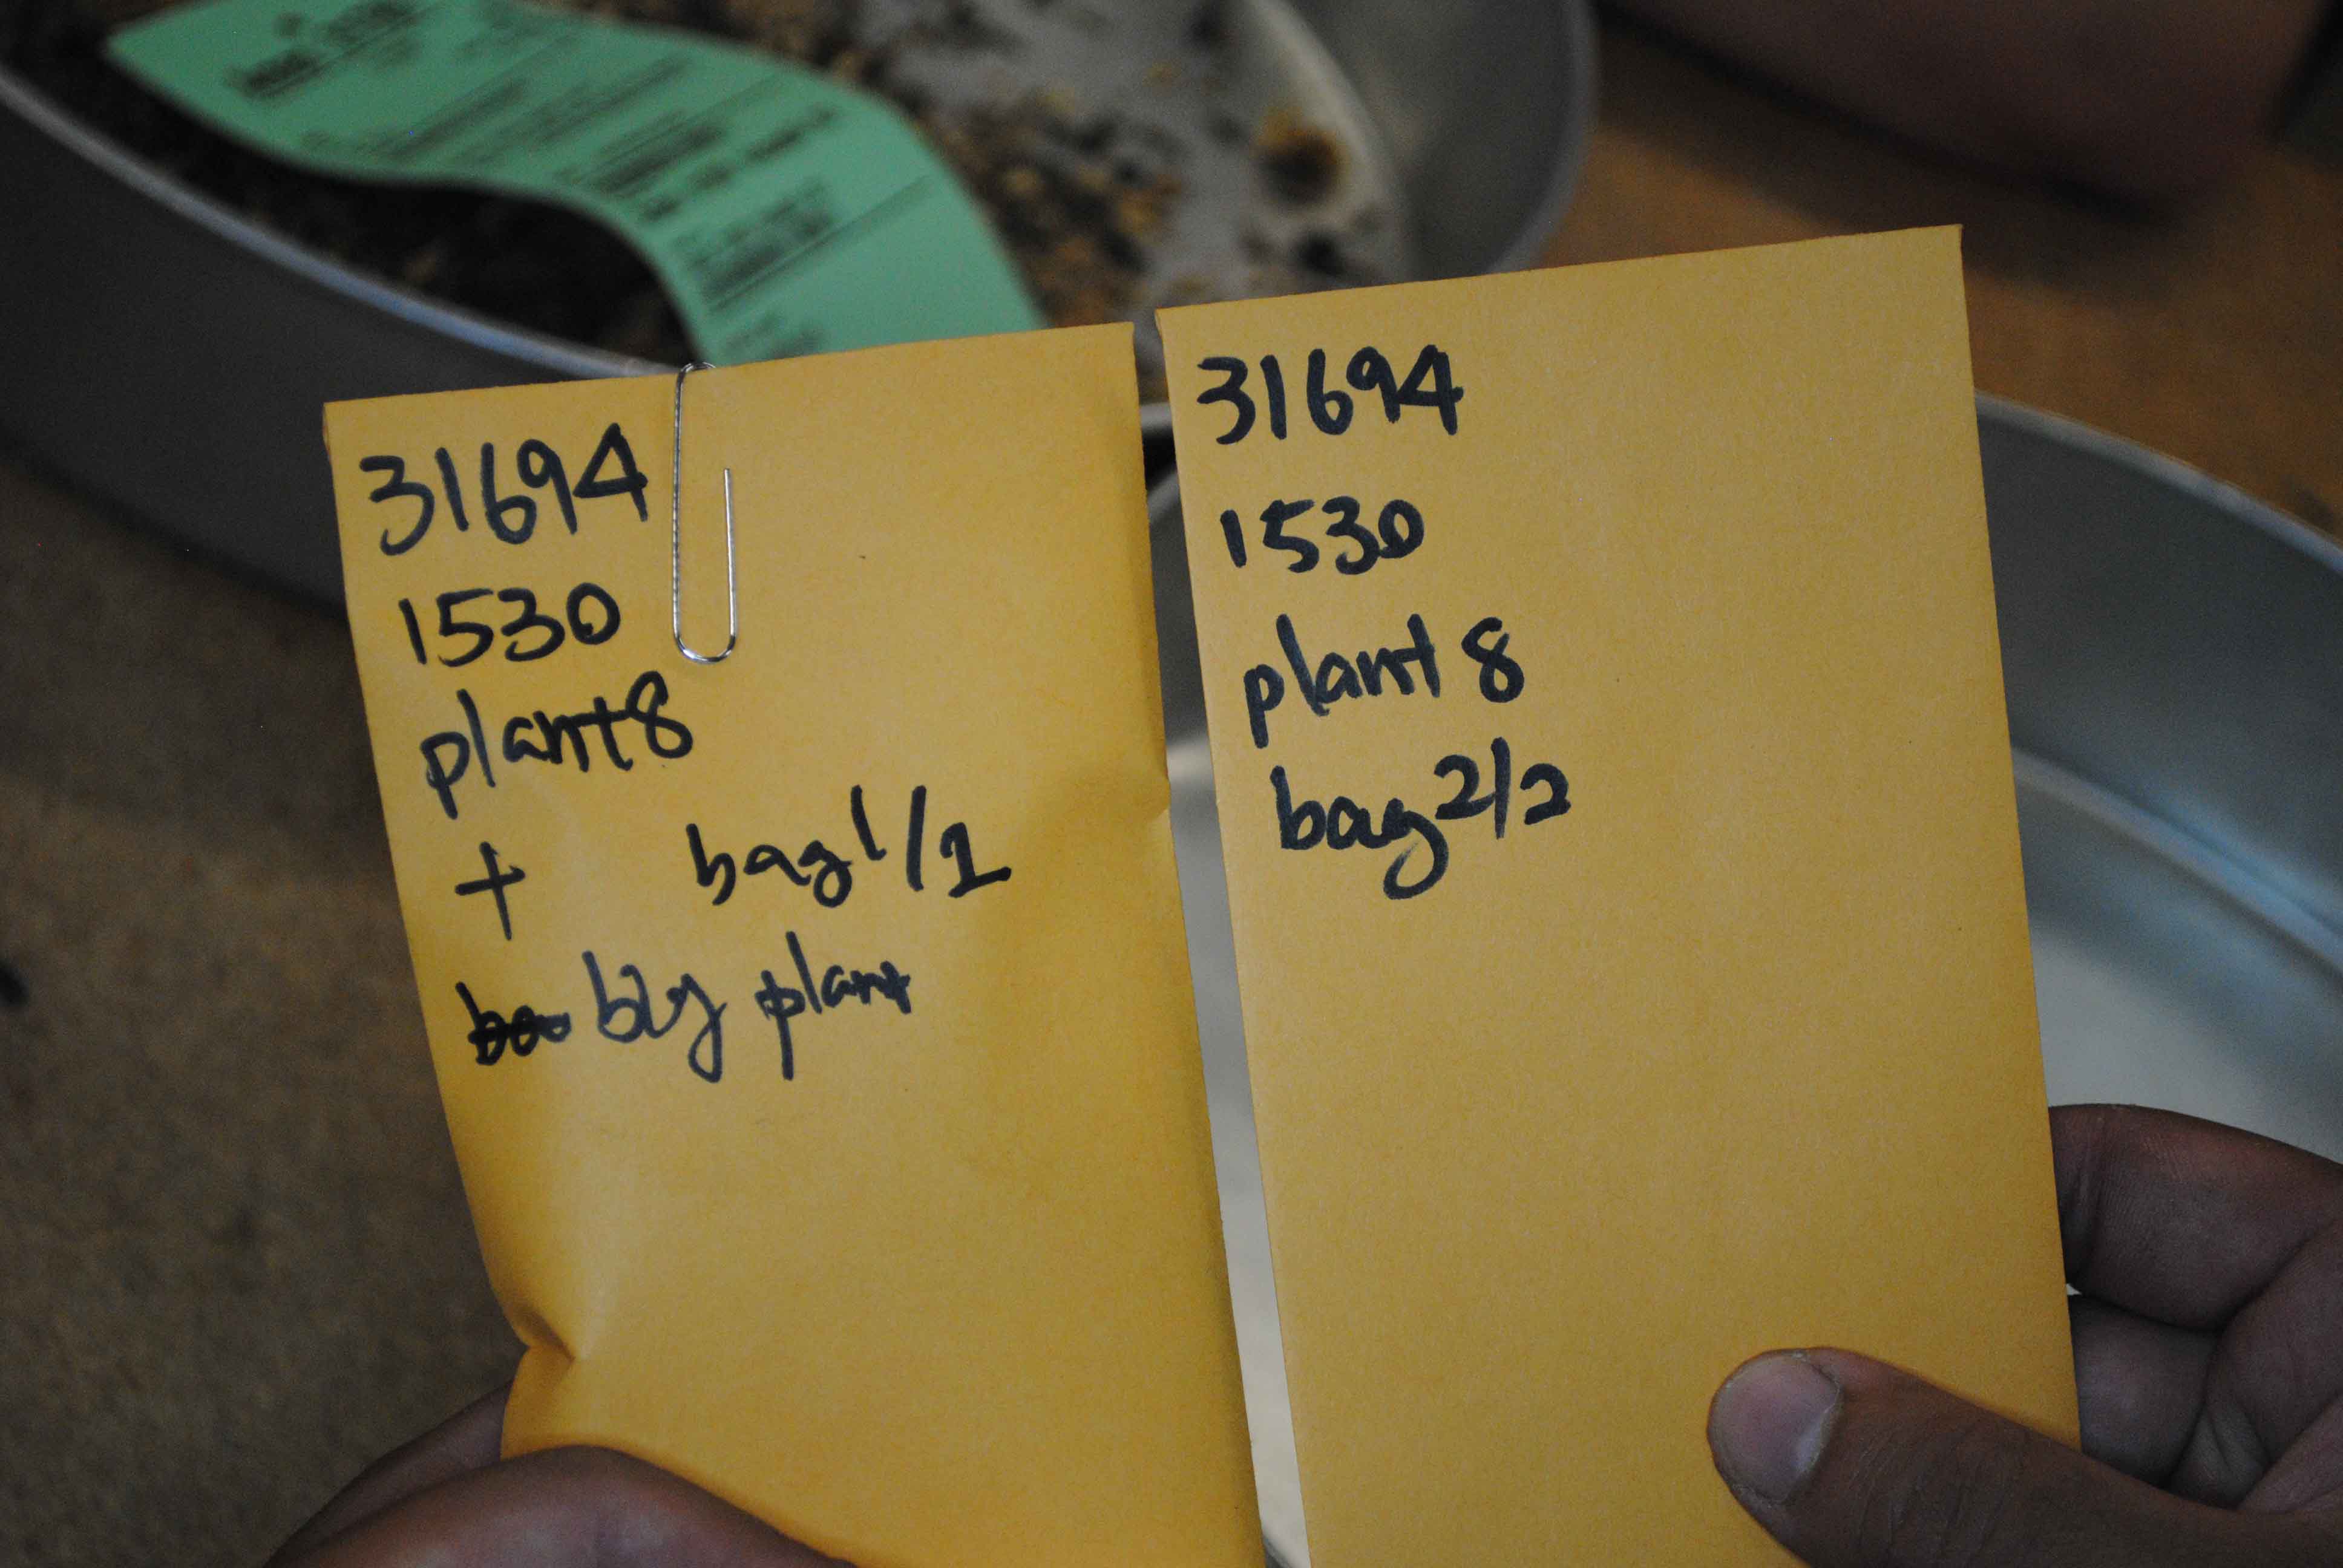
- Place an empty envelop on the table next to the tag.
- Using the Sharpie write the following on the front of the envelope.
- Ames Number, Plot Number, Plant Number, and Field Notes (From the back of the tag).
- "1 of _" is needed only if the amount of seed is too large for a single envelope.
- See Appendix A for multiple heads.
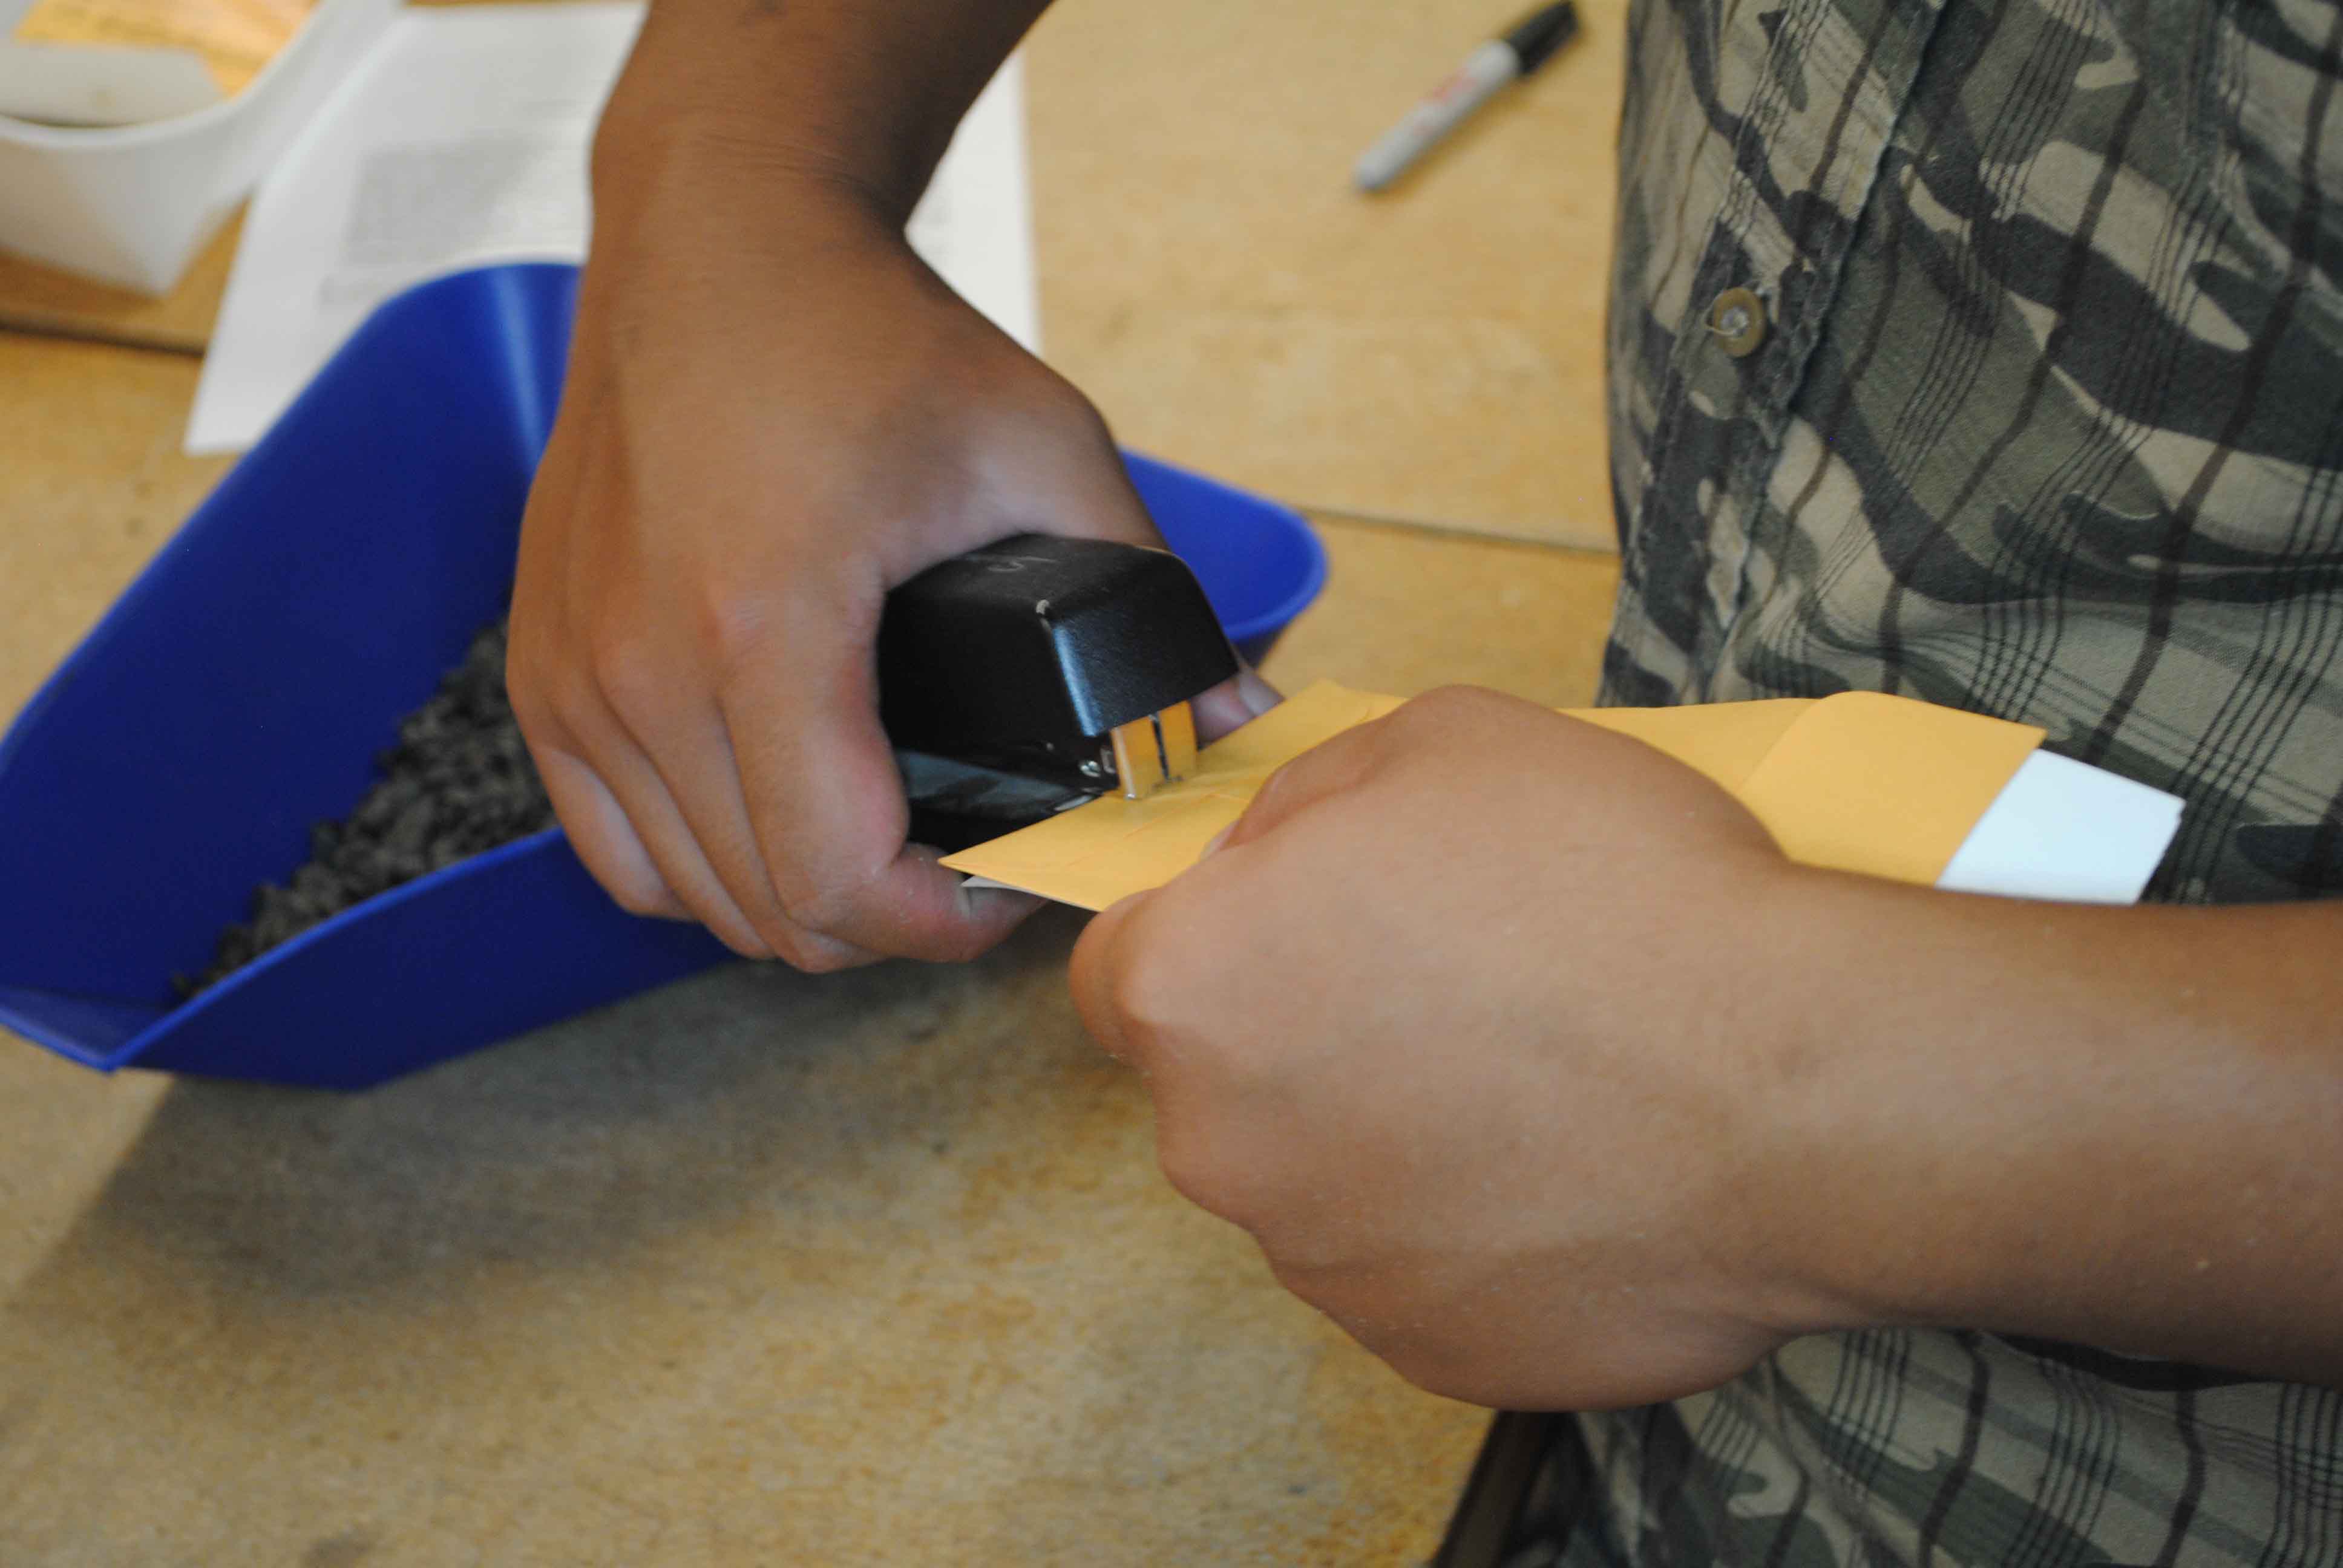
- Staple the tag to the envelope.
- The stape is placed at the bottom of the envelope and tag. If multiple envelopes are used staple the tag to the envelope marked as, "1 of _" or "Main Head".
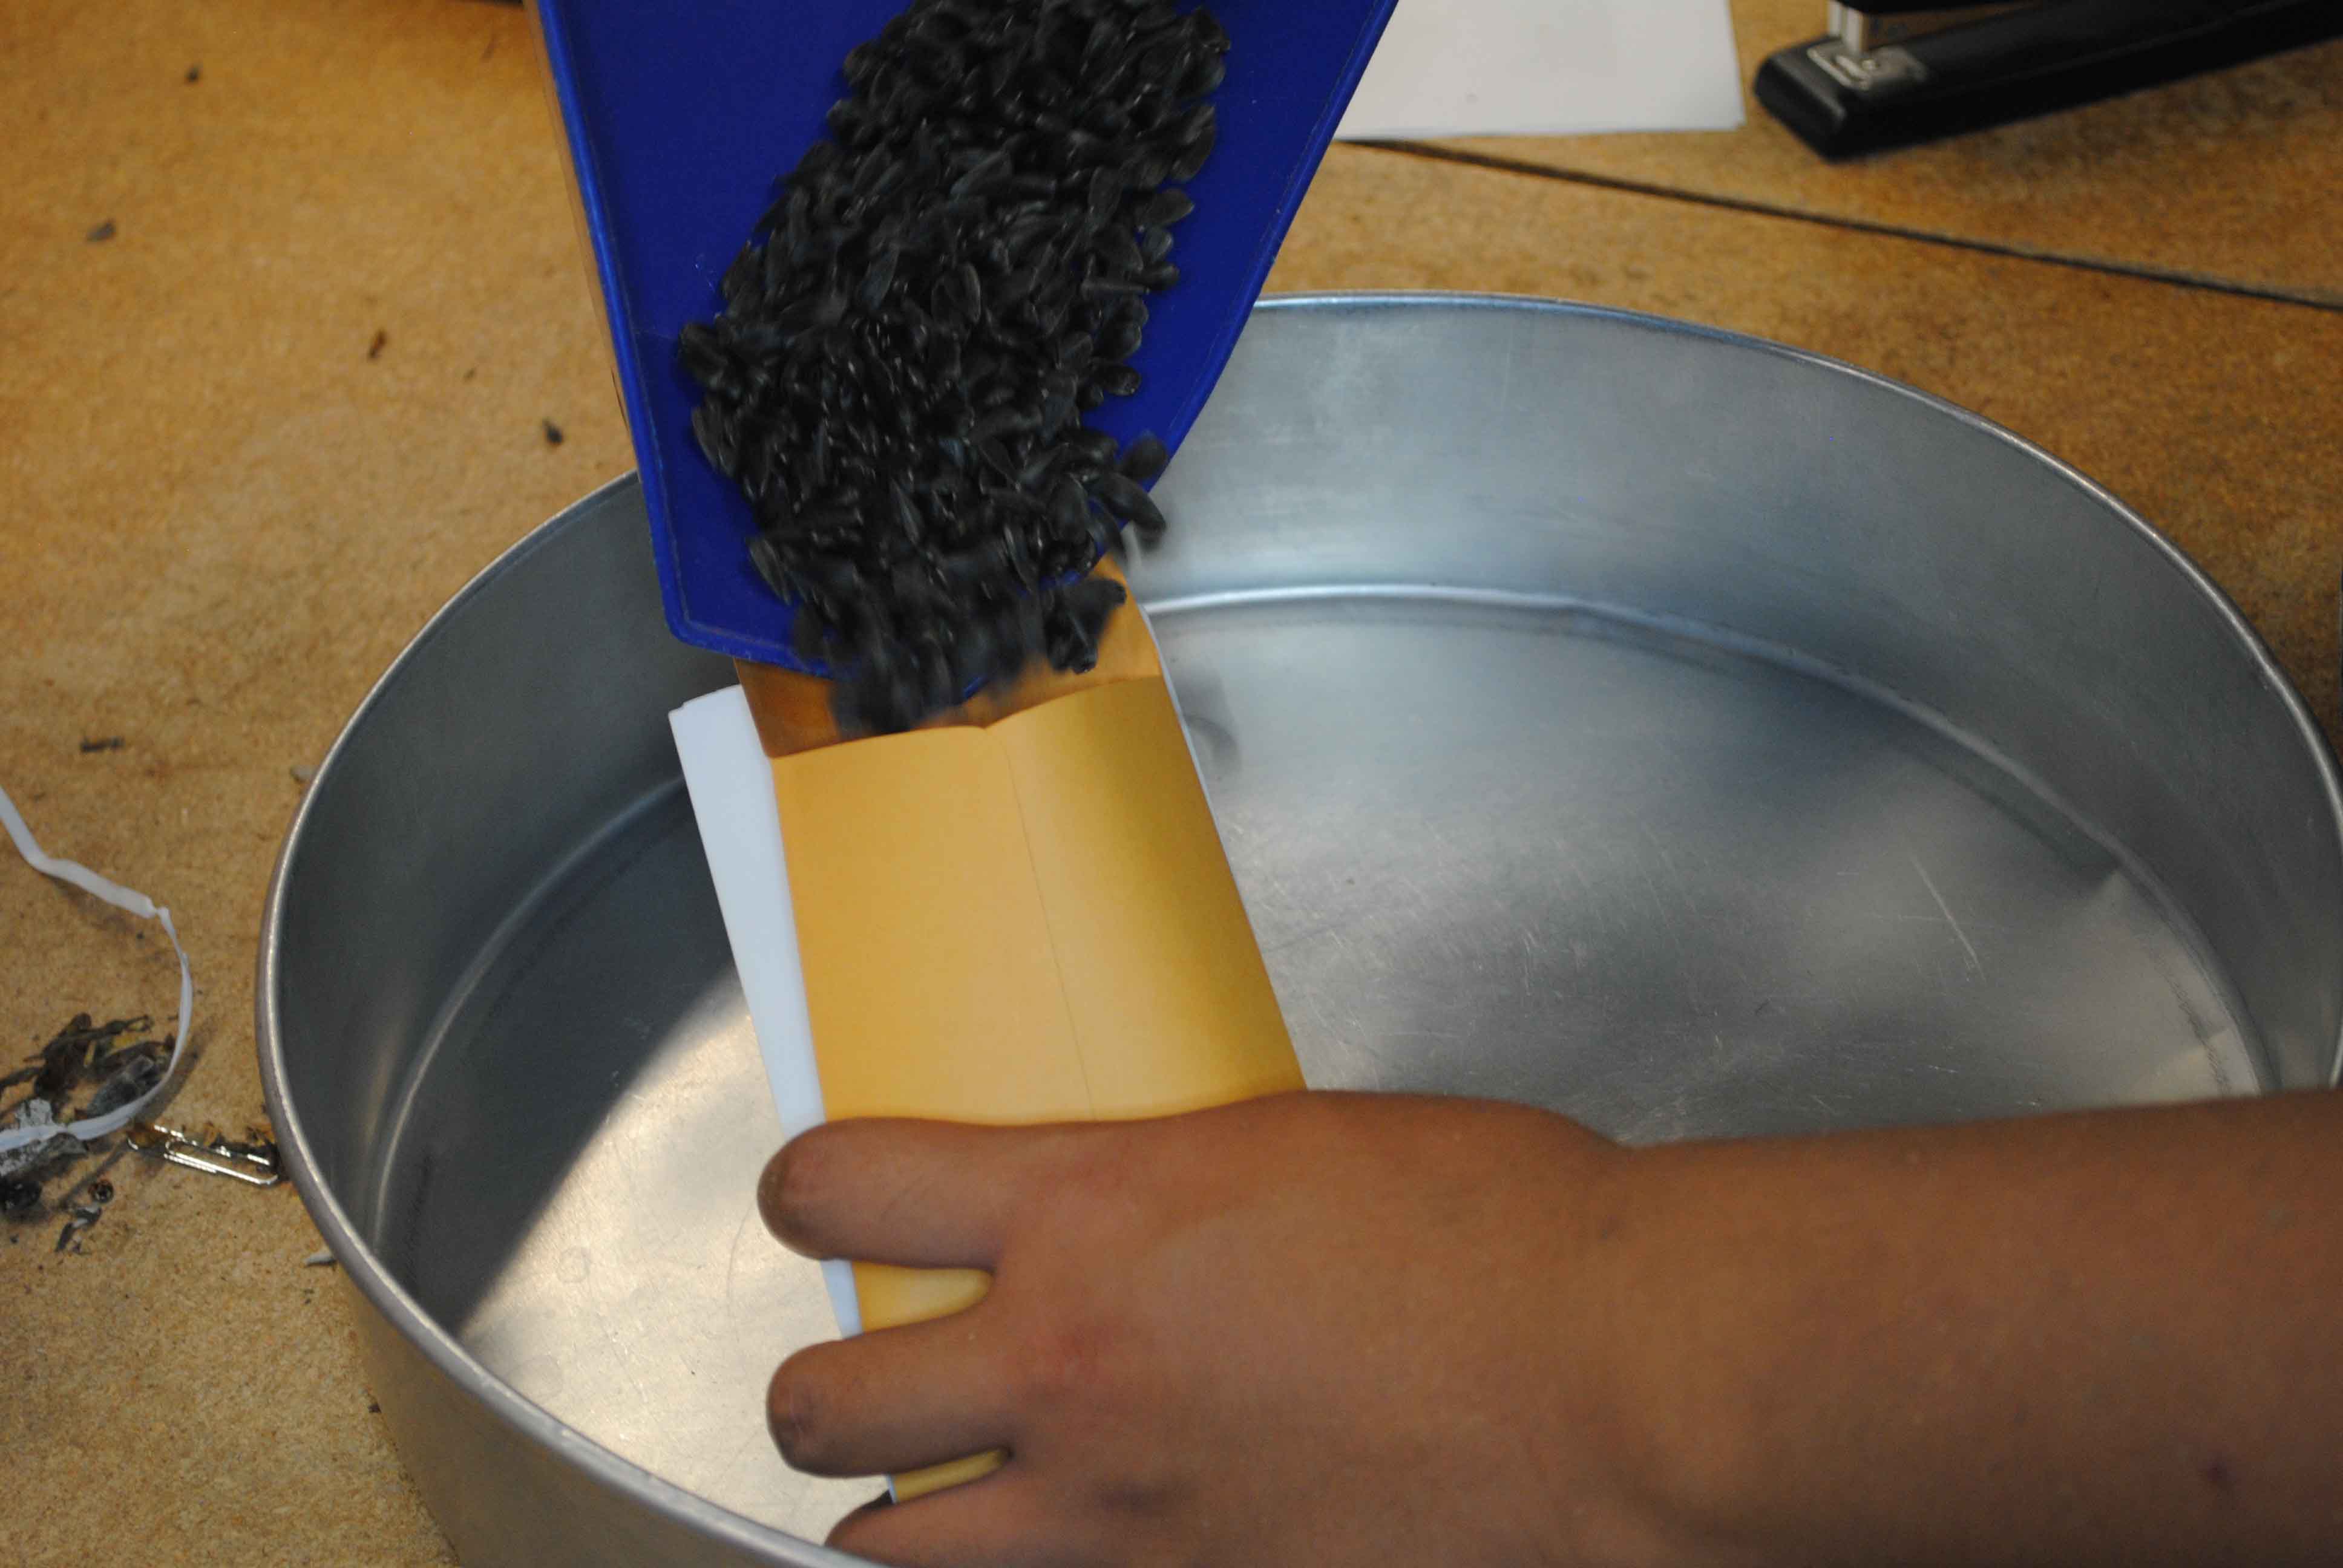
- Pour the seed into the envelope over the cleaned tin pan.
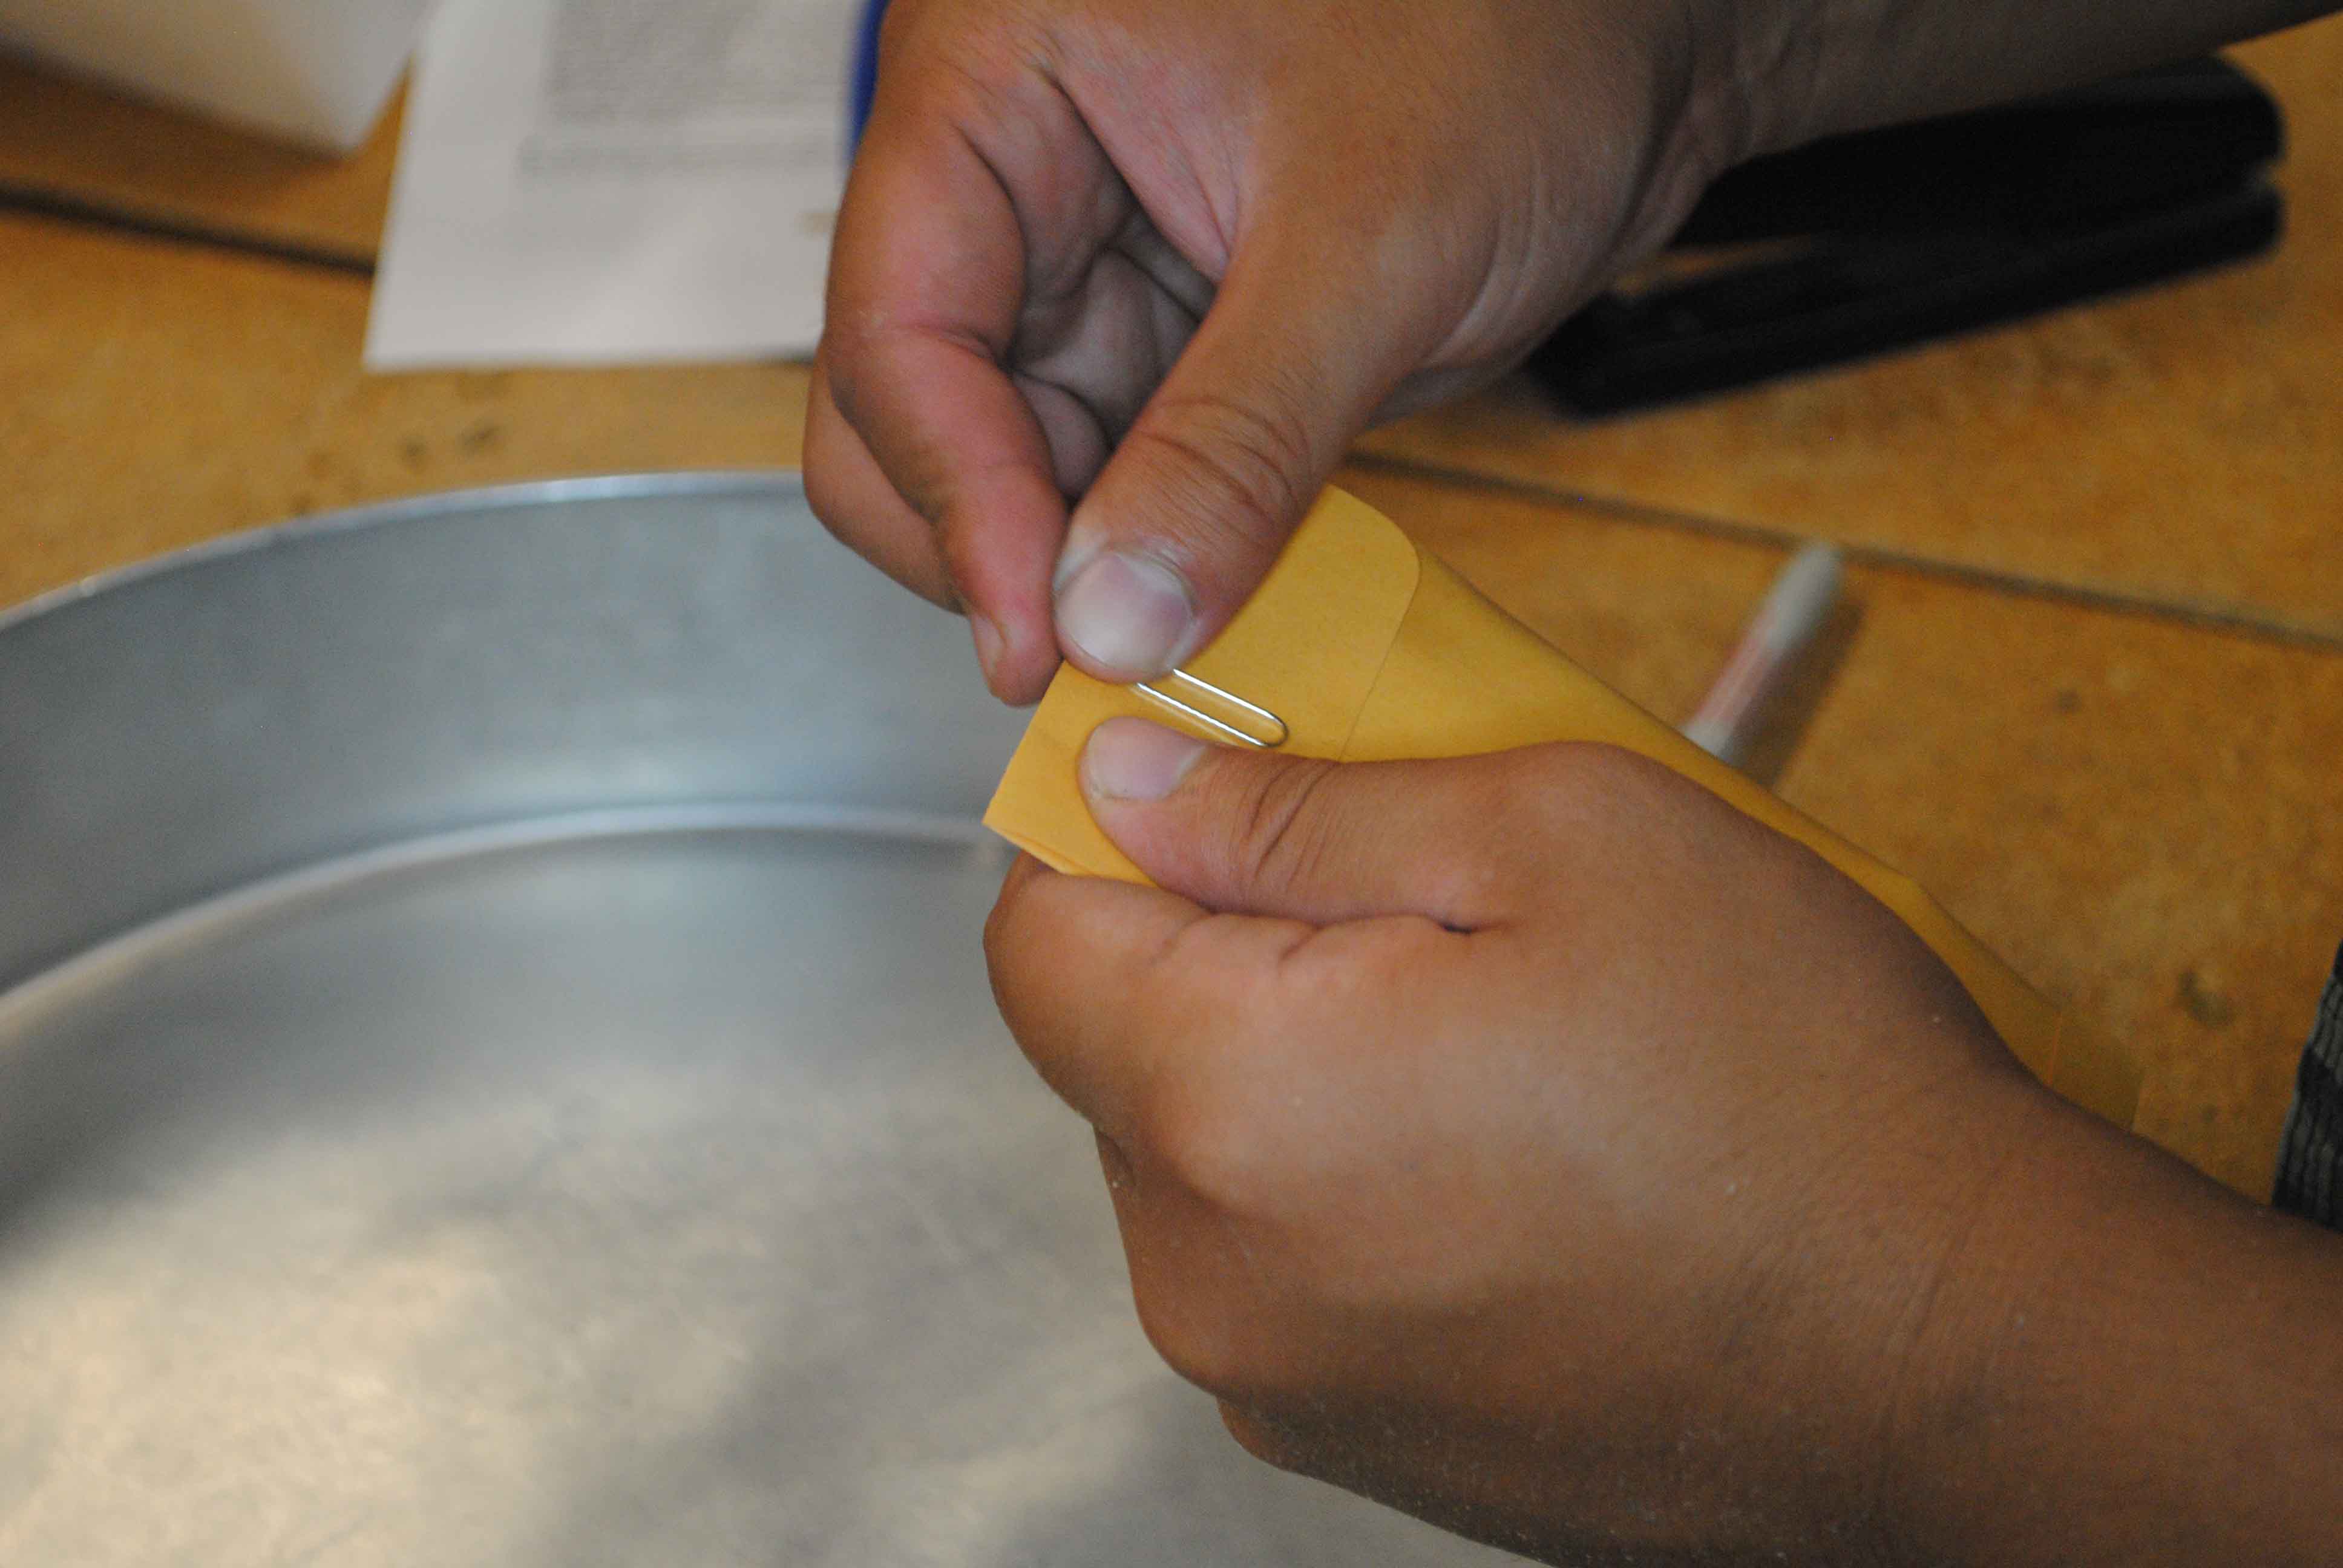
- Use a paper clip to secure the opening of the envelope(s).
- When multiple envelopes are needed, wrap a rubber band around them as well.
- Place the complete seed packets with the others for storage. Ask your supervisor how the envelopes should be ordered (by Ames #, plot #, etc.).
Appendix A - Multiple Heads
Occasionally, a Delnet bag will contain multiple heads. If all of the heads in the bag are mixed, thresh all of the heads together and continue from step 6 of Getting Started. If the heads are separated in the Delnet bag, thresh them separately (step 6). Also, keep the following in mind:
In addition to step 2 of Finishing Up.
- Write "Main Head" on the envelope containing the seed from the main head.
- Write "Other Heads" on the envelope(s) containing the seed from the other heads.